SAVE YOUR GUITAR From Damage - How To Restring An Acoustic Guitar Properly
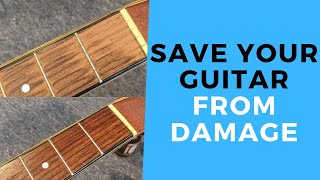
Lauren Bateman shows how to restring an acoustic guitar without damaging it. Change strings a couple times a year, use coated D'Addario EXP strings in light gauge, and stretch every-other-string after winding to keep it stable. Clean the fretboard with Dunlop products and tighten tuning pegs as you go.
Chapters
Hey, guitar enthusiasts, welcome back. Lauren here. And in this video, we're actually going to be going over how to change the guitar strings for an acoustic guitar. So let's get started.
Now, in this video, I'm going to talk about some key maintenance tips that you should be doing on your guitar at least once a year. And I'm also going to talk about a couple colors, cleaning products, and a couple different strings you might want to consider when restringing your acoustic guitar. Now, a question people always ask me is how often do I need to change the strings to my guitar? Usually I recommend changing the strings a couple times a year because this way I'll show you. In the video, we're going to condition the fretboard so that it doesn't get dried out. And I'll put a picture up here of a dried out guitar fretboard and what can happen if you, you don't maintain the fretboard. The frets can actually start popping out of the fretboard and your fretboard can actually crack. Now, where I live in Boston, the temperature fluctuations vary from extremely cold to extremely hot and humid. So I like to usually replace my strings before the winter where it gets really dry, and then usually around like the end of the summer, towards the fall or something. So I'll try and do it twice a year just so I can get some conditioning into the fretboard. And also, new guitar strings sound so much better than old guitar strings. Let me show you just so you can hear. This is my guitar before I put my strings on.
This is my guitar after I've strung it. You can hear it. It's got a lot more sound.
Beautiful. Let's get your guitar sounding like this with some new strings. Make sure you guys stick around to the end of the video because I'm going to show you a little trick that most people don't know. So basically, you restring your guitar, you tune it, you start playing it, and all of a sudden you realize it's completely out of tune. So I want to save you from that frustration. I have a little trick, so watch the end of this video to make sure you catch that. So the first thing we're going to do is we're actually going to take the strings off of the guitar. So I have this cool little winding tool here. They also sell little drill pieces that you can, if you have like a drill that you can do this with. But I'm going to use these. If you don't have a tool, that's okay. You can Just start loosening them up with your hands and get the strings off one by one. Because. Because to properly clean the guitar, we're going to need to take all of these strings off. So what I'm going to do is I'm going to unwind all of these strings, and the next time you see me, I'm going to have the fretboard completely wide open so that I can show you how to clean and maintain your guit.
While I'm taking these guitar strings off. Another thing I wanted to mention about how do you know when it's time to change your guitar strings sometimes? So strings are metal, so they will corrode. So oxygen will discolor them and corrode them so that you'll see that on the guitar strings, your strings will start looking brown. And that makes the guitar strings more brittle, and they're much easier to break. So I would recommend looking for those signs of corrosion. And I'll put a picture up so you guys can see that. Because that, you know, if you're waiting a really long time to change your strings, that's probably a good time to start. All right, so now I've loosened up all my strings here. And with acoustic guitars, we have little pegs down here. That's what holds the string into place. So you might need to push the actual. Let me just get this on screen. I'm hooked on my strap here. You can take your strap off if you want to. Before cleaning, I would usually take the string and you push it down because there's a little ball on the end. Once I pull the string off, there's a little ball on the end of your guitar string. And what happens is this ball slides into the peg here, and that's what locks it into play. So sometimes when that guitar string, once it goes in to the peg like this, and it gets locked, and sometimes the peg gets really, really stuck. So hopefully, once you push those down, these pegs will come out. I like to just put them back into place so I don't lose any. Because if you lose a peg, it's kind of a pain in the butt. You'll have to get a new one. So fortunately for me, these are all coming out very nicely because I change my guitar, my strings fairly frequently, like I said, so they're coming out nice and easy. Now, for some of you, the guitar peg might be really, really stuck. And that's where one of these tools can come in handy, because they have little things that you can use to, like, hook and lift if. Again, if you don't have a tool. You can always get a needle nose plier and sometimes getting under it and just lifting and wiggling will help. But like I said, if you push the string in, it'll take a lot of tension off of the peg and then you can pull it out. Something else I used to do when I didn't have one of these was I actually used a fork and I would split the fork and then lift. If you want. You can kind of get underneath the ball of this peg because the thing with this, if you grab it, it's got a rough inside. So you might mark, you know, if you're into aesthetics and you don't want to mark your stuff. So I have a bridge here. My bridge piece can actually. Well, it used to be able to come out. I haven't taken it out in a while. But you can adjust on my guitar you can adjust the bridge. I'm not going to because I like how it's set up. It's fine. What we're going to do first is we're gonna talk about some cleaning products because this is the best time to go through and clean your guitar. So let me show you what I'm using on my guitar. Alright, so what I have right here is the Dunlop guitar maintenance kit. You can use this for both electric and acoustic guitars. Now I have what's called a Rosew fretboard. So most of your fretboards on guitars, electric and acoustic are usually made of maple rosewood. And there's one other that is totally eluding me at the moment. But there's usually three types of guitar woods that they use for fretboards. Now if you have a maple fretboard, the conditioning sometimes is a little bit different on that. It says on this package, do not use the conditioner on a maple fretboard. You have to use a kind of a paste. So if you don't have, if you have a maple fret board, this probably won't work for you. But if you have a rosewood fretboard, you're going to be fine. And what we're going to do is I'm going to start with the cleaning product. I hope you're enjoying this video. If you're finding value, make sure to give me a thumbs up and don't forget to subscribe to the channel so you can see when I post new content. Also, make sure to leave me a comment. Let me know if you found this helpful or not. So I'm going to start with the Formula 65 guitar polish and cleaner Usually what you do is you'll spray it onto a cloth. And fortunately, this kit comes with some nice microfiber cloths. And we're just going to spray it on the cloth and then you can wipe down the guitar. Now, I do not have a high gloss guitar, but a lot of times with this we can get off a lot of the sweat. We can get off a lot of the dust, especially up here. I don't know if I can zoom in on that. You'll see the dust, especially up here by the tuning pegs. Usually dust gets under the strings. So it's always nice to have a nice clean guitar. We can do the backside of the neck, the sides. So that's what I usually just kind of wipe off the guitar. And this one's not too bad because this is my main guitar and I take care of it fairly well. So the next thing we're going to do is we're going to talk about cleaning the fretboard and then we're going to condition the fretboard. So let's get into that. So the first thing we're going to use is the Dunlop the 01 Fingerboard. This is the cleaner. And it says on the back here, shake well. But it also says in the directions note, not for use on maple fingerboards. For maple fingerboards you have to use some sort of paste. And I don't own any maple. Some strange reason, all my guitars have rosewood. So this is how I maintain my guitars.
So you just spray some on. And usually what I do, you can use the microfiber cloth. At this point, I don't think it really matters because we're trying to really get the dirt. And I go over this and you're gonna see, ooh, that's really kind of gross. So I get into.
The frets of the guitar. Notice I'm always supporting the neck of the guitar. We don't want to like push down on the neck or we could break the neck of our guitar. So what I'm going to do is I'm going to do this a few times. You might have to do it two or three times, depending on how dirty the neck is. And then we'll get into how to condition it. So when I see you next time, I will have a completely clean fingerboard and we'll get into how we're going to condition this to get some moisture back into the fretboard so that it doesn't crack, it doesn't dry out, and the guitar lasts much longer.
Okay. So I've gone Over this a couple times now to get all the grime and stuff off of the fretboard. And now we are ready for the second stage, which is the Dunlop 2 deep conditioner. You could also, if you don't have this, you could use lemon oil. Furniture polishes with lemon oil. It's basically just a wood conditioner. Now, you'll see on my guitar, around the 12th fret, I have these really nice inlays. If I let this get dried out, those inlays will likely pop out because they're just wood. So this is my Crafter Twin Birds guitar. And all you do again, shake, and then you're going to press down on the applicator and you rub it along the frets. And pay attention. Make sure to pay special attention to close to the frets. So I'll show you. You might be able to see the little bit of a shine or a sheen here where the oil is. So this is just like an oil conditioner. And we're going to run it along all the frets. Like I said, get in really close to the frets, especially on these top three frets, because that is where, you know, most of the guitar's wear and tear is. Especially if you're a singer songwriter like me. You're usually playing in these top, like, one to five frets. So we want to make sure we condition those because we're going to have a lot of, you know, oils and dust from our fingers going into this. And that's where we're just going to want to really make sure we're getting some oil in and reconditioning. So I'm going to go down the entire neck of the guitar. I'm going to get this into each and every single one of these frets, and I'll see you once that's done. All right, There we go. I have done the entire fretboard, and even sometimes I'll get my finger and I'll rub it along the frets to really get that oil, especially down here. It's hard sometimes to get the applicator close to the frets. So I want to make sure that oil gets close to the fret. Because if your fingerboard gets dried out, that's. That's where it's going to pop out. It's the frets that are going to start popping out of your guitar, and we don't want that. So I do a little bit of that. And then what I do is I will let the oil sit for just a little bit because, you know, it's wood. Wood absorbs things. So we're going to let the oil absorb. I just let it sit for a little bit. And at this time, you know, I might check my tuning pegs. Are they loose? You can see here you can use like a little Phillips head screwdriver. So I felt one of my tuning pegs was just a little bit loose here. So what I'm going to do is take my Phillips head screwdriver and I'm just going to turn it to tighten the peg so that it's not so loose. And then once you do that, you can check them all. That's all we're doing. Righty tighty, lefty loosey. Okay. And I just want to tighten that up just a little bit more. I didn't like how flexible that was. The rest of them. These ones are nice and tight. I'm gonna do this one too. It was just a little bit looser than I would feel comfortable with. Okay, that's better. I mean, I like. I like my tuning pegs kind of snug. I don't like them, like flopping all over the place that I can hear them wiggling. So I could even tighten that one just a little bit more. But for now, it's. It's fine. So what we're going to do now, hopefully this. This oil has sat here for a little bit. So I'm going to get a clean, clean paper towel here, and I'm going to wipe this off just the same way I put it on. And there's going to be. When you wipe it off, you're going to see there's going to still be a little bit of a shine, a little bit of a coat left. And what I do at this point is I inspect the guitar, especially up here, because where the guitar is going to dry out for most people is usually up by the nut in these first three frets. And it looks good here because like I said, I try and keep on top of my guitar here. And if I saw that it was really dry, I might put a second application just to get a little bit more oil into the guitar. And then I would go to the next step, which is actually stringing this baby back up. So what I'm going to do now is I'm going to talk about a few string options for you guys. So I tend to like to play with light gauge strings. And these are the exp. So these are a coated string, so they last a little bit longer. I live by the ocean where there's a lot of salt. So I want the coating helps my strings corrode slower. So I like these. These have a warm, bright and balanced tone. The other side, these are also EXPs. These are both light gauge, they're 12s. And these ones, these 8020 bronze, they have a much brighter sound. And the great thing about d' Addario strings and if I can't get a close up, I'll take pictures and put them up on the screen. But on the back of the strings. So These are the EXP11's are the bronze, the coated 8020 bronze and the EXP16. This is what I like to use is the coated phosphor bronze. And on the back there is a gauge. There is something that tells you the brightness and the warmth of the guitar strings. And you can see the 8020 bronze is all the way here on the brightness scale. While the phosphor bronze is a little bit more in the middle. So I like a little bit more of a warmer tone to my guitar. But guitar strings are a personal preference. So play around with different things. But these are what I've been using for decades, so I've just stuck with them. Something else I will recommend to students, particularly learners, if they're starting to get into bar chords, is maybe to go down to these custom light guitar strings. They are a 0.11. These are the exp 13s. This one is actually the 8020 bronze. I don't think I could get phosphor bronze. They were out. But I just wanted to have an example for you guys. And this is point 11. So that's the size. These ones are 0.12. So that's the E string. So these ones are a little thicker than these. The thinner the string, the easier it is to press down, which can help people with bar chords. The thicker the string though, the better the sound. So there's trade offs. Also, if you're going from a thick string to a thin string or to a thin string to a thick string, you might have to make a neck adjustment which we're not going to go over in this video. But just so you know, there is a little Allen wrench. If you look down your guitar neck, you'll see there's like this little hole. You can stick an Allen wrench in there and that's called the truss rod and that's how you can adjust that. Especially if you're hearing a lot of buzzing in your strings, your neck might need to be adjusted. Like I said, I'm not going to go over that in this video. But maybe in another video I will put one of those up. So let's open up these strings. I want to make sure I get the right ones. The phosphor coated bronze. Fantastic. So we're going to open those up. And the great thing about D' Aderio strings, not all string companies do them. Some do is they color code everything. They color code the string so you know which string you're working with. So I open them up and right here it says, you know, the E string is silver, the B string is purple, etc. Etc.
So I'm going to pull out my strings here and they're usually wrapped two together. And I particularly like to start with the thick strings first. Now hopefully you kept your pegs in your acoustic guitar because now we're going to remove those pegs again to put the strings in. So just be careful when you're unwinding these. You can see they just like fling open and they're like a whip. And the ends of these are very sharp. These especially on the thinner strings. I've stabbed myself with these before so be careful, don't poke yourself in the eye. We're gonna grab the thickest string. So that is going to be our brass or gold color. So I'm gonna put this one over. Actually I'm gonna put them both in. So I did only two. Take the peg out. Let me move this guitar over a little bit. I'm going to take the peg out, I'm going to stick the ball into the hole in the guitar so there's a little hole and we stick it right in. What I'm going to do is I'm going to put the tuning peg back in and the next thing I do, I'm going to press down on the tuning peg and I'm going to pull up on the string. I'm going to try and lock the ball. See I'm pulling up on here and trying to keep that string down. So I've somewhat locked this into place. Now when we start tuning, tuning the guitar, that pin might start popping up as this comes into the track. There's little tracks in these pegs as it starts locking itself into place. But here, if we do this, pull it up a little bit, it'll lock it into place better. Because a lot of times people, you'll start tuning with an acoustic guitar and you'll tune, tune, tune, and then you'll hear a pop and you're like, crap, did I just break my string? No, you didn't. Break your string. It was the string popping and locking into place. So you might hear that when we get into this tuning section. But first, what we're going to do is we're going to get the string around the tuning peg here. So I like to set my tuning pegs so that the holes of the tuning peg face this way. Basically, they're in line with how my frets are facing. So I get those kind of lined up here. And then what we're gonna do is we're gonna take the string. I don't tend to cut my strings beforehand. I've made mistakes accidentally cutting my strings too short. But I just like to just put the string through from the inside. So from this side in towards me. And we're gonna slide it. You can see how much slack I have. We're gonna slide it into the guitar. And I like to leave enough slack. Not too much slack, but obviously I'm not at the very end of the string. I like to leave enough slack where I can wrap the string around the top of the tuning peg once. Okay. And I will put some pictures up, hopefully for you guys to see. I'll take some pictures as I go. All right, pause to take a picture. And then what I'm going to do is I'm going to then loop the string underneath that wrap. I will put a picture up because I took a picture. And what we're going to do, don't worry about getting the string back into the bridge just yet. And watch this here. I'm going to bend this upwards one. It's out of my way. So now it stays there. And I'm just going to start winding the guitar and tightening the string. And when we go, the string is going to go underneath.
That piece. We just bent up again. I will put a picture up so that you guys can see it. And once it goes underneath, it has essentially locked that string into place. And then you just wind the string underneath. And at this point, I'm getting tight enough that it can sit in the nut of the guitar. But you can hear it's still pretty loose. I'm just going to tune it up a little bit, but I'm not going to tune it up all the way. But it's still. Still pretty loose. But I'm going to move on to the next string. And that's how you know. People ask, how do I know if I've gone too far? If your string is very flappy and you hear a lot of that kind of buzzing, it probably means it's Too loose and it needs to still be tuned up. So I'm going to do one more. So we're going to do the string. We're going to put it this way. It's going to come in towards me through the hole. Okay. So I'm going to go through the hole.
Pull it. Whoops. So I lose the string. I've only done this like for 20 years, you know, should know it by now. Okay, so I got the slack on my guitar. Going to do that loop over. I like to loop over. And then I'm gonna bend the string up and then wind everything underneath. Okay. Now I've been doing this for 20 something years and I still make mistakes sometimes I still put the strings on the wrong thing sometimes when I'm not paying attention. You will probably break a string or two the first time you do this. Don't worry about it. Just kind of like a rite of passage thing. The more you do this, the better and faster you will get at it. So don't worry if you break a string. Not a big deal. Did you hear the pop? It just happened. So remember I told you earlier you would hear some. Might hear some pops when you're tuning. It just popped. That string popped into place. Let me see if I tighten this one. If it doesn't. No, I think I got that one in good. But there was a little puck there. That was that little ball, that part of the string, the wrapping, getting up into that peg. So that means that string is now locked into place. And check down here, you might have to push down on these tuning pegs because as the string comes up and tightens and gets into that track, it'll start pulling up on these little. These little tuner things down here. So are the string holder pegs. I have a wire cutter tool on the end of this tool. If you don't have a wire cutter tool. If you have something like this that has a wire cutter, you can cut them. I like to cut my wires as close to the string. Well, maybe not as close to the string as possible, but I like to keep them out of the way. And that's why I fold these up. I think it gives it a nice shape. So that's it. Once I've gotten these strings kind of tightened up a little bit, then I will cut the strings. I don't like to cut them beforehand because like I said, everybody's human. Sometimes we make mistakes and it stinks when you have to open a whole other pack of strings just because you accidentally cut one too short. I've done it, been there. So what I'm going to do is I'm going to string up the rest of this guitar and I'll see you for the tune up. Now something else. As I tune my G string here. Now the G string, once you get to the other side of the guitar with these acoustics when you got three. Three pegs. Three pegs. The winding happens opposite. So now instead of feeding the string in towards me like this, I'm gonna feed the string out towards as if I was going towards the camera. I'm gonna follow the same thing. But just remember you have to do things opposite because now we're on the opposite side of the guitar. So to tighten it, what was to tighten on this side of the guitar is to loosen on the other side. Side. So just wanted to make you guys aware of that as we switch to the other side of the guitar. Alright, so I have my guitar, it's restrung and what we're gonna do is I'm gonna show you a little trick here. First we're gonna tune the guitar and I'm gonna show you a little trick that might save you some time and frustration. So the thing is you want to listen so you can hear my guitar is out of tune. Listen for this flapping. Because a question people have me. How do I know when I'm going too far with the tuning? I don't want to break a string and I've broken a lot of strings. So I always tell people if you're scared you're going to break a string, always go down in pitch and then come back up. But usually you want there to be some tension in the strings. You can see there's some flack here. But these strings aren't like they aren't coming out here. So we do want tension on the strings but obviously there's some. So I'll make this a little bit. Oh, there we go. So you hear that buzzing?
So if the string is like flapping like that that's probably telling you it's way too low. So then you can. I have a built in tuner here on my guitar. So then we would tune up and sometimes if your guitar is too low, the tuner is not going to pick up the pitch. And you'll see I'm tuning. I have to tune quite a bit. This was kind of way off. Okay. D sharp. And now I'm up to my E. Great. And you can press. There's a lot more tension. It's still loose. It's still Loose, there's still play in the string. If there's no play in the string, you've probably over tightened it. So that's something to be aware of. So I'm going to tune up the rest of the guitar and then I'll see you guys on the other end so I can show you this trick.
Alright, so I'm tuning up my final string here and you can hear kind of that buzz even on this bottom string. So I'm going to tune this way up here back to E.
Again. I'm tuning quite a bit here. Okay. E. Now I'm going to play the guitar and it's going to be out of tune. They're like, I just tune the whole thing. What happened? Well, as you tuned each string, the neck, remember the neck is wood, it adjusted for the tension in the strings. So as you successively tightened each string, it changed the tension on the neck of the guitar. So you're gonna have to go back and retune it. But before you do that, there's a trick. Okay, so new electric guitar strings are much more flexible and elastic than old guitar strings. That's why they sound so much better. So what we want to do, we want to stretch these out. They're too elastic and they won't hold tune. You're going to probably have to do this a couple times. So what I recommend you do is you get your thumb and your first finger and you grab every other string. So we're going to do the E string and the G string and you just squeeze the strings together. If you do every other string like this, you will not break a string. There's not too much you can. I like, you know, as I snap my string, I've done this enough, I know how much I can pull on the strings. But for beginners I say every other string and then just squeeze them together. This is going to take the elasticity out of the strings and you might have to do this a couple times before the guitar holds tune. So now if we go back to the guitar, I'll turn my tuner on again. And this is, you know, this is on kind of like D sharp. So now I gotta tune it back up to E and it might hold tune. So G sharp, we gotta go to A. Okay, C sharp, we gotta go to D. So I'm off about a half. This one is pretty good G. Just a little flat on the B string here.
And then the E string and I'm gonna go back again. I'm gonna go through it again and make sure it stayed in tune.
As we change the tension. Not too bad here, G. Good. And then what I would do is I go back and I do that again. I'd stretch them out. I'd retune the guitar and let's see what we got. Not bad. It's just a little out at this point. So I did a pretty good job of stretching these strings. So I'm going to tune it up again and show you the difference.
There we go. Beautiful sounding guitar. Now, I hope you guys really enjoyed this lesson video. There's some really good tips in here. Take your time when changing strings. You're probably going to break one. It's not a big deal. I've done it tons of times. So I hope you enjoyed the video again. Don't forget to, like, comment and subscribe. YouTube's gonna suggest a couple more videos for you guys to go check out. Would love to see you in another video lesson. And Lauren signing off.










