Why THIS Is The #1 Strumming Pattern To Learn on Guitar
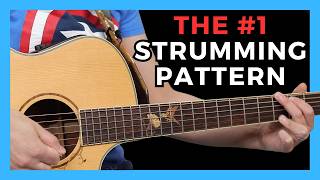
Lauren Bateman teaches the eighth-note down-up strumming pattern, the foundation for most rhythms. Use a thin pick (0.5 mm), keep your wrist loose, and accent beats 2 and 4 with a body slap for that boom-chuck feel. Dynamics matter more than speed.
Questions this video answers
0.5 mm and 0.77 mm.
An eighth-note pattern: eight strums alternating down-up (1 & 2 & 3 & 4 &).
Accents on beats 2 and 4 (and optionally on beat 3 or the first beat of a measure for variation).
G, E minor, C, D.
40 lessons.
Chapters
Did you know that by learning one simple strumming pattern, you can open yourself up to several other really cool and exciting strumming patterns? And I know you don't believe me, but it is absolutely true. And I'm going to show you how in this video.
A lot of times, being good at guitar is really getting good at the foundation. So a lot of students in my seven level guitar system ask me all the time. They're like, lauren, how come your strumming sounds so much better than mine? And part of it is I've been playing the guitar for. For a long time, so I have a lot of experience with the guitar. And I'm also a lot more relaxed in my playing. And relaxation plays a big part in being a good guitar player. But I also spend a lot of time focusing on the fundamentals. And I'm going to show you in this video how we can take something so simple and create some really cool, yet complex things that sound great musically. Before I get into the strumming patterns, I want to share two quick tips with you on how to sound better as a strummer almost instantly. Okay? And I've already mentioned one of them. Relax. Okay? So a lot of students, when they start playing the guitar, especially if you're a beginner, this is all new to you. So your muscles tend to be a little bit tighter than if you were someone that it was a little bit more second nature. So for a lot of students, they come into the guitar, they're holding on to this pick for dear life because we don't want it to fall on the floor. Okay? More holding onto this pick for dear life. And then you're strumming and you're going.
And you hear kind of like the strings sound really harsh and they're snapping at you. Okay? So what's happening is we're holding on to the pick so tightly that it's stuck like this. Okay? It's stuck on a flat plane. And really what the pick is supposed to do is it's supposed to wiggle just a little bit. Now, this is walking a tightrope, because if you don't hold on to the pick tight enough, it's going to fall out of your hand on the floor, and that's frustrating. So I recommend tip number two to my students. What I recommend beginners do is go to a thinner pick, something like this that is much more flexible. You can see I can push this pick. It's very thin. This is a 0.5 millimeter pick. So I'm going To take this pick that I'm using. This white one is 0.77. So I'm going to put that pick over there on the radio. Thank you, Raphael for watching. And I'm just gonna play with the same intensity I used before. And now this is what it will sound like.
Okay, it sounds a little bit better. I just dropped the pick on the floor too. A little bit better than.
Okay. You're not getting those strings snapping, so it takes a little bit of the curve. So those are two things you need to relax. And unfortunately, relaxation comes with experience. So that will take time. Until that happens, just switch over to a lighter pick and it will already make you sound like a better strummer without doing any work. So I use the strumming pattern we're going to use for this entire lesson. This is going to be the foundation for what we're doing. It's an eighth note strumming pattern. Alright, so that means it has eight strums. All right? And it alternates down, up, down, up, down, up, down, up. All right, so I'm playing a little G chord over here. However, I like to play my G chord with my third finger. I know some people play it with a pinky or some people like to play the G chord with the third and fourth fingers. Whichever G chord you prefer, go for it. If you're, you know, a beginner and you know my two finger G chord, you can go with that too. Whatever G chord you like. That's what I'm going to be using for this lesson. So the strumming pattern is 1 and 2 and 3 and 4 and down, up, down, up, down, up, down, up. 1 and 2 and 3 and four and down, up, down, up, down, up, down, up. Okay? And if you're not breathing, remember to breathe as you're doing this. That will help with relaxation too. All right, so what I want you to practice, we're just going to go through this strumming pattern a few times. I want you to just try relaxing. Okay? If you feel your forearm and stuff tightening up, just breathe, try and relax that hand. And I trust me, that will make things sound better too. Just relaxing. So Here we go. 1, 2, 3, 4. 1 and 2 and 3 and 4. And.
Play it down, up, down, up, down, up, down, up.
That's going to be the foundation of our strumming and what we're going to do from this point point forward. So I'm going to teach you something really cool which is called dynamics. All right? So we're going to vary Softness and loudness to add a little extra and excitement to our strumming. So what we're going to do is we're going to turn our guitar a little bit into like a drum. And what we're going to do is we're going to accent on 2 and 4. What does that mean? That means we're going to play louder on the second beat. And on the second. That's one second beat and the fourth beat. Okay? So it's gonna sound like this. Ready? One and two and three and four.
You can hear on two and four it's a little bit louder. You can't hear it when I'm counting. So let me stop counting. Ready? Listen. One and two and three and four.
Okay, so this is what the original pattern sound like. Okay.
Okay. Just 1 and 2 and 3 and 4. Now with the accents. Ready? 1, 2, 3, 4.
Okay. So you can see as I. As I sped up the pattern and all I was doing was playing a G chord in E minor, C and a D. Okay. I just sped up the pattern. It sounded really cool.
Okay. So kind of got. Almost has like this kind of boom Chuck feel to it where you sound like an older country. So you can see just by adding two little accents over this strumming pattern, you can make this sound really cool. Now again, going back to the relaxation. If you're just playing at one.
If you're just playing at one volume, this might be tricky at first, and you need to learn how to go soft loud.
You need to work on going from soft to loud. But you can just see, all I did was I took that strumming pattern and I added two accents to it. And it made it really come alive. It sounded really cool, really percussive, as if your drum was kind of like a guitar. Which is what if your drum was like a guitar? Your guitar was like a drum. I am. My coffee did not kick in this morning, huh? So what we're going to do is we're going to take that same strumming pattern and we are going to turn the guitar into a drum. Okay? We're going to teach you something called the karate chop.
Okay. I don't know if that's a real technical term for it, but that's. I do. Because I'm like karate chopping the guitar. All right? And if you have an acoustic guitar.
It'S hollow. Okay. And they're pretty strong. You can. You can beat these things a little bit. Mine, I don't know if you can see on my close up over here. I got a little crack in my guitar. Okay. So. And I'm missing wood here. You know, these guitars can take a beating sometimes, so don't be afraid to hit the guitar because that's what we're going to do. So instead of it sounding like this.
It'S going to sound like this.
Okay. You can see on the close up, my pinky is kind of whacking the body of the guitar on two.
Okay. I always think I like rolling on the river. What is it?
You know, Took a good job in the city. I don't know if that's the. The Ike version or the CCR version. Another one I would think of is like Maggie May by Rod Stewart. Another great song with that. And what we're doing is we're strumming normally and then I'm just slapping the guitar on too, so it's down, up, hit the guitar. Just work on that.
Okay. I'm going to change my angle here so you can see my guitar.
Okay. So you can see it just hitting kind of like where my little hummingbirds are.
And I'm keeping. When I'm strumming, I'm keeping my hand more open so that I can slap the guitar.
That really sounds more like. Like proud mary, the ccr version, I think it's in d.
Okay. So there's a perfect classic example, and I do have a lesson on that, if you want to go learn that song. But there's a classic example of how you can do that. So we have the first strumming pattern. Okay.
Very even kiltered. And you could play an entire song like this, or you give it a little spice.
Or you could give it a little drum.
You can see how all three of those, they're the same strumming pattern, they're the same rhythm, but dynamically they're very, very different. So now we're going to play around with some more accents here. Okay. What we're going to do is we're going to accent on the third beat. I'm going to show you how you put this in a chord progression. It'll sound really, really cool. So if we take our G chord and we just play 1 and 2 and 3 and 4 and 1 and 2 and 3. So we're really accenting that. 3, 1 and 2.
Okay. And it really doesn't sound that great by itself, but if you throw it in a chord progression, it gives some really cool movement to the song. Take a listen now.
Now, just a little tip that I might not have mentioned earlier, that I want to mention on these accented rhythms is that sometimes people ask me this all the time. Like, Lauren, how many strings are you strumming? Sometimes I'm not strumming all of the strings. All right. So even on that example.
I was kind of keeping my strumming. If you watch my strumming hand, I'm keeping my pick more to kind of like the top three or four strings of the guitar. So the three or four thickest strings. And then I'm really on the accent. I'm. Then I'm strumming the entire guitar. And the reason is these, the treble strings of your guitar have a much brighter sound to them. Okay, so we're talking about dynamics again, the difference between highs and lows, different sounds. So for me.
We're really only getting those high tones on the third beat, the beat that we're accenting. It also allows me to dig into the guitar a little bit more. So here I'm keeping my strumming tiny. Watch my strumming hand. So my hand is not doing this.
You see on the three it's strumming down, but on the other ones it's keeping very tight. Okay. So you just might want to practice that. Practice. I'm just looking down. I'm only getting about the top three or four strings. Very tight strumming. And you're not hearing. I'm hearing my daughter dog barking. But you're not hearing these treble strings. Right, But I'm hearing them on the low. Okay, here we have low, high, low, high.
So you see how it makes that accent on the three really ring out so much more. So that's another cool tip. Another little, little technique and dynamics that can help take your strumming and make it sound better. So like imagine if I did the full strum, this is what it would sound like.
Now here it is with the tiny strumming.
Already sounds so much cooler. You didn't really change much about the rhythm other than tiny strumming on the bass string. So let's talk about a cool two measure pattern that you might want to use with some accents. And we're just going to accent the one on the first measure. And again I would recommend maybe keep practicing that tiny strumming here. So a lot of times you might get a song where you know it's two measures of a G, two measures of E, two measures of C, two measures of D. And I sometimes like to accent the first rhythm because it just, it defines or it kind of accent solicitor that there's a Change taking place. Which is. Which is the chord change. Okay. So, you know, we could just play 1 and 2 and 3 and 4, and 1 and 2 and 3 and 4 and.
Okay. So we could do that, and we could keep it nice and even kiltered, or we could really let people know we're starting something new.
All right, so you heard maybe on that one that my tiny strumming, I kind of switched it down to the treble notes because I thought that sounded better than keeping it to the dark notes. So I had the big accent.
Okay. And you might be like, well, Lauren, you're doing something else before you get to that big strum. Yes. Okay. So music, we call these crescendos, and they're. They're super cool. I find crescendos are especially useful when you go from reverse into a chorus. All right. And that's when we go from low volume to higher volume. Okay. And typically, this is great over the end of a full measure. So if I take this G chord, I'll show you. So if we had 1 and 2 and 3 and 4, and 1 and 2 and 3 and 4S and on that second measure, I would try and grow the volume of the G chord. So I got 1 and 2 and 3 and 4 and 1 and 2.
So here how I. I tend to like to do crescendos as all downs, but here you can hear it's a tight. It starts tiny.
And then it builds and gets bigger. One and two.
Or.
I like doing them as. As downs a lot. But in this, I kept the same strumming pattern. And you heard on. It was kind of the last half of the rhythm, I just strummed a little bit louder. So what I did was on the second measure, I kind of made the. And after the two, a little bit louder. So it was 1 and 2 and 3 and 4 and 1 and 2 and 3 and 4 & 2.
Okay. So when I pick that up to speed, it just gives a little anticipation to the. To the listener. Sounds really cool again. So it's all the same strumming pattern. And you can play over. This is the cool thing about dynamics, is you can play around with loud and soft.
So I got a little excited on the end there. But you can see how taking a very, very simple strumming pattern and applying simple dynamics to it can turn into something that sounds really good and really amazing. And the biggest thing I tell my students is treat this hand. Don't stop it. Okay. 1 and 2 and 3 and 4 and 1 and 2 and just play around, soften.
Wow.
So play around with going between. I'm not changing the strumming pattern. It's just 1 and 2 and 3 and 4M 1 and 2 and 3. And the only thing I'm changing is the dynamics. And I always tell students, dynamics is where you become a better guitar player. And if you're interested in learning more about percussive strumming dynamics, rock rhythms, I have an amazing strumming course. It's a step by step program that takes you from pretty much absolute beginner to doing cool strumming patterns like this. Boom. Chuck patterns. Getting into really intricate 16th note patterns. Learning the stuff that makes you feel like a really amazing guitar player and strummer. So if you're someone who really loves strumming the guitar, you feel like you're doing the same strumming patterns over and over again. Click the link in the description below. Go check out my expressive rhythm and strumming course. It's 40 lessons. It's absolutely one of my favorite courses outside of my seven level guitar system. And go check that out. I hope to see you in a lesson real soon.










