How to demolish and strip out a mid-range renovation project worth around AUD 1M. Learn when to remove everything versus patch, the difference between lath-and-plaster and plasterboard, and how restumping works with hydraulic jacks. Safety, tools, waste volumes, and site prep for extensions included.
Questions this video answers
May 10, 2024.
Early 1920s.
1970s.
Well in excess of 20 cubic metres of bin space.
Approximately $200 per room (materials only).
Chapters
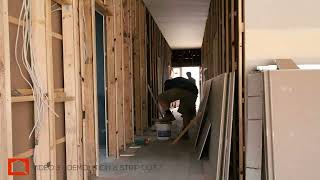
The example shown here is a structural renovation carried out on a property with a resale of about a million dollars. It's important to note at this point that by no means do I suggest that you carry out all the tasks that I'm going to list when taking on your own structural renovation. What you do and how much money you spend is subject to the same criteria we discussed in the previous modules, in particular the resale price and the pricing disparity present in the street. Also, I'm not necessarily advocating that you take on a DIY role as opposed to a project management role. The following step by step examples will give you a working knowledge of what's required for each task, which in turn should result in better understanding for you and communication with your tradespeople. Now, let's get this out of the way right up front. There are alternative methods to all of those that I am going to describe below. I have not set out to create the definitive method to end all methods on how to do exactly a structural renovation. I have simply documented the processes that I arrived at through the experience of eight renovations of my own and my involvement in countless other renovation projects. I A large proportion of these tasks I do not physically perform myself. In fact, these days I do very little hands on work, choosing instead to concentrate on project managing. I have put this case study together with the help of my trusted professionals, those that I use. Through this section I'll be describing things in the same lingo as you are going to hear on site. Like a lot of professions, the building game has its own language which which is important for you to understand. So let's begin. We start at the beginning, the demolition. Demolition starts with removing unwanted structures such as lean tos and outhouses. Depending on the size of the structures to be demolished, sometimes it's more economical to hire a machine and an operator to carry out the demolition. This could be an excavator. A full strip out of the interior of the house was required because the plaster was beyond repair. This can be the case if there's been subsidence in the foundations. The worst culprit for plaster cracking is lath and plaster. Until the arrival of sheet plaster in the early 1920s, lath and plaster was the only type of plastering available for timber framed houses. The process of lathing involved nailing on hundreds of little strips of hardwood or laths into the timber frame. The next step was to render or solid plaster the laths in a coating of lime and sand or later on lime, sand and cement. The final coat Was a skim coat of hard finished plaster which was finished with a trowel until smooth. The same process of a sand and cement render coat followed by a skim coat of hard plaster is also used in solid brick houses. All plastering of this kind is referred to as solid plastering. Plasterboard is what is currently being used today. It came into widespread use in the 1970s, and the likelihood is that even if your property has experienced subsidence and requires restuppering, the plasterboard should be repairable in most areas. Removing lath plaster is one of the dustiest and most unpleasant jobs around. The Wearing of protective equipment such as industrial dust masks, eye protection and gloves is essential. The most effective sequence of removal is to start with the ceiling and then the walls. Some plasterers will advise you that you only need to take off the plaster itself itself, leaving the timber laths on the frame. The plasterer then glues plasterboard sheeting over the top of the existing laths. The shortcoming of this method is that adherence is not guaranteed and the finished wall is not straight. The shape of the wall behind always governs it for me. If I'm going to go to the trouble of removing the lath and plaster and replacing it with new sheeting, I want my wall to be straight. To do this, it requires the complete removal of the plaster and the timber laths all the way back to the timber frame. The timber frame is then battened to make straight and the new plasterboard sheeting then applied. However, choosing this method, like all construction decisions, depends on the price point of your project. There may be a difference of $1,000 or more between these two methods, the latter being the more expensive. To remove the lath and plaster from the walls, you might consider a nifty little device called an easy lifter. While it's not designed for this task, it's actually a floor lifter. It's a really effective tool. It can save you hours of hard work on this particularly loath task. It works by placing the mouth of the tool inside the wall and wrenching down in a single motion. Now, have your rubbish skip bins ready. Depending on the size of the area, the removal of the lath and plastic can take well in excess of 20 cubic meters of bin space. The process of restumping involves subsided structure being lifted up to close, or as close to as possible, its original level. This is achieved by inserting hydraulic jacks underneath the structure and incrementally lifting each section in turn. The results of this can be dramatic. I have seen A timber house that looks like it belongs to the set of a horror movie be instantly straightened. If a house requires a full restump, it's preferable to lift sections of the floor to give the restumper access in particular via the bedrooms. The alternative to this is making the restumper crawl under the house. This makes quality control virtually impossible, that is that the holes are being done to the required depth specification. Removing floorboards also makes the job much cheaper as the time required is much less when the restumper can get direct access to dig holes with a full length shovel. Typically, this method involves removing four rows of floorboards that are located directly over the line of the stumps. This may be repeated two or three times in each each room, depending on whether the perimeter line of stumps can be accessed easily from outside the building or not. In situations where the floor has been damaged in some way, remove the entire bedroom floor. Replacing a bedroom floor with sheet flooring such as yellow or orange tongue is actually quite inexpensive. Approximately $200 per room. That's just for the materials. When compared to the cost and time involved in restumping from underneath the floor. Removing the entire floor in all the bedrooms is still a good value proposition in nearly all cases. Leave the existing floorboards down in the hallway. More on floorboards in the next module. The reed stumper can normally get access to the lines of stumps on either side of the hallway from the bedrooms as a side. I use carpets in the bedrooms for all my renovations, so pulling up a few floorboards is not such a big issue. With the inside of the house gutted and back to bare frame, I turn my attention to the exterior of the house. This is the time to do a big clean up, which I do usually by hiring a bobcat and driver. I also get the building envelope levelled and ready to start the foundations for the extension. This is the stage of the job that work would commence on the extension. This starts with the foundations. We're going to skip ahead for now and return to complete the process from foundation to lock up later in this module.