Sleep Better| TatamiRoom Japanese Platform Bed Review | Wakayama Platform Bed
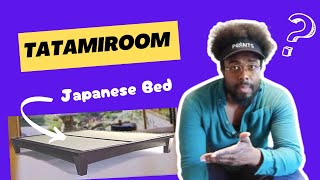
A first-person YouTube review and assembly guide for the Wakayama king-size platform bed sold by TatamiRoom. The reviewer (Luis Lan) documents a delayed delivery (arrived ~97 days after ordering), praises packaging and customer service (agent Jason helped supply interim parts), walks through unboxing and step-by-step assembly, and reports final measurements and impressions (sturdy build, recommended).
Questions this video answers
Luis Lan (uploaded April 4, 2024).
Approximately 97 days from ordering (video: "97 days from ordering this is when it actually came.").
Wakayama king-size platform bed (TatamiRoom).
76 inches (193 centimeters).
80 inches (203 centimeters).
Chapters
It's finally here. Let's go check it out. Sam. 97 days from ordering this is when it actually came. Excuse me, are you hot? I'm hot. So I finally got my bed frame. Hindsight I knew it would take three months because it said it on the website. But then I got an email saying that it would take actually six months. Shout out to Jason, reached out to them, told them, hey, I sold my old bed frame. Waiting for the king sized one. So my bed's on the floor. I'm okay with it. The only thing my wife isn't she severely. Well, I guess not severely but she's very pregnant so getting up out of the floor is hard for her, understandably. So he was able to look through his stock and of course I decided to pick the frame that all of the pieces came in their last shipment or a couple shipments ago. But they were waiting on one specific shipment or one specific piece of the bed that got delayed in the old in another shipment. So that's why it was delayed. But after talking to him it's like, hey, okay, having mix max pieces until the other piece comes in and we were able to get it out and hopefully once that new piece comes I can switch it out. But kind of just wanted to make a video on the tatami bed frame since I haven't seen any of them. But my bed frame isn't the normal one. So I'll just kind of see how to put it together, let you know if there are any weird things about it and hopefully this can help you get the bed frame. All the other ones were in stock. This unfortunately was the one that was on backorder so when you order you might have it in a week or two. There were some comments that said, hey, I ordered mine, it came that same week. So your experience might be different than mine. But super happy that he was able to help me out and kind of mix match some pieces so at least the frame wouldn't be on the floor. But got my helper here to try and put the put this together and I'll let you know how it goes. It first impressions, very well packaged. They had some hard lining and then some styrofoam and then the actual box in case one of the corners got dinged. It didn't mess up the way there's like three layers of boxes with styrofoam in between each layer. So really, really well packaged. But how to bring out the box knife to cut it. And before you start freaking out, I saw there was some space so that's why I was cutting it from the top instead of from the sides. This looks to be the bottom pieces for the headboard. So put these to the side. I got it in walnut. The short pieces were the only ones that they didn't have in stock, so I think those are a different color. But the rest of the bed should be walnut and matches with the floors, so we're doing good. Our paces would have just thrown everything together, then just throwing a little bit of Styrofoam, but they once again packaged it pretty well. They put more styrofoam in between all the pieces and then on the outside as well to make sure it doesn't get dinged. So two thumbs up. This is the headboard piece. Should probably be doing it last, but first box I opened. They're pretty freaking heavy. Sturdy piece of wood. I'll go ahead and open the next box and see what's in there. Once again, Jason, thanks, man. I appreciate it. You could have definitely just said, nah, you gotta wait the six weeks. But he made it work, so appreciate it, dude. Good customer service. So I'm guessing these are the two long boards. The short rails are what they didn't have in walnut. They had the long rails, the long rails in walnut. But the short rails might not be in dark mode, but we'll see how it goes. Good instructions in case you wanted to see them. Lots of pictures. I'm not sure how many piece. How many boxes were supposed to come here. There were three, so I hope everything's in here. We'll find out. It's just as I had suspected. I brought in three of the boxes. But looking at all of this, I didn't have all of the pieces. So went back, looked at the UPS and was missing two boxes. But luckily they just showed. Showed up. I possibly for a bit, they just showed up. And I just noticed that they're luckily smaller boxes, so a lot less work bringing them up the stairs. But they have what they are on the outside of the box. The these Wakayama. Wakayama bed frame. That's the case kind of bed frame that I wanted. The only one they didn't have in stock in the specific color that I needed. So that's why the short rails are a different color. But this is the frame legs. And then the other box, the other box that came was the slats. And that one's pretty freaking heavy. Oh, my goodness. It's this one right here. But once again, very, very good packaging. They all have the little things on all of the edges to protect it from getting beat up. So I'm gonna open these and hopefully get it put all together fairly easy. Let's. I lost my box cutter. So these are the legs. The main. Mainly why I wanted to get this version versus the regular tatami head frame was because of the legs. These legs match the legs from the nightstand that we got and they had a lot more character. So. But they did a really, really good job of packaging this. So if you end up ordering from Jason, rest assure your package will be very well packaged then. Wouldn't doubt it if there's. Oh, okay. All four of them are in here. That's good. Okay, so let me give you a little closer look as to what these look like. Nice and solid and match perfectly with the floors. Yeah, it's kind of why I got them. They kind of funky shape. And the sets will go in here. So no screwing or anything will have to be done. Really nicely finished. So excited to see it all put together. Take the rest of these out. But I'm very surprised at how well all of this was packaged. There were a couple of different manufacturers that I ended up looking through to get this Japanese S style bed. And Tsatami came highly recommended by a lot of people so decided to try them over their competitors. And so far I'm fairly impressed with their packaging and the product and most of all their customer service. So we ended up going to Japan last year for a honeymoon. And a lot of the places that we stayed had beds as close to the ground or on the ground. And I kind of wanted that at home. These two blocks. Not really sure what they're for, but instructions should tell me. I don't know where I put them much stuff everywhere, but put them where I don't use them. Looking at the instructions, those four stands came in that box along with these two little number five which are the metal legs. This came in the large box which is that. That thing came with those. And then these short rails are what Jason told me they didn't have in stock. And he ended up giving me some for right now. Until though come the ones that are the right color come in. So. And then I think the last box that we have should be the slats. So let's open that up. Yeah. It. They were not shy about taping this up. Been waiting to open this one up. But I think it's time. Since we have all the pieces now and we can start putting it all together. We can see how long it'll take. This is the Short rail, just not in the right color. But once again, after talking with Tatami Room, they were gracious enough to give me these, so I didn't have to wait another three months and have my wife sleep on the floor. So once again, thank you to Tommy Room. And I purchased all of this. They gave me nothing for free. So unbiased review of the furniture. Another thing is they did offer to send me the bed frame just in this color since they had all the pieces for it in this color. But I really wanted the dark walnut since it matches with the rest of my room. I am going to start putting the Wakayama bed together now. I'm going to use the short rails that they sent in with this middle support and attach it all along with the metal legs. So let's start with step one. See how it goes. A little confusing, but it looks like the flat side should go on the outside, not the inside. And the little hooks should go upwards like that. So flat side out like this. And the little hooks up just like that. I'm gonna pause the video. I told my wife I would walk vacuum before I set it all up. So I'll pause. I'll come back. I'm back. Time to put the short rail on this side. Same thing. Flat end facing down this way. Don't hit the fan. Definitely would probably be easier with two people, but doable with one person. Okay, now we need to put the middle support onto the two short rails. And they do have little notches. Little notches that you can. I don't know if you can see, but right there that you put on them. And I guess there is a long bolt. There's three holes in it. So this long bolt, I guess you put through it. Okay. Just notice something I put in my middle support. I put it in wrong. Don't know if you can see here, but there's a circular opening on the middle support that needs to face up because you're gonna put in a dowel. Oh, sorry. A barrel nut. You're gonna put in a barrel nut in that little hole and then screw in the long bolt. So it looks like this. You're gonna put in the barrel nut, see in here, and then pass it through there. So I'll do that. But first I gotta switch over the metal support. And you'll also know the metal support has three holes which are supposed to be facing down because that's where the middle legs, the little short wood ones, are going to connect. Putting in the barrel nut first and then looking through the hole to make sure it's aligned helps. It wasn't aligned, so I had to stick the allen wrench in to line it up. But you can also putting a screwdriver through the top to line it up as well. I think I messed it up, but I'm okay messing it up just as long as you learn from my mistakes. So I'm gonna have to undo what I just did. Let me show you. All right. So I screwed in the short rail to the metal support, But I did not see these two holes on each side. You need these two holes on each side to be over here, because that's where your headrest is going to be or your headboard. If you don't have a headboard, then it doesn't matter. But I got the headboard, so I need this short rail with the two screws to be on that side. Jason also told me that he didn't know if the holes would match up depending on the stain. So I don't know if they would. I'm guessing they probably are going to since it's just the stain that's different. But I gotta just do what I just did and flip the pieces and start all over again. So I'm gonna cut it. I'll do that. And then I'll. No, I'm gonna make you wash me my mess up so that it's ingrained in your hand. So you don't. But I'll speed it up. Got it flipped around. Now to add the. What are these? The metal legs to the metal support. And I think, yeah, I just need to use these two bolts that they provided. Now for step number two. Should be pretty simple. Just adding the long rails to the side, so shouldn't be too hard. I'm still wondering what I need these dowels for now that I use the barrel nuts, but guess we'll get there. But yeah. On to step two. Oh, do not put your fingers underneath the little leg. My fingers almost got smushed. Took a little bit of wiggling around, but got it in there. Step number three, optional. I bought the headboard. Jason told me it might not fit since it's a different stain, but let's try it out anyway. So if you got the optional headboard, you would have gotten five boxes instead of four. Two big ones with no headboard. Three big ones with a headboard. Well, three big ones with one being the headboard, two being the long rails and the short rails. But let's do the headboard. The right leg. Oh, the left pole and the right pole. Not sure if there's a difference. I should probably check before I try and put them in. But they should have come with bolts. I guess I'll have to check in the bottom. They also already have bolts, so I guess we'll just have to stick it up on there. I don't think there's a difference between the right and the left. I like that. It also has a little rivet here, which on the other side. It already has a hole for it, so it helps it. Let me see if I can. It already has one I. These wood things on it. So you can take the screws out, adjust it, and then stick it on there. Let's see if it fits. Jason over at the Tommy Room, just so you know, it does fit. Different stains, so in case you ever have to do this again. I probably should not be sitting on this, but. All right, so I'm back. Time to put on the headboard. This one might be the only part of the process where you need two people, since you might need someone to hold it up while you screw it. But we'll see if I can knock it out by myself. This is interesting. They give you three bolts, but four here. So I think they give you the choice of using the top three or the bottom three. That's. That's my guess. So I guess that's good if your mattress is on the bigger side or something. I'm not sure. But it's nice that they give you the option. Let's see if I can get this on by myself. If not, why? It's downstairs, but I don't know about you, but I'd rather just do it myself. It would have probably been a lot easier if I would ask for help, but we don't need that. All right. Got the backboard all squared away. That was step three. Step four is. Step four, I guess, is to put up the slats. And this is where we will use. Use part D in the four corners. So part D, the dowels, the little wooden things. Let's do that. I am very happy that they use solid pieces of wood. I guess you put one and then the dowel. So I guess it's meant to keep it stretched. So I'll see how that works. It seems. Yeah. I guess they only give you four, but I don't know. I feel like they should give you some for the middle one as well, but. Oh, well. Yeah, I guess they should give you 1, 2, 3, 4, 5, 6, 8 of them, because the holes for those are right there. I guess they just didn't give you extra ones. I also didn't mention they give you little caps with a little hole right here. But these are dark and hopefully Jason, they'll eventually send me these in the dark color in three more months. But all in all, definitely I'd recommend it. Pretty stinking. Solid. A couple of last things I wanted to mention. This is the king sized. What is this called? Wa. Hold on, hold on. I'm terrible at my job. Wakayama. This is the king size Wakayama. The main difference is that the legs on these kind of looks like triangles. They bow out versus the regular ones just being square. And you probably want to know the dimensions. The dimensions are on the website. But you sat through the whole video, so I'll help you out from one end to the other. This is six feet and a quarter and a half. Yep, six feet a quarter and a half or 76 inches or 193 centimeters in case you needed to know that or in case you're trying to lay out your room. How long it is. You want to know. Well, too bad. Just kidding. I'll let you know. It is 80 inches or 203 centimeters long. And the height. This is the short version. The tall version looked a little weird with the legs, so I got the short version are bed frame, bed foam, whatever the heck it's called. It's pretty thick, so I think it'll make up for that. And the height of it is 8¾ almost 9 inches or almost 23 centimeters. And why not? I'll let you know the back. The back height as well from floor to top of frame. I put it up on the third, the high, high setting. And that is 34 and a half inches or 88 centimeters. And the headboard is almost as long or maybe a hair longer. So I'll measure it for you as well. That is 76 inches or 193 centimeters. And the last thing that I wanted to mention was this headboard. It's thicker on the outsides and kind of bows in or like smoothens out and then bows back out, which is. Which is nice. It kind of goes like this. I wish, I really wish they would have given me four extra one of those dovets or whatever they're called. I'll probably just go to Home Depot and get some. But other than that, I definitely recommend it. Thank you for sitting with me through this extremely long video of the tatami room. Wakayama headboard. Hope this was very helpful. And once again, I bought this with my own money, my hard earned money. So if you found this at all useful, at least give me a like. That doesn't cost you anything. And Jason, you're the man. I appreciate you. Thanks for not making my wife sleep on the floor. And I'm okay with it. The bed will cover it up. So thanks again. If you liked it like this video, if it was helpful, if you're considering one of these, definitely buy it. It's sturdy, it's nice, it's. The wood's good. And hope you have a wonderful day.
More from Luis

This Is The Best City In Japan for Travelers 🇯🇵 | Hidden Gems & Delicious Eats!