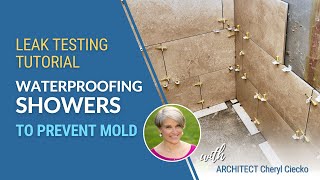
Matt Kelly walks through waterproofing a shower with WEDI board and fabric vapor barrier to stop mold. He shows how to seal fixture penetrations and test the shower pan by filling it, marking the water level, and checking for leaks after 24 hours.
Chapters
Hi everyone. I was just noticing in the Facebook group a lot of questions about showers. And I'm just getting ready to go do my workout and I'll be getting in my shower, so I thought I'd show you my shower. So the questions were about tiling, backer board and all that kind of stuff. So this is my shower. So people are like, oh, you don't want to use tile? No, no, no, you can use tile. I use tile. So I have a. Let's see, I have a tile ceiling. Yes. I have sealed lights. Those are more expensive than not sealed lights. This is actually a steam shower, but so those are for steam, which is a water vapor. I have big tiles on the wall which I just like. I think they look nice. And then I have tile floor also. So you can see the floor is small tiles. It's like a mosaic and that makes it a little bit more slip resistant. The tiles on the ceiling are the same tile as well, only they're smaller. So you have to look for tiles that come in different sizes that match each other. So those are I think four by fours on the ceiling. And there's mosaics on the floor, which is a good thing to use on floors. And then I don't know what my walls are, but they're bigger tiles. But what matters here is what's behind the tile. So what's behind the tile is I have WEDI board here. I have a WEDI board base, a WEDI board ceiling, and WEDI board walls. And then for a steam shower, you put another layer of this fabric over it, which is like nothing will ever get through this. And then you gotta, then you still have penetration. So I have these body sprays and I have, you know, the controls and the shower head and the hand shower. And so those are holes in the, in the enclosure. And so those have to be sealed before you put the. The finish is on. So but yeah, I have tile. It's not moldy. It's never going to get moldy because there's no way for really water to get behind here and be stored here. So it's. The tile is attached to a waterproof membrane that there's nowhere for water to go. And usually what's happening is water is getting behind other surfaces, behind like behind the durock, soaking into drywall or green board or getting behind it especially. It seems so. So these corners down at the base are really critical. And then for showers, what I recommend people do, if you have a shower curb, it's a lot easier. So in my Shower. You can see I have a curb. Where is it? Right there. There's the curb. So you do a shower pan test. This is actually required by code, but nobody seems to do it. If you ask, though, and you know that you have it as code, you can request it. So what you do is you plug the drain. You don't plug the drain on top. There's a tool that's very inexpensive. If you have to get it from a plumbing supply store, that may be where you have to go. And you put it in. You remove the COVID Let's see, you can remove this cover down here. You can remove this cover and. And then you put it in there. You put this thing. It's got a screw thing, and you tighten it in there and it blocks the drain from draining. Then you fill up your base with water. Not higher than the curb. Right here, not higher than the curb. You don't want it overflowing. And you let it sit for 24 hours. Not two hours, not one hour, not 10 minutes, at least let it sit a day, more than a day. It'll start evaporating. So you don't need more than a day, but definitely at least 12 to 24 hours. And I would go 24. You mark the level, the water height, and then you come back and you keep checking it. If the water height has gone down, then you know you have a leak, the water's going somewhere because it's not going down the drain. And that means it's going somewhere in. Probably in that seam there or the seam in between the drain and. And so this is what you want to do in new construction so that you know it before you pay or before you start using it a lot so that you can notice the problem and get it fixed. So that's my tips about shower. And check out my other YouTube videos. I know this one's vertical because it seemed the best way to show the shower. And I hope this is helpful. Don't forget to like and subscribe. Check out my courses. My moisture basics course, mini course is. I'm so proud of it. It's really helpful for people and getting great reviews. And so check that out. It's really affordable and it's on special. So check out my education@avidingmould.com and I'll see you in the next video. Thanks for watching. Bye.