I Replaced My Email Inbox with AI Powered Slack Summaries
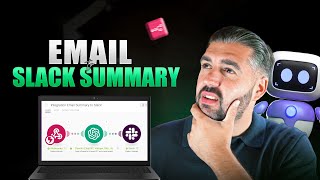
Michael Elliott shows how to forward emails to an AI tool that summarizes them in Slack using GPT and mail hooks. He walks through the setup: configure forwarding, set up the AI prompt, format the Slack message. Cuts email inbox time significantly.
Hey guys, Michael Elliott here. And today I'm going to be showing you how you can convert inbound emails into Slack summaries using AI in order to improve efficiency. This personal flow saved me eight to ten hours a week. I no longer have to go and check every inbox. I get the email summary that gets dropped into a Slack channel that allows me to prioritize my day and ensure that nothing urgent gets missed and that anything that can wait and can the response later or is generic that I can take care of in my own time. But there are many use cases for businesses where I've implemented this, including sales reports, marketing managers, updates on a weekly basis where directors want to see a summary, not just the full document so that they can basically gauge if there are any issues or not before going through their next processes. You can add this as part of other flows. That is a key thing, you know when you're talking about this you can also extend this further. So then you could have a read Slack channel and then another action. But today we're going to stick strictly to integration of of this. It is a really simple flow involving mail hooks and that allows the instant trigger to fire. So stick with me. And I'm about to go through it live. The first thing that you want to do is you want to come into, you want to create a scenario, you want to come into an empty scenario and you want to search for mail hooks. Now these custom mail hooks are used to connect your your inbox. In this case, I'm using Gmail to forward emails to the mail hook that we've produced just as a disclaimer, something that some of you might not know. Stick with me if you do. A mail hook is just strictly used for, for emails and inboxes. A web hook is completely different. It pulls from a URL. If a database is updated, you can update a row in Google sheets or anything like that. That's not what a mail hook is. A mail hooks are what we are using here today. So make sure you you don't get caught out by that. Now I'm gonna call this complete email to Slack summary. Okay, hit save. Once you hit save you see the, the email address here that that comes through. So we need to copy this and we need to save the module and then we need to go to here and inside of your inbox whatever email it is that you're looking to forward emails from. So it might be a sales app, it might be your personal email, whatever it is you go up to settings. The important thing is that you do it from the right inbox. Go to Settings, go to all Settings and go to Forwarding and back, pop, slash, imap. Now this you will, you will not see right now, but you will in a moment. You will not see this right now. What you will see is add a forwarding address. So you hit add a forwarding address and you paste in the, the mail hook that we've just got. So once you hit next here, it's going to make you very. It's going to make me do two factor. But it should be fine because I think it's, it'll be fingerprint. Yeah. Every time you do this I feel like I've been arrested. So you're in a position where that goes through, the verification goes through. You can hit proceed and this will allow it to forward email to, to this email address. Add a forwarding email address. But the key here is that it says a confirmation link has been sent to this email. Well, obviously the problem with that is that. Well, actually we haven't got a. We haven't got a. Let me just remove this because that's not the right one. Let me just, you know, look at this and how am I going to click this verification email? Because there is no, there's, you know, there's no inbox. I don't have a login. I just literally have a mail hook. Well, that's where you head back to Slack and you, sorry, you had Back to. To make.com and, and you click Command S to save and you run this module only. Then you just head back quickly to the, to the, to the Gmail inbox and click resend email. A confirmation confirmation email has been sent to that, to the inbox now and that in a moment will fire and it will give us the output that is necessary in order for us to make that confirmation. It's extremely important because without that it's impossible to do it. Let me just hit resend again. Resend just to make sure. There you go. That can be a little bit boogie sometimes, by the way. So just if you do get caught out by that like that, don't sweat it. It's something that naturally happens. And you head, you'll see the little bubble. You click into the bubble. This is the output. The output inside of the text you will see has. In order to allow this email. So this will be your email to forward emails. You have to verify it here. So you take this, you copy it, you paste it and you hit confirm. And once you've, once you've confirmed that email address. You're now in a position where when you go into the inbox of. When you go into the, to the inbox here and refresh, you will see exactly what I saw, which is this. But your settings will currently be on disabled. So go back into make.com, copy the webhook again. Once you've got that web hook, forward a copy of incoming mail to and yours will look like this. That's exactly what your screen will look like. Click forward a copy of incoming mail to paste in the webhook that we've just used and then hit save changes. Okay, once you do this, you'll, you'll notice this horrible red bar was here all the time because I had a, I had a, I had a mail. I had a mail hook set up before and this is now the mail hook, which is inside of the make.com inside the make.com scenario. So we know that it's now connected. We've authorized it and we've confirmed that the email can be used so the emails can be forwarded. Now what we need to do next is build the flow. But what we probably can do and what I will do here is I'm just going to send a test email. I'm just going to send a test email that says did you receive this? Did you receive this email? And I'm going to send it. Let me make sure I hit save again. I'm going to come out of the editing mode and I'm going to hit send. And what will happen is the forwarding email will. That has, that has just been come. That has just come through here will now be received by this custom mail hook. Eventually it can take a few seconds. There you go. So now we know that any emails that come into that inbox are being received. If we go, you know, if we go in, oops, sorry. If we go into the, to the, to the output, you can see did you receive this email from me? Okay, so we know now that it's capturing all of the emails. We've set up the, the mail hook. There is no issues moving forward. We have all of the inbound emails. All we need to do is now decide what we're going to do with that information. Okay, so we click add another module, hit Open AI and hit create a completion prompt. You can use Claude for this. I just use GPT. The model that I'm going to use is I'll just go with chat GPT 4.1. And if you've seen any of my other videos, you Know that I use a sort of explanation for this, but if any of you have seen the film Big Hero 6 and Baymax the robot, my daughters love it. I end up watching it about four times a week. Effectively, this developer and system prompt is just if a robot's woken up, you need to tell it what it is and what it's got to do. The chip that they put into Baymax, that's what this is. So we need to tell this system what we want it to do. And what we want it to do is you're an intelligent writing assistant that summarizes inbound emails and passes it to a Slack module. Please format correctly for Slack output. Please format correctly for Slack output. Strict strictly format format for Slack output. Less is more when you're prompt engineering. If you've seen me, if you've seen me talk about the one few, one few and many approach, you will know exactly what I mean. The one fewer many is that one prompt is significantly better than no prompts. When we get to the user case in a moment, few is the sweet spot. Three, four, five is perfect. And you will get so close to a maximum output if you use many prompts. A lot of people really struggle with, with engineering prompt engineering because they over emphasize on what they actually need to do when they could finesse it when it comes to AI, you know, less is more. So let me just go through this. So strictly format for Slack output and then we'll add another message and this is a user prompt. This is the prompt I was just referencing a moment ago. And we'll put the text inside of it. Okay, so we will now save that. That AI module now has a development system. It's not the perfectly written. You know, you can tweak it and make sure that it provides specific whatever you want it to do. But this will give us a reasonable output initially. And then we're going to connect it to Slack. So we're going to go to Slack. We're going to. So we open a Slack with the next module, we add a module, we go to Slack and we hit Create a message. Now the Create a message. I always enter the, I always enter the, the Slack channels manually. I've got a thing about this. Um, and the text, even though it hasn't yet been. Yet been ran. I mean, you know, we could. Nah. I mean we could just quickly put something in there. But there's. There's no real need. The text will come from the result obviously of the cheat the Chat GPT module. It will ensure that we're in a position where the result that is outputted from the prompts we've just given it is what is is put in here. Okay, so that's all well and good, but that's just going to pop in a summary of an email that you've received. What you want to do is correctly format this summary before summary you want subject. We don't, we don't need the date because the date appears in Slack. So you'll, you'll easily be able to just cover that subject sender name and I don't know, sender, sender email maybe. Let's just say that that's what you wanted to. So effectively here what you're doing is you're hard coding the, the titles in and then the content from the variables will be underneath and you can see where it's pulling them from. You can't see this because it's not yet ran and the module is behind the, the screen. But that is the, the way that the message will appear in Slack. Okay so if I, if we hit, could you just realize to save that? So if we hit save on that. Right. Our prompt is now built and complete. So let's save it and let's go to the test one Slack channel. Now what we need to do here is this is just the Slack channel that I've created. Now I will peek it at the end so I can just grab it quickly in a moment. But this, this is a web. We're now pulling emails in, in five minutes, eight minutes, whatever. We've built a flow that pulls, uses custom mail hooks to pull from email inboxes. That gives you AI the ability to be able to summarize it and then it goes through into creating a Slack message. So I am now going to come back out of here and I am going to send this a lengthier email that it can summarize and we'll see, we'll see this at work. So you can see that it received the email. It's now creating the output in terms of the prompt and the Slack message has been sent. If we now come into Slack, you will see that the subject is a quick email update sender Michael Elliot Sender email summary. You know the summary. David is proposing a 20 to 30 minute call next week to discuss next steps, key priorities and identify any quick, any quick wins for the project. He asked Michael to suggest a suitable morning time action, suggest a suitable morning slot for next week. Inform David if any reports or metrics should be set ahead of the call and raise any questions about process timelines or platforms. I told Chat GPT to format it for Slack. It didn't. It wrote it incorrectly. You could fix that with a basic, literally a basic prompt. But the fact of this, the point of this video was for us to be able to create a Slack prompt that allowed us to be able to manage incoming be able to manage incoming emails and give an output into a Slack channel, which will allow you to do that. So we've accomplished that. My name's Michael. Thanks for watching. If you want to book a call with me and discuss automations for your business, you can do so in the description below.