Nano Banana’s Breakthrough in AI Motion Graphics Will Shock You
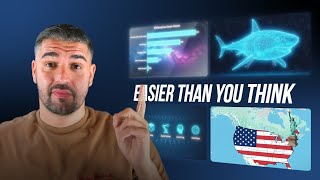
This is a YouTube video titled "Nano Banana’s Breakthrough in AI Motion Graphics Will Shock You" created in September 2025. The content is a detailed monologue by Michael Elliott explaining his experience using AI tools like Nano Banana and Halo AI to create various types of motion graphics, including data visualizations, educational diagrams, infographics, and hyper-realistic map animations. He shares the trial and error process, technical tips, and the potential value of these AI-generated creatives for business and personal use. The video is educational and showcases the power and ease of AI in video editing and motion graphics production.
I had tried creating motion graphics with AI before, but Nano Banana finally allowed us to crack the code for this. I was able to create this custom lower third name card, but that was the easiest of the things that I created. I also created explainer videos. I created data visualization videos, educational diagrams, and not only that, this hyper realistic map animation that used to take a team, if not just a single video editor, days, if not weeks to create. So the ending of that video was the New York Knicks celebrating the Eastern Conference final that they made last year. But I was there, that's why I chose it. Now all of the images, motion graphics that I show you today are created using nanobanana plus a few other tools, mainly Halo. The long animation you've just seen took me the longest, so we'll save that till the end. And I think a really good place for us to start is the data visualization. When it came to the data visualization chart, I went and found this graph of preferred ice cream flavors. Chocolate chip cookie cookie dough is my favorite and is actually the favorite here. But you could definitely use your own data internally to make motion graphics out of absolutely. No doubt about that. Now I'm using AI Studio. I had a little bit of a backwards and forwards with it. Please remove the bottom axis. I didn't need an axis because I wasn't using it as a specific graph. I then asked it to make it more futuristic. You can see how basic the prompts were here. I didn't do anything crazy or special. And then finally I got it to remove the bars from from the graph so that I had a start on an end frame. Now there are two things to note. One is that if you are using AI Studio Gemini themselves, the image will have a watermark. It's pretty easy to remove with a generative fill and selection. It's not a difficult thing to do. I didn't during the video because there was no net, there was no need. Also, you might want to use an upscaler to improve the quality of the imagery. When it comes to upscalers, you can. There's an array of upscalers out there. I personally didn't use them for any of these because I wanted to give it raw. But if I was using it in production, I would definitely use an upscaler in order to ensure that the image was the highest of quality. But as you can see from what I've produced, it's not necessary. Then all I needed to do was head over to Halo AI, hit AI create video there, it will verify and then I simply Just had to drag and drop in the images that I had created. I'll give it a basic prompt. Imagine a cool animation, a motion graphic where each bar slides from left to right one after another and hit generate. And this was the result. Pretty cool data visualization. You could play around with that, you could add a multitude of different things. As you saw, the prompt was very basic. I did run into quite a lot of issues further down the road, but that exact same technique can be used for the educational video that I showed you. And I asked for a digital illustration of a shark portrayed with a network of glowing clean, pristine blue lines outlining its anatomy. I gave it quite a detailed prompt and to my surprise, I wanted to make the dorsal fin red. And it nailed it on the first try. It gave me exactly what we were looking for, which is unusual. Normally I would have to have some backwards and forwards. I couldn't believe that it nailed it so well first try or simply that was left to do. After that was for to remove the coloring of the red dorsal finish. I followed exactly the same output as what I did for the data visualization. And this is what happened. So I followed exactly the same technique of importing the shark inside of Halo. However, I did run into some issues. I was asking the image to swim. You can see, please have this image swim quickly, eventually transition into a red dorsal finish. And I couldn't get the shark to move. And no matter what I tried, I generated a couple of times. Then I asked it to swim at full speed and it still wouldn't quite grasp what I wanted. But I tried a few more times. This was strictly swimming, but it wasn't moving. And by the end I used the truck right tracking shot to make the shark swim, as you've just seen. So there was a little bit of backwards and forwards in regards to that. But as you can see, obviously the outcome was brilliant. Then it was time for the infographic. And for the infographic I had to do something a little bit more detailed because I needed something that looked corporate, was usable and something that a business might use. Something that you may use in. In terms of digital animation of an infographic. Infographics are so common and commonly used that this is really valuable. To create something like this using an editor would also take a significant amount of time, relatively speaking, not as long as the long video, but relatively speaking. So I gave it quite a detailed prompt. A sleek 2D vector style infographic with futuristic aesthetics set against the dark blue, a black gradient featuring a subtle glow grid of a light Blue lines. I told it exactly what I wanted. I used AI to get this. I used AI Studio. I just did a search, I told it why, that I needed an infographic image prompt and this was the outcome. And it was pretty sweet. Okay, it was pretty, it was pretty sweet. I was very happy with it. And then I simply just had to remove the background again. Now I've been quite lucky during the production of this video. If you hit brick walls when you're using Anna Banana, you can sometimes get errors and it will, it will give you a bug saying it can't complete it. If that happens, just create a new, copy the image, create a new chat, put the image in and continue the conversation. It will pick it up from there. Often the refresh helps. Not only does the refresh help, but starting a new chat gets the blocker out of the way. Have you been able to increase them? So I did exactly the same thing and I headed over to Halo and there's some variations in here for us to watch. So when it comes down to the individual creative that was produced, you can see at first I couldn't get the arrow point in at the individual, at the individual infographic. Then it was up and down bouncing, which was quite, which was quite nice. This, this was. I quite enjoyed this, this infographic. And then I couldn't make a decision between the few that were produced. Some of them were over the top, like that one that I didn't really like. This one I really liked the images bouncing, the arrows run through probably the most professional. I'll play that on the screen now. But then there was also this one where the images bounced in and the arrow was hard. And there was a, there was a circle that was generated after. I'll play it now. I couldn't make my mind upon which one I preferred. It's all down to taste. But I gave them very simple prompts, tweaked it a little bit, telling it the images should come from the background. Basic, very basic. Two, three sentences per prompt. And those were the outcomes from an infographic point of view and are definitely usable for business related tasks and saleable if you were to use them to create motion graphics for businesses. So the easiest one was the name cards. I simply headed over to the AI Studio. You can use any LLM. I asked it to create me a prompt for a lower name third card including colors, the name Michael Elliot, AI Train, Randomized Color palette, etc and it gave me back this. I loaded up a new chat with Nano Banana and I gave it the prompt but it gave me back some quite poor quality, core quality line. I mean, that's probably okay, but I wanted to do something crazy in terms of being futuristic. And I simply told it, I don't want minimalistic, I want futuristic. Get creative. I left the temperature on one. It ran through. It created some pretty awesome. Pretty awesome videos. You'll see them appear on the screen. Now. This was the first one, this was the second one, this was the third one, and finally this was the fourth one. And I decided to do those in a way which allowed us to be able to showcase its power, because you can literally create anything that you want when it comes down to that. Now, all I had to then do was say, let's say we wanted this image, we download this image, and you'd head over to Halo AI. And when you're doing this, you only want it to be the end frame. I've used a green background, green or black, because they're easier to edit and remove later. That's why you should use that. Definitely ensure that it is a green or black background. And in the same chat that I actually had with Nano Banana, I actually just. I actually just changed it to Gemini Flash and asked it to create me prompts for each one. And it gave me prompts for including the basic ones, which I didn't use. It gave me robust prompts that I would then take over, which is. That's the third one of the second set, which would be this one. And as you've just seen, this is just for use cases for you literally do that. You can toggle the enhanced prompt on and off. Sometimes I find that if you allow it to enhance the prompt, it can become a little bit too crazy. But you saw the outcome of what happened when I use that exact prompt inside of here. And it gave us the. The output that was. That was required for those. Those infographics. And they're extremely professional. If anybody needs them to sell to or you need to use them yourselves, you can manipulate this to create any type of style that you want using any color palette and any length of animation. And that will give you an output which is. Which is exactly what you need to give you some context on how difficult this is or historically has been to do. I uploaded the main video that I'll show you again in a moment, but I uploaded the main video and asked it how long it would take, like an inexperienced video editor, a year's experience, two years, whatever, to create. And the response was quite frightening. It says between 25 and 30 hours would be a good average. It could take between 20 and 40 and roughly three to four working days. So 25 of a month is spent by a video editor to create this image that that it took me an hour to create from scratch from a fort and I wanted to ensure that it wasn't overlooked the power that this actually takes from a video editing standpoint if you don't have a video editing background and was to try and create something like this from scratch. And now jumping into the idea that I had around countries it didn't start with the usa. Now originally I wanted to do Spain so I uploaded a map of Spain. This was not the only chat I did this in. I went backwards and forwards in numerous chats trying to get the flag to fit and it simply would not put the Spanish flag where it needed to be. I could not get it to work no matter what. I tried I tried different images, I tried different satellite images, I tried Google Earth Studio. I tried an abundance of different techniques to get this to work. And I then tried the UK zooming in on Big Ben or something whatever like and when it come down to the UK actually it nailed the UK as you as the AI thinks and how people may think the. The. The the UK looks but actually Ireland for people who know a lot of you will obviously know but if you, if you're not from the UK Ireland is actually not in the the United Kingdom. So Ireland here is not in the uk. The history you'll know about the history of this Northern Ireland however which is the top green circle is in the UK and when I tried to get the chat to do this it simply just bugged out covered England and Scotland in the. The. The United Kingdom flag and it just could not get it right. It assumed that Ireland was its own individual country. So I then moved on to the United States and the United States it nailed first time. I expected it to be easier using the USA which is why I picked it. The, the. The borders with Canada are very very clear. The borders with Mexico are very clear on the map. And yeah it understood and the output that it gave me was the image that. That I needed of the United the United States. So I just, I'm giving this away because I want to show the trial and error that you will go through to get this right. It's not as simple as just picking the images up and asking it to do something and it working. It isn't. I was backwards and forwards with this quite a bit to get this. This flag. And then I started to hit the issue of the Statue of Liberty and I could not get the Statue of Liberty. And again, this wasn't the only chat. I tried it in into the correct position. It kept just sticking it right in the middle of the United States. And I tried in probably six, seven different chat windows to get this to put the Statue of Liberty in the right place. I ended up just moving the Statue of Liberty in Photoshop so that I had the image to avoid slowing me down in terms of the video creation. Now when we go to, when we go to, to Halo AI what then happened was, was interesting because I was trying to transition the build of the Statue of Liberty out of the ground. And when I was attempting to add the Statue of Liberty, initially it wouldn't get it correct, but in hindsight I'd wasted a little bit of time because all it took was a starting frame of the American flag and a prompt that was generate a photorealistic sequence where the northeastern seaboard of the map extrudes upwards seamlessly terraforming into the Statue of Liberty. The map's topography and the flag stripe should stretch and mould over the emerging copper form. Verdigris copper form as it rises. The final, this was from AI Obviously the final image must depict the Statue as a natural monumental extension and it managed to put the Statue of Liberty in roughly the correct place because the base is so big. So even though Nano Banana couldn't find the right place for the Statue of Liberty, when I put it into Halo and said the northwestern border, it put it in a position that was acceptable to be used. Maybe it's not exactly perfect and if you had a smaller image, maybe you would have to work on it. But when it comes down to the creation of the, of that element of the video, it actually produced it pretty well. And this was, this was something that interested me. I tried a few different techniques to be able to get this to, to, to perform. But yeah, I mean, that was coming out with sand. And is it this one? This is the one that I use, which was a warping technique which I wanted because it's kept the color on the Statue of Liberty as it came through and it was great. So I chose to use that frame as part of my, as part of my, my image generation. Now you're going to see some really cool stuff because after this it was about zooming in. I want you to zoom in transitionally from the image into the flag and I want you to finish the Statue of Liberty. It should be a hyper realistic zoom. It zoomed into the United States in the center, which obviously we didn't want. I tried to change the prompt. In fact, no, that was the, that was two images at the same time. I then changed the prompt and this is a very cool image and this is something that I was close to using. Okay. If you look, watch this video, it changes into the New York sort of skyline and then gives you the image of the Statue of Liberty. But it doesn't quite make sense because it shows, it sort of gives you the overview of the city and then shows you the city baseline in the, in the background. And I was playing around with this and I was trying to get it to do. Look at this, look how cool this one was. Now that was incredibly cool. But the skyline wasn't in the background exactly as I would have wanted. But we could. You can see here what I was trying to do with the, with the imagery. Okay. Like what I was trying to do. Now when you got, when you get individual zoom ins, like this was one, this was an option not perfect by any stretch of imagination. But I'm trying to take you through the, the trial and error that you do go through. I'm not trying to make this look easier than it is, even though it is incredibly easy. And the realism that can be shown in some of the examples is, is obviously frightening. It's very, very strong and powerful. But when it comes down to actually using that, that transition, if we look at this one, it showed that I changed it to get the, the skyline. But I used the push in and pedestal up technique that you can select when you are generating images. Like you can, you can add individual, you can add individual camera movements here and you can select different shots. And these are, that's one of the one, that's what I used effectively to try and get that. And as soon as I did, I ended up with something which looked more like what I actually wanted to produce, which is where we ended up with this. And because I told, because I told it that it pops up around it fast paced, squeeze in much high quality video in as possible. It gave me a really, a really nice and really strong, really strong output for what, for what was required. That was also, you know, fantastic, a fantastic variation. And then it was come down to the zooming in on the city. And this was, this was quite, this was quite quick to, quick to nail. I didn't have to do much. It goes straight through above Madison Square Garden where the game had just finished. Game 6 against the Boston Celtics where I, that I was there. And this was quite a Simple. A simple transition. But again, all I had to use in terms of recreation was the final image of the. The previous video, the. The final. The final scene. And then an image that I generated using, using Nano Banana of the crowd. So that's what every single one of these did. If I, if we look at this and if I hit recreate on them, you can see I'm just using the flag that I put together with the final image that I used Nana Banana to generate. And that's how I was testing each individual one. And it's going to take you some trial and error. You can see here, like with this one, one last time, it zooms through. There's the crowd. The celebrations were absolutely wild. I was there. It was crazy. Like it was such a good fun game to be at. As a bonus, I'm gonna replay the full video one more time. And then something that I created which was with Paris and the Eiffel Tower, which I thought was worth an honorable mention. But I did some tweaking like I've seen from. From individual techniques. This is what I produced. Both of those are incredibly powerful motion graphics that you can create with relative ease. Now using Nano Banana, maybe an upscaling tool when you are in this position. High quality creatives like the main one. I showed you some of the, the covers that I. That I showed you. The, the diagrams for teaching the educational video usage. All of them have a place in this world. Every single one of them has the ability to be able to provide value to businesses for you to be able to sell or for you to use internally to produce your own imagery and turn that into video. So I hope you enjoyed this video. Like subscribe, comment, let me know what you thought to the video. Whether you. I was. It was educational and you learned. And show me some examples of things that you create. I would love to see this because it is extremely powerful stuff. My name is Michael Elliott. Thank you for watching. Like subscribe. I'll catch you in the next one.