NetLease Onboarding
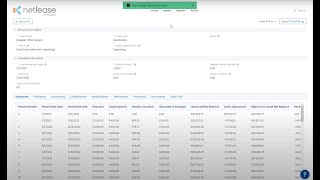
Andy Lampert walks through NetLease setup: configuring users and chart of accounts, building leases with the wizard (setting dates, discount rates, payments, escalations), running modifications and terminations, and generating journal entries and disclosure reports. The software defaults to ASC 842, supports IFRS 16 and GASB 87, and includes a Discount Rate Tool that pulled 1.26% for a 60-month rate on 12/31/2021.
Chapters
Hello and welcome to Net Lease by Net Gain. My name is Andy Lampert and I am a CPA and Firm Manager here at Net Gain and I'll be guiding us through our onboarding. First, before we get started, I'd just like to point out this blue question mark at the lower right hand of your screen. Please note that everything that I cover, plus much more, can always be accessed by navigating to our Knowledge base in the Resource Center. As you can see, our Resource center contains topics ranging from General Admin to Lease Additions, adjustments, terminations, down to some technical accounting topics which I will reference throughout this training. Jumping back into the software, you can see that I am logged into the client side of the software. As such, we can see our Lease portfolio listed out by Lease name with the least type out to the right. The first area we will review together is our Admin features. To navigate to the Admin tab, find Admin in the top ribbon. From here we can start adding contacts into the software. Once contacts are added, you will be able to see the name listed with an email as well as their access level. To add a contact, navigate to Admin Actions, New Contact and that will pull up our input fields. All that's required here is going to be a first name, Last name email as well as assigning User Access levels. As you can see here, we have three different access levels ranging from Admin Read Only and Lease Edit. If any time you're requiring more information on the User Access levels, please reference our Knowledge base by using the search bar and typing in User Access. As you can see here we have an article dedicated to the different User Access levels that outline Admin Read Only and Lease Edit. Once the user has been added to the software, select Create and the user will receive an email inviting them to log in with their credentials. Next, let's take a look at some of our segment options. As you can see here, we have set up our segment one to read Location and we still have segment two, three and four available for customization. To open the input, go to Admin Actions Edit and we can see where segment one has been labeled. Location Common segments that we see amongst clients include locations, Cost centers, departments, anything that is helpful where you would want to segment out your leases. This is a great place to input that. As such, I will input segment two as Cost center while we're in the setup. Please note that we also have the opportunity to set up our accounting standard. If no standard is selected, the software will default to ASC842, but we are compliant with IFRS 16 as well as GASB 87, we also have the chance to elect an expense convention similar to accounting standards. If nothing is selected, the default option is full month, but we are able to to select partial month per our lease agreement once updated, Note that this segment 2 will soon update to Cost center just as soon as I click update. As you see here, Segment two has been renamed as our Cost Center. As you'll note in location, we do have some options already assigned. In order to assign options to our Cost center, all you'll need to do is navigate back to admin Actions edit and that will open the record back up for us. Now that we have Cost center set up, I can navigate to that segment and you'll notice Add segment options up to the right. From here we can start adding our options. Note, although we are limited to four segments, we do not have a limit in how many options we can set up under the subsegment once those have been created. As such, I will add a few Cost centers. To add, just click on the plus button here and repeat. If at any time we need to remove or delete a Cost center or an option that we've set up, simply select the Trash can icon and that can be removed. Once we set up all of our options, update and we should see those populated under our Cost Center. Next we'll take a look at different lease types. As you can see here, we have four lease types that come pre populated within the software. We have land, equipment, vehicles and Real estate. If we do want to add our own customized lease type, we absolutely can do that. At this point all we need to do is once again admin Actions edit and that will open the record. If I navigate to lease types, you'll now see a button reading Add Lease type and at this point we could create another lease type. Common lease types we see would be servers. Sometimes we have also seen if someone leases multiple vehicles, they may require a little bit more detail. So these are all great examples of adding lease types. At this point you'll also note that each lease type has a pencil icon. If I click on that, you'll notice that this takes us to our chart of accounts. While there is a number of different accounts in here, we do not expect that all of our clients will have every single chart every single account in their chart of accounts. So just be wary of the ones that you're using on a regular basis. However, you'll notice that we can update the account name and the account number to match our chart of accounts. So for instance, let's update this to ROU Real Estate and we can just plug in an account number for now. You'll notice that if we don't enter an account name, the software will default to the name pre populated and similar with account number. If we leave the account number blank once we run our reports, that will continue to show as blank. If I go ahead and update, we'll now see that those account names have been saved and then account number. This will come back up in our reporting features once we input a lease together, but this is done one time at the company level and then it will flow into all of our reports moving back into the admin features. The final thing I want to show you is in admin Actions Import data via CSV if you do see yourself having a large lease portfolio, we do have the opportunity to input our lease records via CSV once again drawing you to the knowledge base. If we simply start typing CSV, you'll note there's an article that help walk us through that MAS upload. That concludes the admin side of the onboarding. Next I will move into our leases similar to where we first started. You can see our lease name with the lease type out to the right. Let's go ahead and select new lease. As you can see we are taken to our lease input page. I do encourage everyone as they're beginning to input their leases. As we recognize 842 is fairly new across the board, we have created a lease assistant that you can think of much like a wizard where it will walk us through all of the required inputs. As such, let's start with our lease name and I'll select Next. As you can see, the wizard guides us through into the next input field. These lease types should look fairly familiar as we did just look at them on the admin side. So land, equipment, vehicles and real estate. I'll go ahead and select real estate and hit next. You'll notice that the wizard is becoming a little bit more comprehensive just in the information that it's providing as these are a bit more technical of areas and where we see questions coming up. If we look at the dropdown, you'll see our options are operating, financing, short term, low value, sublease, operating and cash basis. In order to keep this example fairly straightforward, I am going to elect to use the practical expedient where if this was a lease under 840 and we're bringing it under 842, we don't necessarily need to go back through our classification tool as we're allowed to keep the classification of the lease for 840 reporting. As such, I'm going to assume this was an operating lease under 840 and therefore it'll be an operating lease under 842. Next Wizard's going to prompt us to input our commencement date once again an area that we're starting to see questions around. So the Lease wizard is just providing some additional information on what we're looking for here. Assuming that we are using the effective transition method, I am going to assume we're on a calendar year end. As mentioned, this was an old lease that we're bringing under 842. Therefore our commencement date should be 112022 if we are on that calendar year end. Next, input our lease end date. Per our lease agreement, I am going to use around 60 months lease term. So that'll put us at 2026. Moving into our discount rate, we're definitely seeing a lot of questions come up surrounding the discount rate and what we are allowed to use. So as such we have provided a link that's going to take us directly into our knowledge base again in our technical accounting support where we can just read a bit more about the background of our options. We can read about the rate implicit in the lease, the incremental borrowing rate as well as the risk free rate. I will say that majority of our clients we're seeing in practice are defaulting to the risk free rate as the barriers of entry are much lower and this rate is easier to obtain. As such, we've provided a couple of different resources for you all to use. Discount Rate Tool we'll pop this open and take a look at what's going on in here. Right, I'll pop that open. As you'll note, this is a fairly manual tool where we have just simply taken screenshots from the treasury site with those discount rates. You'll notice that our date that we've selected is 1231 2021. As I do get a fair number of questions about why we're not using as you'll note, January 1st typically is a holiday. As such, the treasury did not release discount rates for that day. So 1231, 2021 is going to be our best and closest date. This tool is going to be quite helpful for any clients who have leases that maybe are falling in between the buckets or the dates that the treasury is providing. So for instance, this is now set up for a lease that has a length of 40 months remaining. If we look, we're going to notice that 40 months is going to put us right between three years and five years. As such, the treasury did not release a rate for 40 months, so we are going to be required to come up with a blended rate. No fear, our discount rate tool only requires a couple inputs to help us come up with that blended rate. As such, we will input our months of lease length. So in this example, 40 months input our short end treasury months. So that's going to be our 36 months aligning with our three years, our long end treasury months, which will be five years aligning with our 60 month period. Moving into our actual treasury rate, we'll want the short end treasury rate. So 36 months, 3 years gets us to 0.97 and then our long end treasury rate again, 5 years or 60 months putting us at 1.26. And just with those couple inputs, you'll see that our calculator comes up with a nice blended rate that we then can use within our lease documentation. I definitely encourage, if you are using this discount rate tool, save it down and we can actually upload it into the software, into our documents tab so that if your auditors are also in the software, from their auditor view, they can actually grab this tool and see that that discount rate is properly supported. Now, I've done these a couple times, so I did have a bit of a cheat code and there was a reason that I selected 60 months as our remaining period. As you can see, 60 months is provided on the treasury site. As such, we will use 1.26 as our discount rate. So jumping back into the software, 1.26 will be our discount rate. Select next and then we're going to be prompted to input our payments. So a little bit more straightforward here, all we're doing is inputting our effective date, which aligns with that commencement date, and then we'll start inputting our actual cash payments. So I'm going to keep this simple and say our first year's payments come in at $10,000 and then our monthly payment. We've tried to anticipate any frequency that you may see monthly being the most common. So it does default to monthly. But if you did have a different payment frequency, you should be able to select that here in our dropdown, but we will go with monthly. Next, the lease wizard is going to ask us if our payments change. You can think of escalating payments, so I will say yes. Then all we need to do is hit that plus button and our payments will open up no limit in how many payments we can Enter here. We'll just want to make sure we capture all of the monthly or, excuse me, annual escalations. If our payment frequency changed or we had a one time payment, we could address that here and again hit that plus button and follow suit and we can capture all of those payment escalations. If at any time we entered a payment that we wanted to remove, hit the trash can icon. Once I press next, the wizard is going to assume at this point we have input all of our required fields and therefore we're ready to create our lease schedule. I am going to exit the lease wizard here just so that we can review a few of the inputs that we weren't guided to. So you'll notice prepaid lease payment, lease incentives and initial direct costs. The lease wizard did not prompt us to input. That's just because they're not required as they're just not as common. Not to say that the software cannot handle it. Now that we're out of the wizard, you're going to notice we do have these icons that you can hover over. They are going to serve very similar purpose as the lease assistant where it's just providing a bit more information on what we're looking for when we're talking about in this instance, initial direct costs. Lease incentives even has a link much like the discount rate tool. While we're in here, let's take a look at this lower ribbon. So I'm going to click on accounting. You'll remember we set up those segments so if we did want to tag a location, this is where we would do that. Or a cost center moving down in our accounting overrides. This is where we want to ensure that our payment timing aligns with our lease agreement. So software will default to an advance. But if we have in arrears within our lease agreement, this is where we could make that election. Additionally, ROU adjustments, if you were in you were compliant with840, we should be seeing some deferred rent that will need to be cleared off of the balance sheet. So this is where we'll want to make that adjustment. Please note that when we're entering this balance, it does need to go in as a credit or a negative number so that it flows through our schedule properly. Moving on, I touched on the classification tool. As we are electing the practical expedient which allows us to bring our old leases under 840 to 842. We weren't required to walk through the classification, but as we move away from that transition date, we have created this tool Just to ensure that we're not sitting in a financing lease, you'll see that it is walks. It does walk through the five steps. It's also interactive. So let's assume we were looking at our lease and we notice, you know, this lease actually does transfer ownership. At the end of the lease term, all we do is select this box and our tool will kick us into a financing lease. If we uncheck it, you'll see that we're still sitting in an operating lease. Final tab I'll walk us through is our documents tab. So as mentioned, if we are using that discount rate tool, this is a great place to be uploading that for both ourselves and if our auditors are in the system, all we need to do is upload files, grab our discount rate tool and you can see it's added to the system. We also commonly see people uploading their lease agreements, amendments. Really anything that is applicable to this lease as it will keep it tagged to this individual lease. Now that we've walked through all of those inputs, I'm going to go ahead and select create and you'll see that we are taken into our lease schedule. If I scroll down, we can see that lease schedule has been created with each line representing a different period, period 0 being the adjustment or the lease liability right of use. Bringing that onto the balance sheet, period one will be January's rental payment. So we see that $10,000 cash payment and then our straight lined lease expense. If I scroll down, we'll see the escalation to 11,000. And if I keep going, we'll see our 12 all while having that lease liability and right of use asset burning down to zero at the end of the term. Now, one thing I like to point out here is that we are still in draft status. There's two reasons that's important. One, as explicitly stated, this lease would not be included in our reporting feature if we were to go run a journal entry report or our discount report. Second reason this is important. Really good place for us to be reviewing our work. Encourage people, you know, get up, take that walk and come back and just make sure your discount rates are appropriate. Your lease payments have all been captured as this is the easiest point in which we can edit our lease document. All right, so let's assume we have looked at all of our inputs, we feel comfortable with our discount rate, our end dates are appropriate and we have captured all our payments. At this point we would go to lease action and commence. Again, all that we're telling the software is that this Lease has gone active and if we were to go run reports to ensure that it gets picked up in that reporting package. So now that we have moved into an active status, if I go back to lease action, you're going to notice that we have a couple new options presented. So we now have the ability to modify as well as terminate our lease. So let's walk through a modification. Three different modification types in our dropdown. Standard modification, decrease in scope and ROU impairment. Standard modification is going to be the most commonly used. A good example of this is perhaps you had an option to renew within your lease agreement. At the beginning of the lease, you weren't reasonably certain if that's something you were going to be interested in. Maybe now we're, you know, halfway through or we're coming to the end of the lease and we do believe that we're going to renew that lease and stay in the space. Standard modification type is going to be the perfect selection for that scenario. Couple things, we'll need to update lease end date. So let's assume we push this out to 2030 effective date. That is going to be the date the lessee and the lessor agree to that renewal. And then guidance tells us that we also need to reevaluate our discount rate. So you'll notice that our lease term has now gone up to 108 months. All you'd want to do is go back through that discount rate tool for the remaining periods in the lease. Just for time's sake, let's pretend we did that and we came up with 1.5. We also have an opportunity. If payments continue to escalate or maybe we have new payments, we could add those here at this time. So let's assume we do have an escalation and it follows suit of the previous. With those couple inputs, we're ready to modify our schedule. So I'll go ahead and select modify lease and you'll see that our lease schedule will now update accordingly. If I scroll down, you will Notice that period 11 has now been split into 11.1 and 11.2, 11.1 being that pre modification entry. So cash entry of $10,000, straight line to lease expense of 11,400, while 11.2 is going to be the gross up to the balance sheet capturing that remaining period that we just initiated. If I scroll down, we should still see our original escalations to 11,000, 12,000, and now we should see that new escalation to 13, all while still burning down that lease liability and right of use asset to Zero. I'll also take a moment just to draw our attention to our audit trail as we've done a few things within the lease agreement or excuse me, lease record, we can see that within our audit trail it is capturing the timestamp, the user as well as the action taken. Next, let's take a look at our termination. So lease action, terminate lease. Even fewer inputs here. All that's required is our termination date, total payments made in the month of termination, and if we had any cash received, we would input that here. Now, I won't actually terminate the lease as we are using this as our example, but had we input that information, we would hit terminate lease. And very similar to our modification, our lease schedule would update. Now, I had mentioned previously when we were sitting in draft form that that was the easiest point in which to edit information. Definitely not the only opportunity. But I do want to circle back to that topic. So if we go to lease action, we'll notice that we have an option to edit the lease. If we do use the edit lease option, you're going to notice that the inputs are pretty locked down still. So we'll be able to edit what I call non financial information things including lease name, lease type and add any notes. However, if we are interested in editing financial information that will therefore update our lease schedule, that information still is going to be locked down within this lease edit option. So if we do need to edit anything financial, we'll just need to navigate slightly different. So I'll go ahead and cancel and we'll go to lease action. And what we're going to do versus Edit lease is actually revert to draft. So you'll see here we're going to receive a pop up just warning us that if we are wanting to revert to draft, we will permanently delete all of our current amortization schedules, which if we truly have, you know, an error within our inputs that's totally appropriate, we need our amortization schedules to update. But the other area I want to point out is we will lose any modifications and any terminations that we have ran through the system. So as a reminder, just take note of any modifications that you may have ran through the system as you will need to rerun them after reverting to draft. Good news as we saw, not too time consuming to rerun those. But once you do revert to draft, you will lose those modifications. I'll go ahead and cancel and go back to our lease schedule. At this point we have looked at all of the inputs for the lease. We have Looked at how to modify, how to terminate. We also looked at our different options when it comes to editing the lease versus reverting it to a draft form. So that concludes our lease input section. I will now move into our reporting section to access the reports. You'll see the reports up in the top ribbon. A lot of really valuable and useful reports in here. I am going to focus on journal entry and disclosure reports. But I encourage you to look at some of the management reports we have. So you'll see we have three different reports. We've got a lease activity, a long term, short term reclass and a mid life lease balance report. Most used report is definitely going to be this lease activity. So I'm going to focus on this one and go ahead and generate that report. You'll notice that the report is set up by date parameters. As most of us are concerned with 1231, 2022, I will go ahead and set our date parameters for that calendar year end. You're also going to notice that this group entries into a single date is checked. Really good option, especially as we are looking at adjusting our year end balances as this is going to summarize our journal entries for the entire year per lease into one entry. So I am going to uncheck this for our demonstration purposes. But as you're looking to adjust your books for 1231, I encourage you to keep that box checked as it is going to give you a nice summarized entry. You'll also notice that our segmentation is showing up once again. So if we wanted to drill down on a specific location or a specific cost center, this is where we could do that. If we don't make a selection, it will pull in all of our segments. So I'll leave those as blank right now go ahead and hit submit. And that will pull down our journal entry package. As you can see here, leases will start being broken out by lease type. We also have some view options where I'm going to expand our net gain office space. All right, so first entry I want to draw attention to is going to be our initial balance. So we have our ROU real estate account and our lease liability. Just bringing those two balances onto the balance sheet. As you'll remember, we did update the account name and that is reflected here with our ROU real estate and we input an account number. We did not however touch our lease liability long term nor add an account number. And therefore those are going to come in as blank right above. It is going to be our first month of amortization. For January. So we'll see. We have a debit to our lease expense, debit to our lease liability and a credit to our RU and our lease payments representing cash or AP depending. If I scroll down, you should be able to see that modification which will look very similar to our initial balance grossing up the ROU asset and the lease liability to the right. You'll notice as mentioned, since we did not make a selection on our segments, we have included the location and our cost center. If you go all the way to the right. A common question I get is if this report captures both operating and financing leases, the answer is yes and you can tell what the classification type is here in column N. I'll go ahead and exit out of this and we can take a look at our final report which is our disclosure report. So navigate to reports disclosure. And again, these are all of our required financial statement disclosures. I have selected all by hitting the box up by name and then generate report. This will look pretty familiar similar date parameters. So I'll go ahead and update for 1231, 2022 and once again those segments are showing up. If we did want to drill down on a specific cost center or location, I'll hit submit and that will provide us with our disclosure pack. All right, so I'm just going to run through these tabs from left to right starting with our supplemental balance sheet information. Moving into our undiscounted lease maturity waterfall, you'll see that we do have the five years of payments are thereafter total lease payments, less our imputed interest, finishing off with our total lease liability that we would anticipate tying back to our balance sheet. We have our supplemental cash flow information, our components of lease cost and impairment report. Short term lease census. So if we input any short term leases, this is where those would populate weighted average term and our weighted average rate. One thing I also like to point out is we do have a couple features built into our reports. You'll notice up at the top left if I click on this one, it's going to actually minimize our report into what we anticipate being your financial statement disclosure. First, if I hit option three, it will break out the detailed view of what exactly is flowing into each balance. And of course two being somewhere in the middle, providing that additional level of detail, but not quite as summarized as the financial statement disclosure. And all of our tabs are built out in that same fashion. 3, 2 and 11 being the financial statement disclosure. At this time. This brings us to the end of our onboarding training thank you so much for spending some time with me. And if you have any questions, please feel free to reach out either to your auditors or to your firm manager. And we would be happy to assist you with any software questions. Once again, thank you so much.