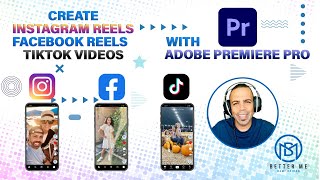
Rami Raiden shows how to build vertical 1080x1920 reels in Adobe Premiere Pro for Instagram, TikTok, and Facebook. He covers setting up the sequence, fixing color issues with iPhone 4K footage using Interpret Footage, scaling clips, adding transitions, and exporting with the Facebook 1080 Full HD preset to keep the vertical format.
Chapters
Hey everyone, my name is Rami Raiden. Today I'm gonna share with you how to create video reels for Instagram, Facebook, TikTok using Adobe Premiere Pro.
So let's get started. First, I'm gonna start with creating new project. We start with the File, Create New Project.
Choose the location.
So we name our project and then press Create. The next step, we need to check the workspace that we're using.
So we go to Windows, Workspace, and then we choose the editing one. This is the best workspace for editing. In the project panel, we right-click and then press on import so we can import our video files. We locate our video files and then select them to import and press import. Now we have all the videos we need in the project panel. We create a new bin Right-click, create a new bin, and name it whatever you want to name it. You select all the clips and drag it to the bin. Double-click your first video and make sure it's playing well. Now we want to create a new sequence, so we right-click on the project panel and select new item, sequence. And then we have to choose the size. I suggest you choose the digital SLR, and then from the setting tab, adjust the resolution. Switch it to 1080 by 1920. That's the best resolution for the video reels, whether on Instagram, Facebook, or TikTok. Name the sequence and press OK.
Now the sequence is ready, so we can drag the clips that we want. So we play the videos and then select the in point or press I on the keyboard and select the out point by pressing O. So I for the in point and O for the out point, and then we drag it to the sequence. Here it's gonna ask us if we want to keep existing setting or change sequence setting. We do keep existing setting because we're gonna modify the size to the Videorail requirement.
If you are importing from iPhone 4K videos, you'll find that Adobe has a problem, an issue reading them with the color profile. So we need to adjust this manually. So we right-click on the footage, Modify, Interpret Footage, and Then we choose color space override. I chose the Rec. 210— 200, so I tried with this one and it's still the same issue. So let me try a different one. It depends on which profile it's using. So we press again Modify, Interpret Footage, and we go down Color Space Override, and we choose a different one. Now I'm gonna choose Rec. 2020 scene, and I guess it works. So this is how to fix any footage coming from iPhone was filmed with the 4K resolution. So it's working good, no issue, same color. So I go next to the second video, and I choose a different scene. Select your in point, select your out point, select only the video and drag the video to the timeline, the sequence. Same thing with the video, with the color profile, we have to change it to the correct one. So I select the whole videos, right-click, then press Modify, Interpret Footage, then Color Space Override, and I choose the Rec. 2020 scene. And now it's, it's working great. Here I want to show you that some of my videos were shot with the 4K and the other were shot with the HD. So the resolution for the 4K videos are 3840 by 2160, while the resolution for the HD was 1920 by 1080. So that's why you'll see in the timeline, you'll see different sizes. I'm gonna show you later how to adjust this. So I continue by dragging the scenes that I want to the timeline. And now I'm gonna show you how to adjust this HD video. I'm gonna go to the effect control and select the scale. I'm gonna adjust the size to around 180. And if you see, I want the screen to be centered, so I adjust the positioning so I can make the screen centered or the object, the moving object centered. Now this scene is going a little bit fast, so I want to slow it down. So you can right-click, select the speed duration, and then adjust the speed 2x60, so you can have slow motion in this video. I'll make sure all the videos are good the way I want it. So this scene, I don't want it, so I go with the selection tool and adjust the length. So I wanted to stop here, so I drag it here and then make sure to delete, ripple delete any empty space on the timeline so we don't get a black screen. So now I'm gonna add some video transitions to the videos, the scenes. Select Cross Dissolve and put it, drag it to the cut between the two videos, two scenes. You see the cut is smooth, changing the transition, making transition from one video to another. You can try different transition, can play with each one. Try it if you like it. Now it's time to export the video. So we go to File, Export Media. We want to use the format that match the video reels we created to match Instagram, Facebook, or TikTok. So first we select the location where we want to export the video to. Make sure to know which one. I usually create a folder named Export so I don't lose them and name it. And now for the format, you can select from the preset Facebook 1080 Full HD. If you don't find it, go to More Presets, type Facebook, and then you'll find it— Facebook 1080 Full HD. You should go to the Video tab and you do Match Source so you can have the same resolution 1080 by 1920. This is a very good high resolution for your reels. And press export. Now your video is ready, and here we go. Thank you so much for watching, and hopefully I'll see you with other videos. See me with more videos.