ClickFunnels 2.0 Product Launch Funnel: How to Build Sales, Order & Confirmation Pages Step-by-Step
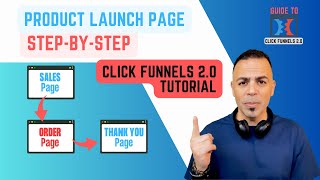
Ramy Raiden builds a three-page product launch funnel in ClickFunnels 2.0, editing the sales page, order page, and confirmation page. He shows how to attach products, configure checkout settings, test transactions with sandbox payment gateway 411111, and redirect customers to the thank-you page after purchase.
Chapters
Hey everyone, this is Ramy Raiden. In this video, I'm going to create a product launch funnel in ClickFunnels 2.0. I will cover how to create the sales page, the order page, and the order confirmation page. We have to create 3 pages, so let's get started. From ClickFunnels dashboard, we go to Funnels on the left menu. From here you can create a blank funnel by pressing on this step, by pressing on this button, Create a Funnel, and you can name the funnel and name the URL, the funnel path URL. But today we're going to create a launch product funnel from the recipes, so So we press on the recipes here, and here's all the recipes for the funnels. So the first one is Optin Funnel, the second one is the Product Launch Funnel. Press on Choose. It's a 3-step funnel, as you can see here. Make sure to name the funnel same as your product name. If you look at the right side, it's the sales page, order page, and down there, there's the order confirmation page. So we make sure this is what we want and then press on Create a Funnel. Right here we see all the 3 pages, so we're gonna start with the first one, the sales page. Press on it. And from here, if you don't see anything here from the template, go press on All, and then you can see— go back to the sales page and choose one of these sales page. And right here, I'm going to choose, uh, this template. Video Sale Letter Page. Same thing here, make sure to name the page with the, your product name that you're going to sell. In my case, I'm creating this funnel for my Canva Mastery course, so I name it and create the page. After that, you'll go back to the Funnels page. Here you see the first one you, we selected, then the Order Page and Order Confirmation. So So we're gonna start to edit the first one we just selected. And here the page we selected from the template. If you scroll down, you see all the page features, and we're gonna replace all the contents that they are here. For example, if I want to replace this video, I select the video and then the setting will open on the right. From here I can go to video setting, and on the top, the video URL, I go and choose a YouTube video, share the link from here, copy, then go back to ClickFunnels and go to the URL again, video URL, double-click and paste your video URL. So you will see your video here. Instead of the other video. You can hide it or show it from the setting. And you do the same for the text and all the content on the page. For example, here the logo, you can press on it and select the image URL and replace it with your logo. And here at the right row, I Adding a new element, so I press the orange button to add an element, and I'm going to add a headline and copy the text from my previous funnel. Make sure always to prepare the text before. This will make it much easier for you to create your funnel and save right away, save your work right away. Same thing, so I'm gonna copy the text from the other funnel I created. So this is a title I'm going to use on this funnel. So I press copy, paste. I'll play a little with the design, so I can remove this title from here and place it up there. As you see, and I'll do the same for the other things. I'm just showing you an example, and it's much easier to prepare all the text before. So, uh, work on the content of your page before creating it so you can just do copy paste. If you see any elements or a row you don't want it, or any section you don't want it, you can go to Delete. And delete it. You can select it and delete it. Same thing, you can select the whole section from here. You also can add the section from here. For example, I'm going to add, uh, this Stack 3 to showcase my product. This is a very nice design to show your product and the features. Same like the one I created before, same like this. So I'm gonna replace the information from here with the information I had already. So I can come here, copy, and then paste my content. Select the text and change the color by pressing on the setting. And from here you can select the color. If nothing happens, that means you need to clear your browser cache— caches— the browsing history, so, and try again. Or you can just come to the style, choose a different style, and then go back to the color— not here, down there— and change it. If this continue to happen, try to choose a different web browser. I tried it with Google Chrome and I had no issue. Here I want to move the text to the right side, the title also to the right side, and I want to move the number to the left side. So remember that you can click the element and move it, it will move from one row to another. Same like this one. And now instead of doing the same for the others, so I'm gonna delete them, delete all the rows here, and then come here to this row. I need, I need to make a clone to have the same format for the other module that I want to place. This is a very useful way to do the same formatting for other stuff. So I'll come, continue, copy and paste. You can prepare all the text in a Word file that will make it easier to copy and paste your content, and at the same time you create your funnel faster. After that, I want to change the prices here, like the total value, the normally, only sales. Remember that you can double-click on any text and replace it or edit it. I'm gonna do the same here. I guess that's it for now. We need to change the picture, but before doing that, I recommend you go and save. Make sure to save your work after finishing each section. Now I come back to the image, I press on setting, and from the image URL here, I press it and select the photo that I want to replace it with. So here's the photo, and here's— this section is ready. If you want to edit the other section, you can. If not, you can just delete them, and you can do the same for any other section you want. For now, I'm just gonna show you like just a sample. This one, delete. And you can go to the footer and change also the setting here. You want to keep your logo, you can delete it, you can keep it. Same thing, I want to replace it with my image, I press on it. Go to the setting, image URL, and choose my logo to have it on the footer. Same thing for the menu. This is if you have a website, you can direct people to the website, change the links, and same thing you can do with the social media links. If you go to the top menu, you see pop-ups, and here if you press on show pop-up, you can also edit this one. Make sure not to forget this step here. And once you're done with that, you also can press save. And this page, let's say it's ready. You can go back on the left here. Now we're gonna edit the order page, so press on it. And if you see there is no item to display in this category, so you press on all, then go back to the order page. Order section, and from here choose the page you like for your order. There are many different ones, so I'm going to choose this one. Same thing, make sure to name the order page with your product page, like product name and then order page next to it. Once you're done, press Create. And here we're going to edit the order page, same like we did with the sales page. So press on Edit, and then here you can see the contact information for your clients to fill with the shipping address, and down there the payment and and this is for you. You can replace your photo here and your name. You do the same thing we did it on the sales page, select and replace. Go ahead and edit the name. Remember that you can double-click and edit any content you see on the page. So let's see the logo, because I didn't save it. I'm gonna choose it again and save. Make sure to have all your policies ready and edit here. You can preview the page from the top. Press the eye icon to preview, and here make sure to test everything on the page. Here you can go next until you fill the information. And for the payment, you can test it by using this sandbox payment gateway using the 411111 number for the credit card. We'll do this later in the next step. Now we're gonna go back and go to the order confirmation page, press it, and the same thing here. If you can't see anything, you go press on all under category and then go to order confirmation again, and from here choose a page you like. So I'm going to use this one. Same thing, make sure to name it the order confirmation page, same with your product name and next to it confirmation page. So once you go back here, you go edit and you can see this is the thank you for your order page. And you do the same with editing all the contents. Start by editing the logo, and then you go editing section by section. Once you're done, you save and go back. So now we have the 3 pages ready in the funnel. If you look here at the product page, you see a warning saying this step, expect product to be attached. So we need to attach a product. We click on this menu and from here we add a product. So we add a product that we previously added under the product section. I'll show you this in a different video. So I'm gonna select this product here and then you can see that this page as it's a product. And now we're going to do some tests. On the top, you can see that this funnel is in a test mode, so we can go to the setting and then change it to no. If it's test mode, yes, then we're gonna make it to no, and we select which domain it's gonna go under. So I'm gonna continue now to choose my domain, and you can change the funnel path URL from here. You can name it with your product name, which is— I recommend. And then you press update funnel. After that, go back to the order page and press edit so we can run some tests from here. Make sure everything looks good, and this is what you want your page to look. And then once you're ready, go to Preview. You are viewing a preview of your page. You can press Go to Live Page, and this is the live page. Page. You can see your product order summary on the right. And let's put the address here and make some tests. Press next. But before doing that, we need to configure that when the customer check out and press submit their order to take them to the thank you page. So we come to the thank you page here and we go to the URL from the setting from here. Then go back to the product order page and edit. Select the next button here, and then you can see checkout step button. Then on the right setting, you can go here and check the default step, then the next step, and then the submit step. So on the submit step, you can do enable redirection override, and here we paste the product thank you page that we created, the last one. Make sure to save, and now we can go back and do the test again. So I'm gonna place an address here for testing, then press next. You can see the product here. Put the credit card number that they gave us for testing and put the date, expiration date, and any number. Submit. And we wait a little. If nothing happened, then we make sure to go live. Fraud error. So because it's live, so we needed to put it— not live, we needed to put it in testing mode so the payment can work. So I'm gonna go back again and do preview, and from here put the address again, next, put the payment. Expiration date, submit. And same thing, it's not working, so I guess we need to go live. We need to go to the live preview, so I'm doing it again. And now with the live preview, submit, and yes, this is the thank you page. And this is the product. You see, it came out showing here automatically. So again, let's do a complete test right now. Go live, get this offer. So this is not— we didn't configure this. I need to go back, hit it, and I want to configure this one to take me to the next step. So I go to the next step, which is this page. I go to page setting, I copy the URL of the page, product Canva Mastery order page. Then I go back here and then I press on this button and select Go to URL, paste it, and press Save. Go to Preview. Same thing, it's not working. Let's try the live one. Same thing. So I'm gonna go back and here I'm gonna add a new button and press on that button, delete the old one. Sometimes, yeah, this doesn't work easily. So I'm gonna press Delete and press here. Write the text you wanna— write the text you wanna do. Get this offer today. And down there Enable redirect override, or you can do redirect to the next step and press save. Let's test it now. Yep, it's taking us to the next step. And right here you can test it again. Put the address, the zip code, the card saved, and press submit. And the order is completed. So we have the 3 pages up and running. Thank you.
More from Rami





How to Explain What You Do in One Sentence | Core Message Formula for Coaches
How to Create a Clear Core Message for Your Coaching Business | Content Clarity Roadmap