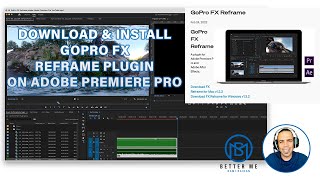
Learn to convert GoPro 360° footage to standard HD video using the FX Reframe plugin in Premiere Pro. Download and install the plugin, import .insv files, apply the effect to a 1080p sequence, then use keyframes to control pan, tilt, zoom, and rotation for smooth camera movements before exporting.
Chapters
Hello everyone, today I'm gonna show you how to download and install the GoPro FX Reframe plugin. It is a very useful plugin that you can use to edit your 360 video that filmed with the GoPro. I'm gonna show you how to use the keyframe to select and use the angle you want. First, you can Google GoPro FX Reframe plugin and go to the GoPro FX Reframe. You can go to the website and here you see there's a download FX Reframe for Mac and for Windows. So make sure to download the right one for your computer system. The download page will open in a new window. So you press on download, and once it's done, press on the file to extract it. And here we go. So you can press continue and follow the instructions. I'm not gonna do it right now because I already have it installed. Now I'm gonna import the videos from the GoPro camera. So I connect the camera and locate the DCIM folder. I open the folder and then you'll see the file. So the extension for the videos ending with insv and the photos insp. I'll drag and drop to a new folder so I'll have a copy of them on my computer. Now we open Adobe Premiere Pro. We hit the new project, locate the project, choose the location where to save it, and name the project and press create. In the project panel Right-click, New Bin, name it Videos, and right-click, New Bin for your photos. You can also import your photos here and add them to your videos. Select the files you just copied. I selected all the video files ending with insv, drag them to the Video Bin. And I select all the photos and drag them to the photo bin. I'm gonna double-click the photo to see how it's open. And the video— here we go, it's working good. Now we need to create a new sequence. Let's check the resolution. You see here is 3840 by 1920. Now it's time to create a new sequence. So here we can choose, um, DSLR 1080p 25 or 30 frames per second. You can check more setting here. I'm gonna go with the DSLR 1080p 25. It's easier for me when I assign the keyframes. So I'll go ahead and name the sequence and press OK. Alright, so now I'm gonna Drag a video to the sequence. Let me check this video. All right, I'm gonna drag this video to the sequence. And here you keep existing settings. We don't want to change the sequence setting because we chose the HD 1080p 25. So you go to Effects and you search for GoPro FX Reframe. You just type Reframe, drag it to the clip, and now go to the effect control panel and select it. You'll see here you're gonna do keyframe for the pan, title, you can do the rotate, lens, zoom. Alright, so let's see this scene. Alright, so I'm gonna place a keyframe here and move around with the camera pan, right? For example, if I want this scene to Go from the top. You notice I, I put a keyframe at the beginning. So here I adjust the tilt. So let's see how this works. I always do keyframe at certain points. So I don't mess up, mess it. I'll go to the end and also adjust the tilt. Okay, here I'm showing. So here I want to remove myself from the scene, so I'll just keyframes. Delete. You can select the keyframe, delete it. Okay, and start all over again. Okay, this is like a drone scene. Let's see. Maybe here we need to do tilt a little so we can see the water and then the camera will roll up. Yes. I'm gonna select a LUC. Let's see, this one, this is look nice with the water. I'm gonna drag it to the CQ1s. Alright, let's select the endpoints. Okay, so now I'm gonna go to the effects, GoPro FX Reframe, select it and drag it to the clip. And in the projection setting, make sure to choose the GoPro 1920x1080. So you'll have the HD quality. So I'm gonna search for an endpoint here, and we do a keyframe, we adjust the pan and the tilt. Okay. You always can play around before placing the keyframe. Just make sure that every time you move the pan or the camera on the panel, you're placing a keyframe. In this scene, I'm gonna show you how to add speed, uh, to a walking scene while walking with your 360 camera. So again, I'm gonna go to Effects, GoPro FX Reframe plugin, select it, drag it. The best way to control the camera is through the program panel. You can click on the screen and move like this, so you can select the lens curve, zoom, you can rotate. It depends where you press on the screen, and then a keyframe will be added to the timeline. So as I mentioned, you can do this on the program panel. You can move your camera. So now I'm gonna do this quickly add more scenes while walking in the woods. You can play around the way you want and do the adjustment you want. This is just a quick video to show you what you're able to do with the keyframe. Now I'm gonna adjust the speed of this clip. So I right-click, press on Speed, and I'll do the speed 400% more. And you'll see— play it— you see it's, it's like running in the woods or like a drone scene. But we need the keyframes to be smoother, so I select the keyframes. You can select Easy In or Auto Bezier. You can play around with the Easy In or Easy Out, then render the scene to see the preview. You can adjust, delete, add more keyframes to have the scene the way you want. This is just a quick tutorial. Preview for now, and I'll show you how to export this. So put all the scenes together, select the in and out point, and go to File, Export Media. And here you can select it like a Facebook preset or YouTube preset and hit export. After that, you'll have your video ready, converted from 360-degree video to a regular HD video. Thank you for watching.