How to Create a Course in Mastermind Business Hub (Step-by-Step SOP for Coaches)
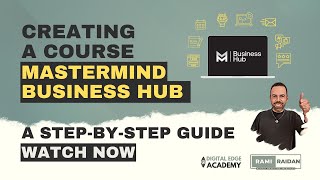
Rami Reden walks through building a course in Mastermind Business Hub, from picking a template to uploading videos and thumbnails. He covers naming modules, adding lesson details, generating 1280 × 720 pixel images in Canva, and previewing before publishing.
Chapters
Hey everyone, this is Rami Reden, and in this video I'm sharing with you how to create your product in Business Hub, how to create your course, upload your videos, and edit all the details. This is good for you if you already have a course on other, other platform or on the old Mastermind or any other platform and you want to bring it to Business Hub. Or if you're creating a new course. So let's get started. First, let me move this here. And okay, when you log into Business Hub, the first thing you see, the dashboard. After that, here on the left side, you can see Build Your Product. Let me magnify this. All right, if you see here Build Your Product, you press on it, and here you will see the dashboard of your products. And from the top menu here, you go to Courses and then choose Products. Once the products open If you created any products, you will see it here before. If you create any course, you will see here. If not, you will see nothing here, and you have the option to go here and create a product, and you select start from scratch. If you have a Kajabi, uh, account and you already have your course there, you can import from Kajabi. But if you're starting from you press Start from Scratch. After that, you have 4 different options here, and this is just like an option for you to get started with. If you have a sprint course, a short course, to build gateway to membership, this good template here. If you have a marathon course, like train and upskill your audience within your niche. This is more like more details. Membership, nurture and mentor your network or build your own. So for me, I'm going to share with you how to do this option, like choosing this template, Marathon Course, and start building just to show you the details inside. So this, the first option, you want to name your course. Of course, you need to have everything ready about your course. So for example, I have this course, Tech for Non-Techies, uh, Canva Genius. Gonna copy and paste the title here. Okay, actually this version is Canva Mastery. All right, and to create the product, right, once you press create, you will see here a template. So the first thing you see, introduction, it's like a module 1, then fundamentals, then the what, the why, the how. Advanced Tips, and Course Wrap. This is just a template. I chose this just to show you how easy it is and how easy to create and edit the template. For example, if you want to edit the introduction, you can press on it, and from here you can change this title. For now, I'm, I'm keeping it as Introduction. Then you can have the description here for it, okay? And also the thumbnail for it. Same thing for others, other one. For my course, I have the introduction, I have one video, so I'm going to choose this one, Welcome to the Course. Press on it. And for here, I'm going to upload— this is a demo text, by the way, just for you to, to know. And here you can upload the video. So I'm going to upload my video here. All right, so I'll go to my videos and the course intro. I'll make sure this is the course intro. Yep, so this is the course intro. I choose it. And drag it here. After doing that, I'll, I'll press on Upload File, and now it's uploading. It says please do not close the model while uploading. Okay, so make sure it's done uploading and don't close it. All right, done, perfect. So this is the intro, right? So here you can give it the title, Welcome to the Course, and it's under Introduction, which is the first module of the course. Okay, if you want to write the description here of the course, for example, for me here I have this description. I can put it here, copy and paste. I will work on the details later, right? And save, just for now to show you how it works. Back to products. All right, this is about your instructor. You can have about you here. Also, you can upload a photo or a video if you have a video about you. Then outline and objective. You can also here, uh, explain more about this section. It's important to outline the overall goal and objective of— for the course. You can have it here. So this is a very useful template and it's it's nice to follow along with each section. For now, I just want to share with you how to upload and the technical part of this. So for example, this Module 2, I'm done with the introduction and I want to start with the Module 1 and Lesson 1. I can go here on Fundamentals on this one and rename it and name it Module 1. And if I have a title for Module 1, so for my course, A Beginner's Guide to Designing with Ease, I copy and paste. I have it here and I have the description too. Copy and paste, right? And here the parent category, it's root as root category. So I want it— it's not under other module. It's, it's separate, right? So this module will have lessons under it, but it's at the root category. So, uh, if you have a thumb for this module, you better upload it. So I'll show you also how to do that. For example, for my course, I have this thumb for the main course. And I created thumbs for each module, right? So this is Module 1, Lesson 1.1, Lesson 1.2, and 1.3, and always like following the template. So I created this template. I'm going to save it for now just to show you how easy to upload the thumb and how to where your audience can see it. All right, so module 1 would be this. So going back to Business Hub, and here I select the image. If you notice something here, the recommended dimension of the thumb is 1280 by 720. On Canva, if you If you want to get this size, which is the one I have here, you can simply go to the homepage and type here YouTube thumb, and in templates, and you will find this template here ready. YouTube thumbnail is 1280 times 720. So you'll make sure you're having the, the perfect size for, uh, Business Hub thumbnail. So 1280 by 720. And here on YouTube, on Canva, the YouTube thumbnail is the same size. So you can choose any of these thumbnails and edit it to your course. All right, I'm gonna go back in here. And from here, uh, I'll select image, upload a new file, and I'll choose Module 1 thumbnail and upload. Okay, perfect. So now I have Module 1 title, description, and thumbnail ready. Save. Okay, I'll go back in here and then see, this is Module 1. Now I want to upload Lesson 1. So Lesson 1, I press on Concept 1 and I rename it. So I have, I have it here before I use it as Session 1.1. So I'll copy paste it here, sign up. Sign Up, Sign In, Download the App. So this is the title, and it's under Module 1. Here we're choosing the category under Module 1, and then the description here. The description is here. I already have it. I'll copy and paste it here. Okay, so I have the title, I choose it under the Module 1, I have the description. Now I need to upload the video. So I press on upload the video and drag Lesson 1.1. Very simple. So, okay, drag it here and then press upload file and it's uploading. Perfect. So the video already here, you can just to play it. Okay, now I need to upload the lesson thumbnail. See, also the same thing, recommended dimension of 1280 by 720. So I created all the thumb with the same size. So now I want the 1.1 Drag it here and upload. Alright, so this is, this is all set. Video thumbnail, title, description. You can preview this by pressing preview button, and here we go. You see, this is how it will show up on And here you can have your name. When you fill the instructor name, you will see the instructor name. And once, once your audience finish this, they can mark it as complete and they go to the next lesson. All right, so I'm going to do the next lesson just for you to, to see. Okay, so I'm gonna go back here, back to products, then select 2, this one, second one. Same thing, I will edit the title. So the title of this is Session 2, uh, 1.2, and the description is here. Same thing. And for the video, I'll bring this one. 1.2, drag it, upload. Maybe you need to organize your desktop better than me. Alright, so yes, this is a second video playing, ready, very fast, and I need to upload this thumb to it. Okay, so here the thumb, upload, drag and drop, upload file, done. Very, very fast. And if you want to do preview, the same thing. Here we go. So you see Lesson 1, Lesson 2, and you can continue doing this. So So that was all about it in this video. After you do this, after you do that, you will see the, the course here, okay, in the products. But you still need to work on the main preview of the course. What you can do, you can go here to— when you go to the course, to the product, you will see the outline, which is showing you all the, the lessons, the modules and the lesson, and you can edit all this. But if you go to the second option here with the details, this is where you edit the title. Again, you can edit the title from here. You can put the description of the course. For example, mine is— I have it ready here. I still need to work on it a little. But copy and paste it here. So I, I have it here ready. That product thumb, select the image, and the same thing, it's 1280 by 720. So I have it here, this one. I'm gonna download quickly, actually just this one. Alright, perfect. Okay, so in order to replace this one here, to put the product thumbnail, you go to Select Image, Upload a New File. And same thing, choose the file. You can choose the file and upload, right? And if you want to edit the instructor name here, instructor, and put the— like, write your name if you are the instructor of the course. And the title, instructor title And you can also put your bio here, your image, your logo, and everything. Save. And if you go back to product, you see it's, it's ready here. All right, that was all about it for this video, and I hope you create your course with ease. Thank you for watching.
More from Rami





How to Explain What You Do in One Sentence | Core Message Formula for Coaches
How to Create a Clear Core Message for Your Coaching Business | Content Clarity Roadmap