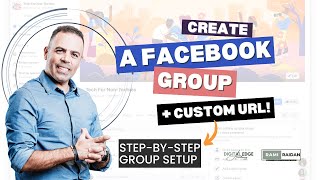
Step-by-step walkthrough of creating a Facebook group and replacing its default URL with a custom one like facebook.com/groups/tech-for-non-techies. Covers choosing a name, setting privacy, uploading a banner (1640 × 856 px), and configuring group settings before inviting members.
Chapters
Want to create a Facebook group for your business or community but not sure where to start? In this video, I will walk you step by step through how to set up your group and how to change that long messy URL into a clean professional one. Alright, let's get started. Log in to your Facebook account and look for groups section on the left-hand menu, which is here. You press on it, and from here you have the option to create a new group. Press on Create a New Group and give your group a name. For the group name, I suggest you choose the name wisely that is related to your business or what you do. For example, I want to give this group a name called Tech for Non-Techies. All right, so this would be the group name here. You will see it here, Tech for Non-Techies. And the second option is to choose the privacy. So do you want this a public group, which anyone can see who's in this— in the group and what they post? Okay, you can always change this later. Or you want it to private from the beginning, only members can see who's in, in the group and what they post. For this group, I want to do it public, okay? And for here, you can invite followers, send one-time group invites to current active followers of your profile. Uh, I don't want to send an invitation right now, okay? I just want to create the group and to prepare it. So this option, I'll do it off. Once I'm done, I go here and press Create. Then The group page will open. Next, you need to upload a banner. Best size for a Facebook group banner would be— this photo here would be 1640 x 856 pixels, 856. I'll create another video covering this part on how to create a Facebook, uh, cover photo. So I usually create mine in Canva. You can search for a Facebook group cover and do it if you, if you're ready to do this right now. Okay, you can also change the setting of the group. In order to do that, you go to group setting here. Okay, and from here you can change name and description. So Edit. Again, you see the name of the group appears here, and here you can write a description. So you write the group description here and you save it. And after that, you go to other setting, New Member Intro. You can do this, uh, on to create a message that a new member will see when they visit your group. You can get started here, press Get Started and customize the message. Privacy, as we did it, we set it for public. Visibility of the group, it's visible. Location, you can have a location for the group, all right? Like if I want to put location for me, Los Angeles, an example, it will show that this group is related here. But for me now, I'm not gonna do this location. Um, this is the URL customization. This is really, really important. So this is where you get the chance to edit the URL. All right, so in order to do that, you press on this edit here, and here you give it a name. So I want to do this Tech for non-techies. Oh, it's not available. Let me see if I can add a dot. Same thing. So this is— this group name is not available. Let me see if I can do Non-techie with Y. Yeah, this is available. All right, so I'll do it like this. This is just for the address. Okay, so it would be facebook.com, then groups, then tech for non-techies, and then save. Okay, so this is the web address. Then you can also do the group color. Badges, group affiliation, and, and more settings, right? But this is the basic setting that you need to create the group, and then you can start inviting people to that group. Okay, if you set up, um, the group to private, then no one will enter the group until you approve them. So you can review people before they join Okay, and you can control, uh, who get posts. Also, what is the benefit here to have a public group? There is a benefit to have a public group, and there is also benefit to have a private group. Okay, so for now, this group I'm creating, I'm keeping it for public. The group is ready, and you can start inviting, uh, your friends from here by pressing Invite and then select your friends. All right, the friend list will appear here, and then you will see people to invite them. If you have any question, please write it in the comments below. Thank you.