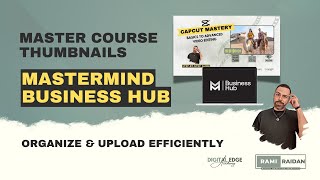
Learn how to export thumbnails from Canva as 1280 × 720 PNG files, organize them in folders, and upload them to your course, modules, and lessons in Mastermind Business Hub using drag-and-drop or file chooser. The presenter shows how to save changes and adjust visibility settings so thumbnails display correctly in your course preview.
Chapters
Alright, now we have our course thumbnails ready for the main, uh, course thumbnail, the modules, and the lessons already. I want to show you here how to upload this to Mastermind Business Hub, to the course. So when you go to the course you will see there is, uh, a main page here for the thumbnail, and this is where you want to upload the first one. First, let me go to, to Canva and export this. So I'll go to Share, Download, and for here you want to make sure to have this size. If you have the thumbnail for, uh, a template for YouTube, it's 1280 by 720 by default, and here, it will be the same. So you want to make sure that this is correct here, 1280 by 720, and PNG is perfect. And here I have everything here, so I want to download them by pressing download, and Canva will ask me where to save them. I usually save them under the same, uh, course files. So here, courses, and I can do this one. So after saving, then you can press Show in Finder. It's a zip file, double-click on it, and here we go. So we have all this, all the thumbnails ready in one folder. Okay, so in Mastermind Business Hub, you go here to the first, uh, to, to edit the first thumbnails. And when you press on it, you can go to details here, and here it says product thumbnails. So, uh, this image will be displayed when you— your member view their library. Recommended dimension of 1280x720, as I told you before. So select image and upload a new file. From here you have two options. The first option, to choose the file by pressing on choose the file, or you can simply drag Drag your, uh, the, uh, the photo and put it here. So drop your file here and then press upload. Boom! Very fast, quick, and it's here, uh, inside, inside Business Hub for the product, for the details for the product. This is the title and this is the description, and then the thumbnails comes up. And also you can customize more stuff here about the instructor, the name, and your photo. I will cover a different video about it, right? But for now, my main focus is just for the thumbnails. So save. Then you can tell now this is the thumbnail for the course. Now I need to upload the modules and the lessons. So I go inside and go here to Module 1. Press on the title, and from here on the right, same thing. This will display— displayed category, the image upload. And bring Module 1, make sure this is the one, and drag it here. Boom, upload. So it's here, and save. And go to Lesson 1. You can go to Lesson 1 from here, or you can go from the Main menu, but I'll go from here. And left-hand thumb, same thing, recommended dimension of 1280 by 720. Upload. And come here for Lesson 1. Make sure this is the right title, Creating Short Videos in CapCut. It's here the same, so I'll drag it and upload. Boom, it's ready here. I'll go back. And select Lesson 2. Now same thing, upload image and drag. See, it's already saved. So Lesson 3, upload image. And you see, when, when I named them the right way in an organized way. It's very easy for me. M1, L1, M1, L2, L3, L4. So it's by order, so it's very easy for me, uh, to upload them with less time. Then upload. Perfect. So now Module 1 is ready. Now Module 2, I'll go to the main module. And here the category, select upload and save. This, if you see here, visibility is draft, so I need to change it to publish in order, uh, to see it when I preview the course. Now Lesson 1 in Module 2. Module 2, Lesson 1. Upload. Boom. Lesson 2. And now Lesson 3. Almost done. One more time and I'll be done with this. And upload. Perfect. So I'll go back here. Let me go back here and see this one. Okay, let's see preview. All right, so I can see here, this is the thumb for the lessons, okay? And this is module 2. There's one missing here, so that means there's a course that is not published. Yes, lesson 3 is not published. If you see here, it's a draft, so You can publish it from here. Okay, it's— yeah, it's published now. If I want to see inside the course, you can do this preview, and this is how you're gonna see the thumbs inside the course for each modules. And if you go back to categories, you can see Module 1 and Module 2 thumbs there. That we just created and the name of each lesson. It depends which template you, template you chose also for your course. You can choose different templates here. Customize, and here you can choose different template for your course too. Alright, I hope you find this video useful and you will see me with more videos Thank you.