20 m3 (700 cu ft) WALK IN CHILLER FOR €2,000
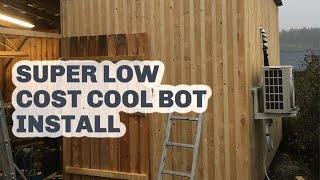
Video walkthrough by Richard Perkins showing how he builds a walk-in chiller from second-hand freezer panels and salvaged materials to save cost. He selects 4 m × 1.17 m panels (2.3 m high), builds a wooden internal frame and floor on concrete blocks, silicon-joins panels, fits a salvaged insulated stainless-steel door with timber/frame and spray-foam sealing, adds external cladding and roof, and connects a split AC via quick-connect (argon-filled) lines. Final assembled internal volume is ~19 m³ (approx. 3.6 × 2.3 × 2.3 m); the system reached about 2.7 °C during the initial test. Emphasis is on low-cost sourcing, modular assembly using panel dimensions, and practical improvisation.
Questions this video answers
About 19 cubic meters.
Approximately 3.6 m × 2.3 m × 2.3 m.
Panels are 4 m lengths and 117 cm wide, built to 2.3 m high (using full panels).
He mentions building around 80 mm panels but having 100 mm panels (a timber packing/join solution was used).
The quick-connect pipes are already filled with argon gas and hermetically sealed.
Chapters
Okay. Kristen and I are driving all day and tomorrow picking up panels. Got remote control in there in the back. I see. We like it big enough, right? We've been driving far enough. This is what we come for. Old freezer room panels. Now, this is an auction yard and they have a ridiculous amount of panels. We're just trying to select the right amount. It's much cheaper to buy this kind of paneling. It's about a third of the price to buy proper paneling with metal fronting than it is to buy insulation and build from scratch in Sweden. So we're just looking through to find the best combination that will work with the dimensions that we're looking at that is generating in this system. You're seeing all that land. It's the morning of the day before we are bringing stuff in. This is the mock up that we've seen in other videos. We're just going to unpile all these panels, take the van back, which we hired. And next week is the great build. All right. That's the harvest. So much cheaper way of buying panels. These are four meter lengths, 2.3. So we're actually going to build it 2.3 high. And if it's too big, the way we're building it means it'll be easier to trim it down later. But we're going to go for the biggest volume we can and build around the dimensions of the panels at 117cm wide. So we are cutting away more bushes because chiller has changed in design based on the size of the panels that we picked up. So we're using full panels without cutting them down. By putting the end pieces on the outside of the sort of long walls, we'll be able to just put roof panels on the top supported by that. We're going to use the back wall with the panel sitting horizontally just because it was the best option with the choice of panels we had because we got 2.3 meters and 4 meter ones. And then we are basically building a wooden frame sitting two floor panels on as a floor, which is unconventional, but we'll put rubber matting in there. And we are then basically building a wooden frame with the inner dimensions so we can lean up the panels and silicon them together. And we're cutting a door frame. We've got this nice aluminium door, stainless steel door that's fully insulated. That was a bargain price. We've got to build some wood into the frame to support that door. And the whole chiller is going to end up with a volume of 19 cubic meters. It's a little bigger than a Coolbot with an AC unit is meant to be able to cool. But we decided we'll try it because we can always lift the roof off and cut the walls down and reduce it by quite a few cubic meters in this way. Another part of this project is finishing off the back of the wash station here. So this will have an angled roof sliding down and then we'll have a barn door here and panel the rest of this, which will be awesome. So it's time to take down this mock up frame now and start laying out the correct dimensions. Now, obviously when you buy these panels new, they come with channel locks and you turn a key and it pulls the sections together and locks it. We chose these and decided not to cut them down and build the chiller around these dimensions because these metal beads will give us a really tight edge that we can get sealed. Sealed. So even with the added cost of buying a door that we didn't anticipate we were planning to build our own. It should come out about a quarter of the price of building a chiller this size as opposed to going out and buying it with 40% running costs associated with using an AC unit and a cool butt. So this is the AC unit we will be seeing. And these are the quick connect pipes. They're already filled with argon gas, hermetically sealed. This is what makes using a split AC doable because we don't need a thousand euro a day chiller technician. And so here in Europe, where we only have AC units that are split units, where you have the compressor on the outside and the unit chilling inside. Our only option if we want to use cool box in Europe is to have a split system with a quick neck pipe. And so this is a good test for the benefit of other people as well. So first step is building a timber frame support for the floor that's going to sit on concrete posts and be perfectly level. So new dimensions are marked out squared and true. And then we are using three concrete blocks on each side to support the wooden frame. So we have been just checking the height so we can dig the minimum needed to put these blocks in the ground that will support the wood frame. And the blocks apparently have just arrived so we can load them up and hopefully we'll have them in place by the time they build their wooden frame to support the floor so it's square and true. See if our support posts are now this is gonna mean that our chiller is up off the ground because we're putting insulated panels on top of this frame. However, we're lifting stuff in grey crates from the pack station right here. So we don't actually ever need to wheel big loads of crates anywhere because they come out of the chiller to the pack station there. So we decided that's the best way to get over the undulating land. And we can always have a step to step up in the door and that should do us good. So now we get to see if the frame fits the plan, which it looks like it does pretty good. And we've kept it a little bit off the edge of this shelter so that we can clad the shelter and the final frame. Look at that. Okay. We don't have a big enough circular saw and we don't have the right blade bit. This is metal going through to the polystyrene. So we're using an old wood bit that's about to be thrown away anyway and just trashing it. The metal skin is very, very thin. Technically it's not how you're meant to use the saw, but it's good enough for the few cuts we have to make. That way, right? Yeah, yeah. Cool, cool. Let's take it off. These guys are building a frame with the exact dimensions to within 1 millimeter of the internal space so that we can basically line up the panels and we're going to join them together and just build like LEGO bricks, basically. But it's really important to have everything square. So we measured, we calculated diagonals and we measure the diagonal if it's square or not, and then we put the diagonal brackets in. Yeah, it's going to be much smaller inside. It's a big thing. So basic aim today is get this wooden frame the boys have built inside here. Stack up panels, join them together, let it dry overnight. That should give us the outline. 19 cubic meters. Okay. This is the inner framework. Floor is secured. Panels are ready to start being assembled. Should be quite quick if Richard didn't mess any calculations up. So we learned building from Ikea. So we, you know, just everything flat packed panel base held together with gaffer tape. Seems to be how construction works these days. Look at this. This is a big chiller. Walls are up. Pretty good job on the frame. So this is just held together by silicon. The door panel is not attached in. We're just going to let this dry up overnight and then come out and seal it really well, put the roof on and start thinking about the cladding. So we're actually going to put some beading around the outside so we can clad this whole thing with wood, which will also give us a support for the condenser unit on the back. But that changes the landscape quite a bit. Now we need to build wood onto the backside, where the compressor will be on the outside of the wall to make a strong support for holding the weight of that. We might put the roof on now, leaving this framework inside. It's been designed that this framework can be taken apart from the inside. And we're waiting for silicon when the shop opens. So we've got enough to maybe do the roof. So we could get that on, Take the door panel out and start thinking about how to fit the door. And then we've got to think about how to clad this with the free timber we have just to make it look pretty and think about the roof structure. Okay, straps are off. Doors are standing. Now we've got to build a roof frame. Build a door aperture, clad it, lots to do. So peeling back a little bit into the old view to accommodate the new roof. That's going to come down at the same. It'll be a separate roof. The boys down here are ripping this timber in half to make it the dimension. This is built around 80 millimeter panels, and we've got 100 mil. So we're going to have a piece of timber inside. And then join that up to the ends of the where we cut out for the door. And then we're going to have some timber from the top wing beam that the roof is built on to the bottom wing beam on the outside that we can really bolt the door frame into. And that should give us the strength we need. Just preparing now to get the roof panels on. So we just trimmed the end of this roof down to put the panel on. So we have a separation between these two that will allow for the roof structure to go on here and cladding soon. Ready to raise the roof on this one. So up on my roof, just inspecting the chimney. That's the placement of the chillet. Okay, first roof panel is on. Dimensions good. We are siliconing the gap to make sure that that is sealed. Because these are all random blocks, they don't have any locking channels. We're having to make them ourselves. So we're having to build door frames onto these frames that came for 8 centimeter panels. So we've planed down some wood that fits in and fill the cavity with spray foam. Slot these in, build a frame that can be then joined together onto the external wall of the chiller. Okay, Christy. And the human clamp. Just squeezing the last roof Panels together, going to put the strap around, hold that in place. Let's have a look. This is an almighty sized chiller. It's dark in here, but it's going to have its own light system that is rather a large chiller to make for a couple of thousand euros. So it's now 3.6 by 2.3 by 2.3, something like that. Okay, remove the frame. This is the tiller with the location to the back station. So veg off the wash station into here, take them back out for packaging. It's gonna be awesome. Okay, roof is going on storm proof, hurricane proof, snow proof. Okay. So door frames are connected up. We've got spray foam to fill the void here between the wood and the metal. And that gives us something to bolt onto an external frame and connect it through to the panel that we cut out. You see, this is going to be the door panel and we've marked the sort of dimension on there. It's a very heavy door, stainless steel door. It was very cheap. So we thought we may as well take a stainless steel insulated door rather than build something. So tomorrow when that's really dried up, we are ready to go. Okay, next step, mounting the brackets. Some cladding has gone on on the outside here. Step back. We're going to clad the end of this shed too, so it all fits in looking nice. Okay, show must go on. Beds being harvested, carpentry being done, health and safety being observed. We have a chiller mounted ready and we're trying to set the door in. But this is a bit the bodge job making the door into the side of the cabin. We're going to make it tidy. So continuing work on the walk in chiller now because we've got this second hand door, it's an insulated door. We've had to build a frame that meets panels. So we're using wood to connect to a wood frame inside here with expanding foam on the inside of it to give it insulation. But I've just adjusted the door, lifting it up 5 mil. So we get the seal on the bottom of the door. Perfect. That is impressive considering how we're making this thing. But it's sealed now. I've got to bolt it in so it's super strong. What are you actually up to? Well, now we are connecting the gas pipe to the system. You are a certified technician, I believe. Yes, of course, us. So these are the quick, these are the connectors. Connectors that allow you to connect the gas without. A technician should have a technician to just check. The system's all operational, all connected. Yeah, they got on the indoor unit and put on the outdoor unit. And you basically just. Yeah, put the cable or the, the hoses on the quick connectors. Wiring up the electrics out of the lean to this goes along and across to the unit here. So this is the first testing of the machine we're going to see inside. Got the remote control here. So this unit has to be run for 24 hours before you attach the cool bolt. That's what it says in the manual. Power is on. Seems to work good. Then it's probably not going to turn. Okay, testing is over. We're actually turning this unit off now because we don't need it till next summer. You can see temperatures down to 2.7 now. We won't get to test it in hot summer's days until next year, but it should do pretty nicely. It's well sealed in here. And to shut it down. How do you shut it down? You just press this button. So that's the controller for the AC unit. Turn that off and then we'll just unplug the power supply to the next screen.
More from Richard


A review of short and intensive season on a mixed farm and restaurant/event space in Sweden






Alskade Kyckling Exploring complexities of poultry production in Sweden and what we stand for


