Amazing DIY natural swimming pool for €8000 Step-by-step
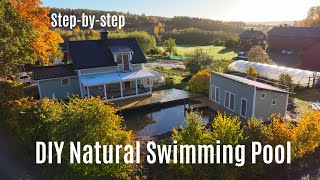
Richard Perkins builds a 10-by-3-meter natural swimming pool in Sweden for €8000. The video walks through excavation, concrete walls, pond liner installation, plumbing, and drainage, with practical details on costs and construction choices.
Chapters
All right, well this front lawn is about to change. The dig went extremely well. Well, let's come to that time. We're getting digging. We're starting tomorrow. Super exciting. All right, well this front lawn is about to change. We're starting digging tomorrow. Swimming ponds Atafel Zeus. It's going to be very different. So regular viewers of the channel will know I've been planning a natural swimming pool build for a couple of years now and now's the time to get on with it. So the build in a nutshell is going to be dig a very deep hole 3 by 10 with a pond equal size around it. We're going to have to berm up this side to get the ground a bit level. Take a bit from here, add a bit for me. First thing, take topsoil off, put it aside for a repairing the job dig. Hopefully we haven't got any massive rocks that we can't deal with. Probably up to about 5 tons we can move. But it seems to be the house is built on sand with lots of smaller stones, certainly from when we dig the lean to greenhouse. That's what we found. And then we're going to have some flat pad where the excavator is standing. We're going to build an outhouse there for extra accommodation for guests. Come in and visit. Come and visit me in Sweden, you lovely people. And we've got to dig a pipey pipe to the lean to greenhouse that's going to house sewage and water and electricity. And we've got to have another pipe that goes all the way to the sewage, the septic chamber for this new house. But we're not going to build a pond just yet. We're just going to dig and make a total mess of the lawn. And then I'll probably start building up the concrete block wall in here so the sides don't subside. It's quite sandy so we might have to dig at an angle so it doesn't collapse in on itself. And then we've got pond liner. Then we're going to put in some subsoil on the edges of the pond for plants to grow in. Cover that all up with gravel, install some pumpy, pumpy things that make the airflow nice to keep it oxygenated. Plant lots of nice stuff around and do some landscaping and come May we'll be building a little house here. It's going to be pretty awesome. So let's get straight to it. All right, diggers here. I'm not even ready. Got my trusty laser level, got Me spray paint. Got my measuring tape. Let's go. Okay, so we begin. That's kind of what we're doing. We want to end up with some nice decking around here to the Aterfelshaus. That's like a little mini house and a deep swimming pool by three by ten, maybe two and a half deep. If we can get down that deep. With pond of equal size around. We're gonna have to berm up this side first, though. Just taking the tops of the way, putting that to the side. We'll see how it goes. Time to get the coffee on. Just a normal day on the farm. Only got one way in with the digger, so we've got a backtrack. Basically, we have to dig from this end and leave it complete as we go because the digger can't come back in. Fuel price has gone up. Eric was telling me that €600 to fill the digger. Now that's a couple of days work on the digger. Typically, the fuel price has gone up a lot, as you all know. So we'll see. This is the same digger driver that we had digging our big pond. He's very skilled and with that ankle bucket, can really sculpt the ground here. It's a bit frozen on the top, so we're just digging out frozen topsoil and stockpiling it for now. So this side is going to be underneath the decking. So decking is going to come out straight into the deep bit of the pond. So it's going to be quite a sharp angle on this side. But I'll be hidden away under the deck a bit. Get some plants in there like lilies, etc. And then we'll have more plants on the far side. All right, that's the sitting rock. Sit and look at the water. Water always hard to see with your eyes, but we have pretty level surface along this edge, which is perfect. But that means basically the rest of the surface is going to be built up. So starting to build up now. It's going to build up probably quite high on this side. We're going to measure that. It's always fun to watch. The digger driver and I spend the entire day just observing, thinking through. You know, you can see into the mind's eye of how he's thinking through the job. And I learn a lot from that process. I've always sat and watched all day when big machines are working because there's a lot of thought and skill goes into a job like this, thinking through workflows, which is something I love to do too. So it's really fun for me. You can see we start building up the far end now. But it's gonna really raise up the garden on the far side. Those bushes there. I want to keep the trees. But those bushes might have to go to level it in and try and make it look a little bit natural. By the end of the getting to the sand now it's frozen in the topsoil. You see that we're lifting the side. I'm curious if we're going to be able to go straight down here because you never know what you might find. But good progress. Only been at it half an hour. So my plan is to possibly just take out these two panels. But maybe take out all these panels and build like an integrated deck that's steps down to a flat deck to the edge of the pond. And I got these roses in all the corners and two on the front here. So I'm just pruning them now and I might have them popping out holes in the deck. Steps. Could be quite beautiful. I like flowers. Who doesn't like flowers? So Eric's just moving soil downhill. Probably come with a tractor and trailer later. But some of this topsoil is going back onto a. But we'll have a lot of subsoil to be removed that will get dumped up at the top of the farm. So far so good. So I've been at it an hour now. But this subsoil looks pretty nice to work with. Let's hope it goes down like that for another two and a half meters. We hit an old drainage pipe that comes from this guttering here to drain away from the roof. But what I might do is intercept this and have it going filling the pond anyway. So no big deal. What I don't want is water draining into this on the outside of the pond liner so that it balloons the liner up through the wall. If you see what I mean. But it's very sandy. It looks very well drained. That's why the house is built up here. So. So I think what I'll do is put the rainwater straight into the pond and have an overflow to the ditch at the other end. So digging this bigger hole so that I can put insulation on the outside of the brick wall. So we're digging bigger than we need. So we end up with a 10 by 3. Love this ankle bucket that all the excavators have here in Sweden. It really turns this big machine into a sculpting machine. Saves a lot of time and a lot of maneuvering therefore a lot of diesel. And this machine is moving a cubic meter every 30, 40 seconds. More rocks. It's going to be a nice thick spot, but it's going down real nice here. That's the second bigger rock we found. Well, I did say gonna make a mess of the front lawn. Who has these funny ideas, eh? Still got about 40, 50 centimeters to go. I love this kind of process. It's just creative, super creatively fulfilling to design projects like this and then carry them out. Always an exciting day when the digger comes and it really starts actually happening. Grace has got a play date today, so we've got a good long day of digging. I expect we'll get quite far with this. So that's approaching 1.8 meters now. 2 meters. We want to see if we can go down two and a half. All right. Just marking levels. You can see it's quite a lot higher up on this side. This is the lowest corner. Okay. On the fly meeting. So here is the pad for the atvals Hus, but it's going to be down below that wall where you can see my spray marks. So we decided we're going to take all the topsoil this way, stick it down in this growing pile and build this whole land up to put the Aterfels house on, which is going to just be way nicer. It's going to be looking over the pond at the same level as the house and it'll be quite a big disturbance. We're going to dig up these bushes and batter this wall with all the soil that we're digging out and just make this quite a steep slope down to the trees. It's going to look quite different in here. That's the way it is. That's what we wanted. I always hated these bushes. So not even going to bother keeping them. Get rid of them. Lump of frozen bushes. Let's measure this, see how deep it is and then get the drone up in the air. So I think it's a good call to lift up where the Atfaas house is too. That's where the digger is. Now. It's going to look a bit weird from the outside because it'll be like a steep bank. But from the inside it's going to be a glorious spot to have that house at the same level. That also gives us more purchase on the sewage. That needs a bit more height to get a good drop to the sewage. But it's going to make this enclosed space with these lind, these lime trees forming like a visual barrier when Their leaves are out and it's going to be a little sun pocket in the evening. It's going to be beautiful. Visions coming to life. Nothing holding you back. Just got to go for it with these things. It's too short. Life is too short not to do awesome stuff. Okay, topsoil's gone from the Atfelshaus pad so we can build that back up. And now we can use the subsoil. Still got to go down 20, 30 centimeters in the deepest bit, so we'll have plenty of soil to build all that up with. Another rock for the collection. All right. A couple of hours in and we've reached depth. It's two and a half meters or 2.4 meters. That should be plenty. That's enough to dive. And it seems like we're going to get through all this material. Lovely job. So just thinking ahead, I'm gonna take a little strip off here. It's gonna be. Imagine I build a brick wall up here and I'll put the insulation and backfill. But this is going to be a bit too steep, so I wanted to shave that off, make the pond wider. And then on this side, he's going to track roll the walls to compress them. But I want a bit of a shelf going up. So by the time I fill with gravel, there's still enough planting area for all the pond plants that are going to go in. But we're getting down now. It's definitely deep enough to dive in. Bit of compression going on on the subsoil here. Now, because the pond is lined, it doesn't need to be exceptionally well track walled, but it will submerge obviously over. It's. All right. Shallow in the edge a bit. I think that makes sense. It's going to be a lot for me to backfill by hand. Otherwise. That's definitely better. Changing plans on the fly. Yeah. My thinking here is because I'm building a wall up then putting insulation behind and I've got to kind of meet these two, so I actually want this side to drop down about 50cm. But we've got to get it right now because he can't come back in. He can come on the wall and cut this side later, but this side we can only do now. Yeah, we can have that here. Just sitting on that is a mighty one. All right. I think just communicating to turn that around so it makes a nice sitting rock. Yeah, That's more like it. Perfect. All right. That's going to make a nice sitting spot. Okay. A bit of reshaping on the edges. We've hit the water line. This section has cleaned up. Okay. Just had some breakfast now. I'm just getting down in here to take some measurements across this pad. It seems that we're raising up slightly. So quick coffee break and just check that before we carry on digging. Just moving plants. So these rocks are going in to form the back wall of the little house that we're making. Okay. I've been shaving a straight edge as best I can down there. And we're just going to finish digging a vertical wall this end. Then we got to deal with pipes going to the house and the sewage and then making this pad. Just making quick work of it. Good soil for it. You can see it's going to be really nice to open up the sides here and have the decking down. We're going to get all this sunlight right reflected off the water. So a couple of thoughts at this point. We're making the pad for the Hatfal Seuss. But what I notice, I'm obviously interested in a nice straight edge that I can build. A wall quite tight up to. This wall is tapering in this side. So we need to do a bit of work on that here. I've just been measuring the water line at the top of the batter, and that's perfect. You can see on the far side. So it's going to be, yeah, two and a half meters deep. That's perfect. I think it was a good idea bringing this pad up. And it doesn't look too unsightly. If we go down onto the street, it kind of creates a bit more privacy to the garden. I mean, it's quite nice to sort of have this up away from the road feeling. What a nice fronting of bushes. So all of these rubus here will grow up as a hedge with the trees joining together. I think it's going to be quite beautiful. And we'll probably put in perennial plantings along the banks here. Getting there, that's, you know, probably a day's work. And we'll be mostly done, so pretty cool. Okay, so we've laid a string out beyond the neighbors here. We've squared it off. So we've got just over 10, just over three, which means by the time we put the wall, we'll put the bricks up to the string line, and then we should have enough of a cavity to get some insulation behind there. And then you can see they'll be in place. There's a lot of backfilling to do, and that will allow us to smooth out this edge to accept more gravel for plants. So I'd say that gives me the measurement to now order the concrete blocks to build a wall. I'm probably going to build a wall up to this height and then smooth all this in by hand. Nice. Oh, done for the day. What do you think, Ragnar? Pretty crazy, no? That's a deep pool. So Eric was saying he's charging 800 grams an hour now, so that's €80 an hour for his time. The machine and diesel. It used to be 600 an hour when we dug the other pond, but that's basically €500 to get to this point. Tomorrow we're going to finish digging the connections to the greenhouse and to the sewage, and then we'll put topsoil back on the batter on the outside wall. And then we'll at some point start building the concrete wall. There's no rush other than getting the concrete wall in to stop any subsidence. That's it. That's a wrap. Okay, so this is the pad that the outhouse is going to sit on, and that's where we got to today. Fantastic process. Still got to put in the connections, but we'll deal with that tomorrow morning. All right, welcome back, folks. Day two of the dig and today we're going to connect up sewage and water and electricity conduits to the house, to the new house, the aterfalsus, and hopefully put topsoil back on the batters of the pond. But it's all frozen in lumps. I'm not sure if we'll be able to get through all of that, but hopefully job done today. And then I've got to get on ordering all the components for building the pond out. Eric's moving some of the topsoil up. I've come into town to buy insulation. So typically here, if you were putting in a water pipe, you would go down a meter, 20 meter and a half. We can't do that. And it's a lot of digging. So we're just going to go about 70 or 80 and put these insulation blocks on top, which is pretty standard practice here for short runs. So I'm picking up these and some lagging to go where the pipe comes out the ground. And I need a hole saw to get through the laker blocks under the lean to greenhouse. Okay. Hectic days, running around, looking after kids, running around after a dig all day. But we've got a solution now for coming up out of the ground with these foam blocks. So normally you have lagging that you put round the pipe. But we're going to use four of these blocks as a cube vertically in the ground and just cut a fine hole for the tube because that seems cheaper and more effective than the thin lagging that people typically sell, which they don't have a big enough diameter of. Here, I got it. I got sunburned yesterday. This spring sun is pretty fierce when you're out in it all day. Still cold, it's minus degrees. But fun times. I feel really alive doing projects like this. It's super cool to have started this now before the season gets real busy having a lot of fun. All right, back to the farm. The dig is on the go. This topsoil's been moved up to the top of the farm. Hopefully he's finding some unfrozen stuff that we can put on, too. Top's all going on the batter. I'm going to check my hole drill. Big enough? Looking good. All right, so this is the septic tank. We're going to end up scooting this insect brash pile away. You can always put it back. And we're going to intercept with an existing pipe. So we're going to take an angle just to go around the bushes to the pads where the atifl sous will stand. And then we're gonna dig in this black pipe to one for water, one for electricity down through the side of the lean to because I can come out with the electric and water there. And that's. It's not going to be so deep. So we're going to put the insulation on top of there. I'm wondering how the dig is going to get out of here. Okay, Getting down to sewage pipe. So this is what we have to intersect with and make it fall on a nice gradient all the way across to the aterfeld's house pad. No problem. Got the laser level. We'll be ground. All right. So taking the old bit of pipe, they actually had a very dodgy connection made with perforated pipe and concrete. Seems to have held up, though. So we're going to put a little bend in there and off we'll go that way. All right, so silicon up these joints to make them go in easy. And I've just got a connection like that to send us off at the right angle. Okay, so got this pipe in. Now we just keep digging and get the levels right. Getting there. Okay. So we've just put two of these in to cover the sewage, because sewage pipe is empty most of the time, but it is quite shallow. Eric was just saying he's got water pipe just 20cm under concrete with one of these and it's not freezing. So that sounds good to me. So we're going to dig now to the bottom corner of the wall to la lean to and connect back with where the pipe comes out here. And this is where we're going to put in this black pipe, which is one for electric, one for water. And we'll pop up in the far corner of the pad. That's where the water and sewage will come out from the little house. Once got them in, it's time to just cover everything up again and finish up. Neighbour Bjorn is going to have some of the excess topsoil. We've got a little bit of topsoil to finish. You can see the water, waterline there. Need to sort of bring it round here and raise this bit of ground up too. But it's a bit wonky because the pad is lower down than the water line. But the building will step up a bit so it will work out in the end. It'll just look a bit wonky. In the meantime, found a sewage pipe going around the house. That's a bit bizarre, but that's the way it is. Now I've got my new drill bit and I've got to chip my way through there, get a couple of holes through for the pipes, then we can backfill the whole lot and work on the other end of the pad. Okay, two holes, last sort of leg. Now just getting the ditch to the corner of the pad for the house. Got to lay this curly, curly pipe in and I'll jump on it while he puts a bit of soil on top to hold it down. Chuck the insulation boards on top, fill it all up, smooth it over. Lovely. Okay, made it all the way. Now for the wiggly wiggly pipes. All right, one pipe in, Windy. Just hold it down with some rocks, get the other one in. Then we can start putting a 10 centimeter layer of soil before we get these insulation blocks in. Well, a few flakes of snow can snow till the 5th of June here, so it's not that surprising. It's a bit weird on a sunny day when you're getting sunburnt. All right, dig has gone quiet, which means we're pretty much done. So that's moved out and we've got the batter here of topsoil that will make up the waterline coming around here. Perfect. And we'll have to deal with this bit when we get to it. Neighbour's going to have the rest of this topsoil and we'll work out. I'm gonna have to mark out where we put pipes and work out how we do the foundation for the atifal cells because it won't work with the screw pins they were looking at. So you'll have seen in the last few videos, the dig went extremely well. But what you can see on the edges, maybe you'll make out is that there is a little bit of subsidence. Now tomorrow, all of the bricks and mortar. I'm using a mortar mix to speed up the process. Working alone, arriving. So I'm gonna hopefully they're coming with a lorry with a crane, and I'm gonna have them put them here. And then I've got to make some kind of wooden chute to send bricks down effectively. But this is okay as long as it doesn't subside anymore. What we don't want to find is lots of water pooling in here and lots of subsidence on the edges that will get dug out easily enough, but over time that could get a lot worse. And that's just going to create a lot of work doing by hand. What I'm going to do is get a straight line back up again, the string has been buried and start putting up the base of the wall at least as quickly as I can. Now, when the weather fairs up a bit, we've been blessed by a week of beautiful weather. And then it's just like this. And that's the way it is at this latitude. And yeah, once I've done that, I'm gonna put 70 mil insulation outside of the wall. I'm gonna use a hundred mil insulation, big foam boards on the whole base here. I've got to get in touch with the company that's putting together the Aderfels house for us. And they're using ground pins that drive into the ground, but high torque ones that you need a special machine to put in. However, I was intending that this pad would be lower down. It turned out this was a great idea to use some of the subsort and get the outhouse at the same level as the water. Imagine this beautiful decking all the way joining the two houses. It's going to be absolutely beautiful. You see the water line there? It's going to be quite extensive and a lot of reflected light. So what that means is they need to use either very long pins to get into the subsoil below what we've constructed, or we need to think of a different foundation like concrete or Something. But I'm hoping we'll get away with the pins. Okay, brick delivery. All right. Bit of morning exercise. 4 tons of brick sliding down a slidey slide. Stacky, stacky, ready to go. Okay, four tons of bricks coming down the slide. Functional fitness. Some people go to the gym. We do cool stuff. It's always better. Real life, First day. So we've been trying to get this lower wall level. It's level within a few centimeters and that's probably good enough. Tis just a swimming pool after all. And we're just trying to get a ring of blocks around. Every time the soil is freezing and thawing, it's dropping down. So having this wall is a good start. And then I can just build on it anytime it. Little frog. Hello, mate. You're a bit eager. We haven't got any water yet. There's a few toads and frogs. Maybe they're falling in three layers up. That's where we're getting to today. And four more layers to go. Give you a sense of it, it's going to be up to here. Then we'll put insulation boards behind the wall. And I've got 10 mil 10 centimeter insulation boards to cover the whole floor here. Then I'm going to have to come along by hand and sort of grade this soil and pack it back down to make a nice transition from the top of the wall to the edge of the pond. It's going to be steep on this side and this side, shallow on that side. Then we put down underlay. Then we put down the liner and do a special fold to get it neat in the corners. Then we'll put wood along the tops of the walls here, just to define the edge of the swimming zone and hold in the gravel. Then we'll put another geotextile on the graveled area. Then we'll put the gravel, which we're gonna have to move in by hand, which is gonna really suck because we can't get the machine close enough. Then we'll plant it out. I'm going to go for washed gravel, but I can't get rounds like sea shingle around here because we're nowhere near the sea. But I'll get wash gravel to minimize the cloudiness and nutrients coming in. And then I'll probably plant potted plants into the gravel. That's my thinking now. I'll put in the bubble system, put in a nice bit of decking, Dilly d, put in a jump board from the roof. It's gonna be all right. Last brick in the wall. Alrighty. So that's the height of the wall. Now I've got to level the ground, take away rocks so we can put insulation here. And then it'll be time to put the insulation behind here and fill the void while smoothing out the transition here. Then I'm looking to put probably 40cm of timber on top of the wall after the underlay and liner are in. That will hold back the gravel. So my neighbour Bjorn and I got to the point of finishing the wall, but we're stuck on this project because we're waiting for the insulation that I wanted to install behind the bricks and on the floor before we fill it with soil. They've been delayed and they said end of the month, but now into May it's a bit annoying because I want to get this project going, but I'm also considering forgetting the insulation because the cavity behind here is not that big. And what I want to end up with is soil level to the bricks and a nice dish shape to make the pond. There's going to be 40cm of wood on top of this that holds back gravel that we plant in. So I need to end up with a nice profile. And I'm worried that by the time the insulation's in, I won't be able to move enough soil to make that profile. So we're gonna have to see how that goes. I'm gonna make that decision soon. Obviously, some areas there's a lot more soil to fill in, but too many things to think about at this time when everything is starting to come to life. Okay. Pond builders going on. Got insulation on the far side there and I'm just filling in the soil. You can just see it's just loosely stacked and then there's a hundred mil thick board on the base. Got some leveling to do and that just gives me the profile. The wood beams are going to go on here. They've actually been taking down a barn down the road. There's a lot of timbers that maybe we can utilize some of that, but it's spruce and I'd rather have larch, which is what Venice was built on. It's good underwater. I have larch, but no easy way to fell them in my forest without trashing a load of other trees. And don't have a sawmill, but we'll see, we'll get to that. First I'm just leveling and shaping, then we'll do underlay and eventually get the liner in. We've been having incredible weather. The warmest spring I can remember, I've been Trying to get a bit of this going on in three moments. So I've put in the insulation that you can see just at the wall there and then I've started shaving in the sides so that helps start to reveal the shape of the pond, this being the water line around like that. And yeah, it's brought up a couple of things. So one thing I'm still waiting for the building permission over here. But one thing immediately clear to me is that the backside is very steep and it's not going to work so well with the gravel. So what I'm going to do there is probably because I'm going to have decking that overhangs the water like. So I'm probably just going to leave the liner there and on these shallower curves put underlay on top the of of the liner and put back gravel and plants. I'll still have plants here because if you remember, you've been following the process. I'm going to put timber on top of the wall here that would hold the gravel back probably about 40cm and that sort of defines the swimming lane. And what I'll do then is just put some potted lilies along the back here and they will grow up to the surface and you'll have the wood lilies on the surface with decking overhanging. I think you won't really see the liner behind that once the lilies are established. So it's going to be quite good. Next step in here is getting in and leveling the floor that the insulation for the floor sits nicely and then it's time to start putting underlay and liner. But it's really starting to give a sense of what the pool is going to be like now. Okay, looking good. So we just wanted to put a bit of water in today to get this weight in the pond to start putting pressure on the liner. It's a little bit brown looking. That's mainly it's forest water. It's coming out of our irrigation dam but it's actually got a layer of bubbles on the floor. So it's actually reflecting a lot of light. This will go quite black. And then next steps is we're putting a wooden wall maybe 45, 50 centimeters high around the top of the the concrete wall underneath there. Around that will be perforated drainage pipe with uprights made of just drainage pipe. And then I've got two of these pumps and these pumps are going to be connected with this clear hose to water stands down inside the vertical pipes and the bubbles cause enough motion to draw water through the drainage pipes that will come down through the gravel, through the drainage pipes, cause constant surface motion. And just think this through this will be. This side is very steep, but the decking is coming out here over the water's edge. And I'm going to put lilies in pots floating up on the surface with bubblers and then probably a row of bubblers on this side, just three or four. Then the gravel will extend all around this side and be planted up. And that decking is going to go all the way along here. I'm going to have to sacrifice these lovely flowers. I'm also taking out this wood here. This will be decking with steps up. And I'm thinking of having like a little barbecue house here. And the decking will continue around the pond. And the Atapha's house is going up here. Looking everything this way. There's quite a big surface area. It's about 80 to 90 cubic meters, maybe even 100 cubic meters. It's 60 cubic meters up to the wall. Well, no, that's a light up a little bit higher than the wall and looking forward to it. It's a really cool process. This is 1 millimeter thick, high quality liner. Most expensive bit of plastic I've ever bought. And we haven't secured it down yet. Now that we've got this in place, I'm very confident that this will take up any rain and it's not going to cause any damage now, whatever happens. So this is a really big milestone for me in this project and great to have the regenerative agriculture design course on and lots of excited helping hands to move this project on. That's enough water for now because the pond is not refilling because it's so dry here at the moment, the stream is not refilling the pond, so we're going to turn that water off. And that allows us now a bit of weight in the bottom. There's 20cm there, so it's probably about six or seven tonnes of water that we can pull against that and get this nicely tightened up. Really nice job on the corners of this to make a neat finish. It's going to be beautiful. Finally some progress. And this is one of the highlights of the year so far to me to get this project rolling on. It's meant to be finished in early June. Things have been kicked back a lot with different projects around the farm this year, but I'm super happy to see and hear this pond filling up. So this is the underliner that went underneath the butyl liner or it's not butyl, it's the other one, the high quality pond liner. This is what's going back over the top where the gravel sits. And once that's in and the liner's fully settled, we'll be putting gravel in the trench we've dug around to hold all this down in place. Then we can start the bigger job of getting this all landscaped and planted. It's going to be awesome. All right. Rain and sun. It's going to be a lot of thunderstorm tonight. Anyway. Next job. Now, the timbers here is I'm going to measure corner to corners to corners and then diagonally across and then recreate that inner side of the wood on the driveway. Cut and join all the pieces before bringing them over here and hopefully they'll fit once that's done. So this is larch. They built Venice on larch and pine and oak. It's gonna be submerged fully underwater all the time, so it should last hundreds of years. Not sure the rest of the pond will, but it's very heavy. It's probably about 180 kilos per block. It's about 10 by 3. It's actually not. It's 9.7 by 2.8 or 9. And so I'm going to lay this out on the driveway and joint it roughly before lifting it in. But I think what I'm going to do is cut it down. So there are three segments for each long length and one piece for the cross beam so that we can actually manage to lift it safely without damaging the liner. Because it's a bit too heavy, really, it's going to take a bit of strength out. This is, of course, holding in the gravel, but the gravel is not going to be exerting so much pressure downwards. I'm going to get angular gravel, a bit like on the driveway here. But it should. If I join it nicely, I think it's gonna be fine. Okay, thoughts and decisions. So I've had to redesign this because I don't have enough timber. I've only got 10 bits of timber, so I'm gonna have to make the walls. 5, 10, 5, 10. 5, 0, 8, 5, 0, 8. That's 1, 2, 3, 4 logs. But then I've got to get the two ends out of another log and they're too long with the overlaps. So they're gonna overlap like this. 10 centimeter cuts in the corners like this, but they're not quite big enough. But as long as it locks in there, it's going to look A bit weird if there's wood missing here. But as long as it's locked in with this joint it's stable. So I've just calculated a reduction using the most wonky bit of timber that's actually skewed if we look along it. And so I want that to be an end piece because it will be less skewed in two pieces. Turkeys are trying to mess up my marks there, look. Hey, keep off the string line, will you? No precise measurements. So that's the plan. So it's going to be a little crooked in the corner but it'll be good enough. And I've. I can't get any more timber like this. It's not possible. So that's what we're gonna do. So some modifications to the drawing. Because I only had 10 bits of lumber I've had to chop the ends down. Shy these are just dry fitted on an uneven surface. But they don't meet up in the corner here. But that's okay. It's locked in and that's the main thing. It's to give it some stability so the gravel doesn't push up. Not the neatest joints. I'm just working with a chainsaw. I'm not even bothering going to clean them up square because the wall is not square and the wall is not totally flat. So it's just going to be a division wall. Doesn't have to be perfect at all. You won't really see any imperfections when it's under the water. It's going to be about 50, 60 centimeters under the water. So you actually be able to sit on it drinking gin and tonic. We like that. I'm resurrecting these old timber moving pliers. And these are 160 kilos. But I'm able to shift these around just with one hand. Look at that. Makes it kind of useful. Now it's going to be heavy. I'm going to need both hands. Okay, putting the second liner on. Got to work out how to move this timber down. I've run out of fabric for protecting this lip. Okay, last plane coming down. So we're using a little tuby tube to protect the liner. Out with the old well. Nine o' clock at night. Some decisions are best made late in the evening. I've just smashed down all the gates and walls around here to start enacting the vision to put decking stairs around that link to the Adolpheus house there. I think I'm going to have to have a step down because it's quite different in height. See the level of the doorways there? It's about, I would guess, 20 cm below ground level here. And I've got to build up from the ground to put the deck on. But that's fine. We can manage that with a nice elegant step. I'm thinking the decking is coming out over the waterline here and curving around, but possibly where the bushes there in between, having a little barbecue hut. It's going to look lush. Been doing some more painting. I've actually painted round all the way to the other side of the house now and inside the garage port, which is the market garden wash and pack station too. It's very hard to see probably, so half the house done. Very nice. Okay, so next step has been conducted here on the swimming pond. So I've put on little lips to be able to put rocks and gravel on top of that with a bigger one in the middle and also joined the weakest part of the structure, the join here. And so I think when we start digging, I'll move some of the bigger rocks and wedge them into the corners to hold this frame down so it doesn't float. This is obviously a lot of raft material and so that's what we're going to do tomorrow. The digger's coming, but the digger can only actually sit in the gap here. So we've asked for washed gravel and the lorry will back up and he'll be able to scoop it out. It's going to be like 20 tons, probably, that I have to move around a bit by hand because the digger doesn't have access. That's the way it is, keep me fit and healthy. But that's a bit of the structure. So I think this, along with some rocks that can just sit on top of these bits of wood and just act to sort of jam it down. It's going to keep this from sinking away. That's the plan. It'll be an absolute disaster if it does float away once gravel's in there, because it will obviously be impossible to get that out again. So I've got to get it right first time. Okay, last phase is I've got perforated drainage around the ring and that comes to these joins. And I've got four evenly spaced vertical pipes down in the bottom of these. I'm going to drill a little hole where the air stone goes in, and that air stone is going to create a lot of bubbles. Water level is going to be up here somewhere, and so that will draw water through this perforation pipe below. All that gravel and filter the water. Wow. House is getting painted, sun's going down. I'm just bringing the skylift here to top these trees at the same height. It's going to make it into a sort of living fence. But I just want to show you inside the Adelfel's house. It's been going on, it's getting insulated. This is going to be a shower room with just simple sink, mirrors, shower, toilet and a little area to hang clothes. Then you've got a space that's going to be like a table, chairs, work area with simple. Just a sink. Not a proper kitchen because we have so many kitchens here. Sleeping loft up here and then got plasterboard on in here. This is going to be a double bedroom. Looking out at the pool. So it begins. Eric's driving blind behind the trees. To be able to bring this gravel over it's gonna be a lot of work moving. Okay. Moving some by hand. Gonna be able to fill this side. We're gonna have to move by hand to do the back there as well. So bubble stone goes in the tube like so. Now I'm going to feed these back to a central point to pump up here. I've got the option to put two pumps on if it's not enough. But they're not very deep underwater, only about a meter underwater so it should be fine. So put in rocks. The wood as I started filling up the pond slightly moved and that scared me. I do not want this wood floating off because there's no way to get that back if gravel is going underneath. So with inadequate machinery I'm just hiking out rocks, rolling them around. A bit of a job Liner seems very hardcore. It's stood up to some pretty big abuse. Just managed to get this beast up coming up the bank here seems to work. Haven't made holes in the liner yet. That's good. It's a pretty tough old thing. It's millimeter thick, so pretty resilient but better safe than sorry I would say. So just a few rocks around, I think it's going to look nice as well as be holding down what's essentially a big raft. Well when you're on your own and you've got half ton rocks to move. So I've got a winch on, made some rails. I don't know if this can work but I'm going to see if I can pull the rock along. Okay, a little update. So we've put rocks around some of the wood and to make the pond look a bit more Natural. But also way down the wooden structure. You can see the four bubblers are on and got a few sub marginal plants in. The water is quite dirty because the gravel was not washed, but we've got it mostly filled. We're in the process of building the over spill. And this part of the line, obviously too steep for gravel. It's going to have decking out over the top of it. But for now, just getting the water in and once we've got the overflow, we can fill it right up. The water level will be near the top of the gravel here, so once that's done, we can tuck down the edges of the liner and start a bit landscaping, put some soil back on and get some other plants and things planted. Pretty cool. All right. Planning decking. So it's going to be quite a big stretch to overhang the water, but that's going to be on the edge of the pool, which will allow you to jump in the deep water. It's going to have a diving platform out from the outerfalls. Hussler. And the decking is going to stretch all the way around and all the way to the greenhouse. So a lot of work to do. I've just been planning it out, making measurements and cut lists ready for that project. So hopefully a few more sunny days to get this work started off. Okay, Decking going on and a bit of decking over there. So it's going to be three levels. First level, second level. Reaching to this one. Down another step. Right now, just trying to do the awkward job. Got my waders on. And this is beams that are pinned onto the wooden beam. And we're just going to make a nice bridge for jumping in. Yep. Oh, first dive. What do we think? It looks cold. It's fresh. I got my own little rock. We love it. Okay, little progress report. So the decking is progressing and it's quite beautifully formulated so that you have a step down here and the same height step down over there. I've just been laying a level beam to check that my calculations were correct. And they were. So that's very nice. This layer of the decking is going to sort of cut across and then all the way to the greenhouse here. So it's all transferring to deck. And I've managed to get it looking pretty good and it's pretty solid. And that overlaps the edge of the pool. So you can jump in from here. But this is where you want to jump in to be able to dive and swim. Very nice. It's worked out really beautifully. This is all micromanagement with laser levels, etc. From the initial dig back in the spring when this was just lawn. This is all being calculated through and it's beautiful to see it all come together like this. And in the next week or two, I hope this will be fully done next spring. It'll all grow into lushness. Alright, steps going in. Get this decking done today. Okay. Working on the last section of deck. Just got this funny angle to get a couple more supports in. I've made this one at the standard board length. I've run out of decking boards now. This is all left over from platforms and things, but that means I've got a pretty easy process with no cutting to lay this square section. And then I've got a lot of off cuts I can use for this bit. So looking good. And I've left a gap where the turkeys are. And I was going to go right up to the greenhouse, but I think I'm going to leave that for now and maybe that'll be lawn. It's wide enough for the lawnmower so that could be fine. And I might extend it over there afterwards, but I'm going to feel into this and obviously when everything grows up next summer. There's some nice rose bush here that I don't want to get rid of. I could have it coming out a hole in the deck, but it'll be easy to extend the deck to here if I want to because I can screw a ring beam to the actual concrete wall and easily extend it if necessary. But that's where I've got to need to go out and get some more boards and then we'll be finishing it up. Ram.
More from Richard


A review of short and intensive season on a mixed farm and restaurant/event space in Sweden






Alskade Kyckling Exploring complexities of poultry production in Sweden and what we stand for


