GCL LINED POND (How to build ponds with GeoSynthetic Clay Liner) S4 ● E75
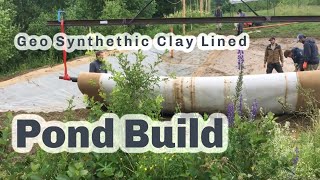
Richard Perkins builds a small pond with GeoSynthetic Clay Liner, showing how to profile the site with laser levels, shape slopes at roughly 2:1, unroll heavy GCL reels, seal seams with bentonite, and handle overflow piping and backfill.
Questions this video answers
About 38 degrees (C).
About 2 to 1 (rise:run).
25 mm pipe at about 700 liters per hour.
Planned ~20 cm of soil (speaker notes recommended 30 cm).
About 1,200 kilos (roll weight).
Chapters
It's early morning on Saturday. It's our day off. Perfect time to build a pond. This is an old coat dryer that we use to dry herbs because most medicinal herbs need to dry about 38 degrees or so to retain their medicinal properties. No more than 38 degrees. And when we load this up, it's about 24 hours to dry them. So we load it up full each time to make the most of the energy. But solar dryers aren't very useful here because it's only sunny two days of the year. So it's a nice little adaptation. It gives us herbal tea all year. Snow peas are out. Super tasty. There's cucumbers coming. Plants are still really small, but there's a bunch of young cucumbers. It. Okay, we got a plan. We have to transfer. Laid in Swedish We've got our head of operations and we haven't had breakfast yet. What's going on with that? It's time to dig. Thinking in 3D. So because you have 30cm on top of the liner, this is the bottom profile. And this will be the finished line. So you can see the water line will be like so. So we're using this to create a section of the right build and then he'll be able to mirror that around the. So now we've tested the profile and we've got the profile here. This is going to be a wall, but it's sitting about one to one. We need it about two to one. So we decided we're going to push this outwards rather than make it shallower in the middle here. So once you've made a profile section, it's very easy for the driver to come along and move this out. Every excavator in Sweden has this ankle bucket, so 30, €40,000 bracket here. That allows it to become sculpting machine. So it's 360 degrees swivel as well as tilting. So it allows them to be treated like a sculptor's hand, essentially. So we're going to zip round and do the profile around the back of the pond now then flatten this out and shape it up. Test everything with laser levels as we go. And then we'll be worrying about the liner. But the liner needs to be nipped in at the edge here. So we'll probably come around and cut a 20 centimeter shelf. This is all marked down concrete or on the back of the pond. And so we'll be checking everything with level and tucking the liner in, which in turn is 20 cm above waterline. So laser level is a super important tool to know how to use on a farm for all kinds of building jobs as well as working with water. This is a self leveling laser level. So it sets itself up level, kicks out a laser beam several hundred meters up to 800 meters in the right condition. So we can use this to measure all of the. Like this sill that he's working on now should be exactly level all the way around. And obviously the embankment must be level all the way around. It's not going to be a super packed in embankment because we're putting a liner in. So it's not so important to pack it like track, roll it like you would if it was an earth and damp because it's contained. But we'll be checking these profiles because two to one is about as steep as you want to go with Geotext to keep the soil in place on top of it when the water's in place. And so as he's got this profile sorted, he's working on the wall now. So once that's in the right shape and angle he'll be able to then just mirror that all the way. It's very relaxed. So we might be lacking topsoil to go back on the liner, in which case we're going to cut a shelf in here and make a shallow planting shelf. That will give us the extra topsoil to put down in here. But we can go down a bit on our shelf here. We're about 10cm up on the plan so that will give us a few cubic meters by the time we drop all this down. And it's just a constant measuring and calibration test. So we had a change of plan. And just calculating again with the liner length we got, we've decided to pull out a shelf here. The pond can't go any further that way because we need to get the eggmobiles here. It can't really go any further that way likewise. And so we're just cutting a shelf onto the southwest side of it which is here to get enough topsoil to put aside to fill back onto the liner as planting medium. We've got more clay we can take out of the cut down the bottom and that will do for lining the bottom of the pond on top of the liner. But this gives us quite a bit more topsoil when we look at that. So he's just shaping out the mark. So now we've shallowed this off a bit and that's much nicer for the soil sitting on The GCL like 2 to 1 is about the maximum. You're getting a bit of slippage. Otherwise I got the hexaw going to put a pipe in. We're going to take the thin bucket, go through the wall, install the pipe with a 90 degree bend that will set the water level. It's going to be about 15 off the top of this wal. Then we'll keep shaping out here and cut in here and then we'll be ready for lining soon. So this will be where the overflow is set and the siphon comes in here. So we're putting the overflow on the opposite side just to encourage water to travel right the way across the pond. And this is just going to over spill. We'll leave the 6 meter sewage pipe overhanging and it will just create its own channel back to the switch stream which is down in the bushes there. So be constant running water in here, about 700 liters an hour from what we tested from the cycle. So it's important when building an overflow to make sure you know how much water can possibly flow into this. This pond's got very small catchment from the landscape. It's always been part of our design to have a pond in here, but we knew we wouldn't have the soil resources to build an earthen pond. So it's a line pond. So very little surface runoff is coming in here, very little surface waters landing in here. And we've got a 25 mil pipe coming in at 700 liters an hour. So you know, we're just oversizing the outflow pipe that we never end up with any difficult surprises. If you have landscapes draining into a catchment area, then you need to calculate properly, you know, with knowledge of the soil and the coefficients of runoff, etc. But when you're filling pond via a pipe supply, very easy to make sure you're safe in regards to your outer. So we're putting in an oversized pipe to start with and then we will just trim this down. When we've measured everything around the corner, we know exactly where we want the water level to ensure it can never flood over. So we've got our pipe in, but we've made it a bit longer. Longer. We've used like a glidex product so we can get this back out. This is sticking out the bottom of the wall, so the line is going to come in somewhere there and we're working close to the digger just to fill this back in and we'll stomp it by foot and around the pipe to Protect the pipe and it'll replace the bulk of the wall. And then we're off shaving off this new form over here. Magnus is checking the levels and doing the finishing touches. So it's horrible wet weather today and not ideal for digging in many applications. Because we're making the line pond, it's not a big deal for us. You shouldn't really put GCL out in the rain unless you know you can cover it. Now, we've got an issue here where we don't know if we've got quite enough topsoil. But you see we've got a steep bank here, so if we need a little bit extra topsoil, we can cut into the pasture here. We just got to make sure we have enough room to get eggmobiles and things around. It's very hard to gauge levels here because the landscape behind us is on an angle on a slope. It's very hard. I've just been talking with the digger driver about, you know, the human eye not being able to see level. So I've been going around with the laser level all morning working with him. We got to lunchtime and we're not sure if we'll complete it today, but he's up for working later. So the next step now is get the liner down and get it covered up as quickly as possible because you want the GCL to swell underneath the weight of the soil. We're going to go a bit thinner, I think about 20cm of soil on top. It's recommended to go 30, but I've got no concerns of it leaking. I think it's going to do just fine. So we'll need to rig that up. We'll put a steel bar on the bucket and a steel bar through the GCL and pull it out and lay it in place. So now we've removed the bar from the old roll. The pond we made last year, we got a little 8 meter cut off. We're going to suspend the new reel of liner onto this pipe which requires that the. It's just a thin plastic tube in the middle of this, so it requires the roll to be pretty straight. And we're going to suspend that bar off this I beam and suspend the I beam from the digger so then we can pick up the whole reel. Because it's so wet conditions today. We're going to then tie ropes to the corners and pull the liner out a few of us strong. It's 1200 kilos here and you don't really want to be underneath that. If that Falls off, especially in slippery clay. So make sure we're working safe. So we rigged up the I beam trying to see if it's working. Time to see if our slip knots are working. That's a lot of weight there. And the reason we're doing this is so that we have a free spinning roll that we can pull out in the correct place in the liner. Checking tension. So we're off to the pond and I'm just holding the line straight so we don't break Albert's car. So we're ready to roll out the first sheet of liner. I'm putting the camera away because this is is potentially very dangerous if anything breaks. So we're going to be well away and not underneath the roll. And I'll show you what it's like after. So we got most of the first reel out but the roll is slipping off at an angle. So just move the straps and we're pulling from ropes back here just to not be right underneath this heavy reel in this sloppy clay. Which has worked out okay. So now we cut through for the pipe overflow and we're just applying a lot of bentonite powder before we put another layer on top. I've cut a little cross in there. We'll put this on top and that's all we need to do to seal the pipe through. Really easy to work with. Lovely material. And just prepping for the second lap which will overlay about 40 centimeters. This seems like a self sealing seam but they sent a bag of bentonite as well. So we got it. So we'll use it. So we're sealing these two layers with a continuous bead bentonite powder. We're just taking out the big creases and then we've got one little strip up there and we're ready to backfill. So it's all going well. We're just coming up to the edges here. It's going to all be buried below the soil. Now typically with GCL like we did on the other pond, you would dig this into a trench 90 degrees down along up again. And that's all to do with anchoring the GCL into the pond wall. And it's to do with shearing forces of all the soil laid on top of this. However, in this case it's such a small pond that we're just not concerned about the sheari stress. If you did the calculations it would be quite minimal. So we're just going with the easy option which I think is going to work out fine. So now it looks like, we're trying to finish the job today. And the driver's got photos going, so he wants to go, but you can't reach the middle. And you don't really want to drive on GCL without a flatter grade and about 30cm of topsoil on top. We're going slightly thinner on this job just to conserve soil, because we're gonna scrape out a bit from here if we can. And it's not gonna leak. I'm not concerned about that. But we don't want to drive on the liner. So we're just doing this middle couple of meters a bit by hand. He's throwing it off the scoop, and we'll just send that away and compact it by foot a bit. And then he'll be able to take the excess oil here and take it back down there. Digger's gone for fuel. Nearly done. Ragnar's checked the lines, and he says they're okay. They're within like, 3 or 4 centimeters, so he's happy. So we're just putting the rocks back for aesthetics, Make a little habitat. We'll probably put some tree branches in here, too. A little bit left to go now. And then diggers off, and we'll be starting the siphon up and seeding these banks with grassy. They say build it, and they'll come. Here he comes. So I got a few kilos of annual rye grass. Very quick to repair damaged earth. If you're going to damage soil, you better repair it straight away. So even as the diggers going, we're starting to seed the banks here down to the waterline. This side has been shaped, so the glazed area there, it's going to turn back to pasture over time. And we'll be collecting some water plants to put into the edges here. So I'm just seeding the banks here, and job's nearly done. Okay, job done. Good job. Day off. Water's coming in. So now we know it fills about 16,800 liters a day. So we're going to calculate exactly how big the pond is by the time it takes overflow. Set to about 8cm below liner. Happy days. So, good day's work. I'm going to give the man some pastured chicken and some of our pastured eggs for a job well done. And thanks for watching our videos. Really appreciate the comments and all the questions that come up. And we're nearly at 10,000 subscribers, which is amazing. I expected we might reach out by the end of the season, but to have that now, it's amazing. Level of support for regenerative ag and I'm super happy. So please continue to share and like the videos. It helps grow the channel. It's great for more people to be exposed to these amazing things. Really appreciate it. You can find out more in our book Making Small Farms Work and the Ridgedale Cookery Book is coming along and it's going to be a ridge practical guide to catering for between 15 and 50 people from field to fork, well field and forest to fork foraging and how to prepare and cure and smoke and dry and use all these different amazing products we have. Thanks for watching. Appreciate it. See you next time.
More from Richard


A review of short and intensive season on a mixed farm and restaurant/event space in Sweden






Alskade Kyckling Exploring complexities of poultry production in Sweden and what we stand for


