No-Dig / No-Till Market Gardening: overview in 30 mins
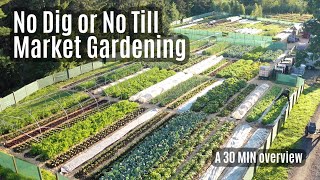
Richard Perkins runs a commercial no-dig farm in Sweden using permanent compost beds and standardized 10-meter plots. He covers water management (40 liters per square meter weekly), season extension with tunnels and row covers, and sales through CSA and pre-sold Facebook markets. Soil microbes come first; crops follow.
Questions this video answers
About 1,500 square meters of beds.
10 meters long and 75 centimeters wide.
59 degrees north; about three months without frost (variable ± ~20 days).
Approximately 4 centimeters of water per week (≈ 40 liters per square meter per week).
Over 20 years.
Chapters
Welcome back to another video folks. I am deep in a world of editing, compiling, writing, cooking to get the Ridgedale Cookbook to you. And it's probably 75, 80% of the material in now and it looks incredible. So I'm not making videos on YouTube and as you know, lots of different things going on in the background. But I had to put together a very quick overview of the Nodig market gardens here at the farm for a South Korean network, a large network of farmers and practitioners there. And so I thought may as well share it with you folks too. It's a very rapid over fire of what we do to make the no dig gardens work. So hope you enjoy that. Okay, so welcome to Sweden. This is the market garden. It's on 1500 square meters of beds, plus a big polytunnel. It's a fixed polytunnel for tomatoes and a smaller tunnel for cucumbers. These are movable caterpillar tunnels that we'll talk about. So I'm going to tell you about how we approach no dig standardization in market gardening and how we water, what we grow, how we start seeds, the tools we use and dealing with post harvest, that's washing crops, packing them for delivery and selling them. So for context, we're at 59 degrees north. We actually only have three months without frost and that can vary 20 days plus or minus every year. Here's a little flyover of the farm. So we're also raising pastured poultry for eggs as well as meat chickens and have cows and sheep in agroforestry systems. And then we have our no dig market garden as well. This is what the farm looked like 10 years ago. When I purchased the farm. It hadn't been cropped for a couple of decades and it was pretty much abandoned. And so I designed up a farm based around pasture and animal crops and spent the last 10 years putting that into place. And I wrote a book called Regenerative Agriculture, which is a 750 page manual detailing my approach to small scale farming. I won't talk about this slide now, but this is what regenerative agriculture means to me and this is the outcome. We basically 3D printed this design onto the landscape and made a very high economy in a very short growing season at the same time. But we're going to focus on the gardens. What I want to do is copy nature and nature doesn't have bare soil. So I've been growing no dig or no till for over 20 years now. So since leaving agriculture school and the way I approach commercial no dig is to use compost beds. So this is balanced compost straight on top of pasture. And then I bring the pathways with wood chip. This is spruce wood. That's a type of forestry that we have in Sweden. I like that because it breaks down over four or five years and works very well as a weed suppressant. And it also sucks up excess moisture. And so you walk around in shoes in heavy wet weather and you don't get muddy feet. And that also keeps the crops clean so we don't have to wash a lot of crops. And that's very beneficial because anytime you wash crops, you then have to dry them. And you'll find that the shelf life, the storage of that crop is not so good. So this is early in the summer, looking beautiful in the early morning sunrise. You can see the garden is very aesthetically pleasing. And that's a happy consequence of no dig. But it's also important because you can see the road on the right hand side. This is where people drive into the farm. It's the first thing they see. So when a customer sees a vegetable garden this beautiful and this well cared for, it automatically translates in their mind to everything on this farm must be well cared for. Which it is. But it's an important selling point. But it's not why we make the gardens beautiful. It's just a happy consequence of good ecological practices. So the soil is covered and armored permanently by the compost layer, just like in a forest floor. If you go into an old growth forest, you can't even see the mineral soil. It's covered by mulch and compost and then leaves with animal manures, etc. Breaking down on that rich forest surface, lumpy carbon, rich soil surface. And carbon is really important here because carbon is typically in an annual vegetable cultivation where the ground is plowed or tilled, carbon reacts with oxygen in the atmosphere and flies off as CO2. We want to capture carbon and lock it down in our soil. Carbon helps with the nutrient cycle. It's the starting point of the soil food web, feeding microorganisms that keep our plants healthy. And it's also stopping compaction and it's buffering ph and it stores water. So one part, so one particle of water can hold. Sorry, one particle of soil humus can hold four particles of water to it. It's like a sponge. And so even in the heavy droughts that we had In Sweden in 2018, we could still crop with very minimal water application up here in this extreme drought, because of the amount of water held in this rich carbon topsoil, let's say we've done the same in our fields, using a key lime plow and grazing our animals in a very special timing. You can look up this on my YouTube channel or in my book if you're interested to know more. We won't delve into that now, but this is how we started out. And so we literally put old compost. So you want animal bedding, like animal manure, like cow manure that's had straw or some other organic material for bedding in the winter that's broken down for 12 to 18 months. And we literally put that straight on that grass lawn in April. I think this was before the grass started growing. And if you look closely at the photo, you can see cardboard we've put under the pathways. We didn't put that under the actual beds, we put it under the pathways and in this way it makes a weed free, very nice planting surface that you can plant up immediately. We've also tilled ground to take away the grass and knock it back mechanically before covering it. And both work fine. These are the beds on the other side of the farm, just as we've put them together. And this is it maturing in. And you can see we've surrounded the gardens by these wind breaks. Vegetable crops are obviously very low, so we want to create microclimate to be able to avoid strong winds that we get. You can see the big wind breaks that we've put up on the farm. We get very strong winds up the valley that we're within. So that's a bit of the farmyard. Everything is focused around a central washing and packing station behind this big oak tree. So all the gardens are immediately in the vicinity of where things are harvested to washed, packed, stored in a chiller to go out to delivery. Now, everything in this garden is kept in high level of order. All the beds are exactly the same length, 10 meters or 30ft in our case, and 75 centimeters wide. And that's because most of the innovative hand tools are designed for 75 centimeter wide beds. Now our beds are 10 meters because that fits the shape of the land we're working in. But it could be 20 meters, 30 meters, it doesn't matter. What's important is all the beds are the same length. And that's because every time we do an operation on the farm, it just streamlines all the planning and actions on the actual land. For example, if I want to put these row covers that increase the temperature inside those beds by 3 or 4 degrees, which I use in the spring and the autumn to help improve my climate conditions. Then I put one of these four millimeter metal hoops that are one and a half meters long. I have 11 of those for each 10 meter bed, which means I can space them a meter apart. I can take out one of these covers from the storage and they all fit on any bed. So I'm not having to run around looking for different length ones to fit different beds. All the beds are the same. That means also when we plant a crop, whether we're direct seeding or transplanting, it's always the same number of that crop. So when you're seeding in the nursery, when you're transplanting out, it's always the same values. And those little efficiencies add up to a lot of time in the season. Here we're growing about 35 to 40 different types of crop. And we sell them through an innovative sales method called RICO rings that are popular throughout Scandinavia. And they're basically pre sold farmers markets that run through Facebook. I'll touch on that at the end of the talk. But you can see here we're doing very much what we'd call bio intensive plantings. We're armoring the soil with the compost that we've put down onto the grass. And then we're planting dense plantings, as dense as they can be. So they cover that compost layer with their canopy. So we've got soil armored by compost, armored by plant canopy. And we have plants planned in our crop plan to be growing as long as possible in each bed throughout the year. And then when we harvest these crops, we leave the roots in the bed. So I'll come along with a push cut knife and harvest those lettuces, but leave the roots in place and then transplant the next crop next to it. If it's a crop that will regrow, I'll chop the top under the ground a bit so that it doesn't regrow and it'll rot away. Or if it's too lumpy, I'll put some new compost and plant again. But the reason I'm leaving those roots is there's a huge amount of food for the soil, food web that I want to stay in the bed. So another way to look at this is we're not growing vegetables, we're growing soil microbes. That's really where I put my focus and attention. I do what's best for the soil. I get healthy, happy plants. As a consequence, I'm not putting my attention on the Lettuce. I'm putting my attention on the soil and the lettuces take care of themselves. Different types of crops here and here you can see. An interesting thing that we've done with the wood chip pathways is we've inoculated them with fungi. Sorry, not. These are saprophytic fungi, fungi that break down organic matter and turn it into edible proteins. This is King Stropharia or the wine cap Stropharia. There's also another mushroom that will an edible mushroom that will break down spruce wood chips, which is oyster Phoenix oyster mushroom. So I put down about 50 cubic meters of wood chips every five years. And out of those wood chips, which are not only making my garden beautiful, keeping the crops clean from soil, splashing back up on the crops, keeping my feet dry, absorbing excess moisture when it's wet and releasing it when it's dry, they can produce 4 to 5 tons of edible mushrooms in the little gaps along the edges of the pathways. At the same time, mushrooms are a missing piece in the soil nutrient cycle in vegetable production. So this is a neat strategy. Some people will use mixed broadleaf tree wood chips and that's even better for the soil. But they do break down a lot faster, so you have to apply them every couple of years. Simply use spruce wood chips. That's a Norwegian spruce because 90% of all trees in Sweden are Norwegian spruce. Here's a little aerial. So this is where we have a dining space and a classroom space in the center of the yard for education that we run. And I don't know if you'll see the mouse cursor properly, but this is the washing and packing station that has a facility for cleaning, bagging, prepping and a big walk in cooler for keeping veg cool that the delivery van can back up to load it up. Off it goes to sell. So all the gardens are centrally situated around that wash and pack station. Typically in our climate we want to put down 4 centimeters of water per week, so that's 40 liters per square meter a week. So we didn't have enough water in a well and there's no municipal connection for water here, so we had to build a pond. So we did this as an educational exercise, teaching people about volumetrics and how to dig earthen ponds as well as how to use CAD and then spent a few days actually laying that design out. This is a stream fed pond lined with bentonite clay liner, GCL geosynthetic clay liner. Fantastic material. It's no more expensive than high quality butyl like plastic Pond liner. But the beauty of it is it's self sealing. It's bentonite clay sandwiched between two layers of geotextile and you can stick a metal point through that and the bentonite clay between the geotextiles will suck around it and fill that hole in. So you can see the overflow pipe. We have a stream flowing in one end and a bigger overflow pipe going back to the stream, and it's just cut in across through the liner with an extra piece and a bit of bentonite clay powder put inside and that seals itself up. So it's a very, it's about €5 per square meter in Sweden. So that's very cost effective. And the beauty of this type of liner, which is used all over the world in sewage containment and motorway constructions, it's working to hold water when it's covered back with topsoil. And the weight of that topsoil pressing down on the line as it swells up creates that impermeable barrier. But the beauty of filling a pond with topsoil is now you can plant it up with aquatic species. And this is that same pond six weeks later. So it's already a functioning ecosystem, putting living healthy water onto the market gardens. So you've got to have enough water to be able to water the garden during the longest dry period. And for us, that's typically five, six weeks where we might want to water quite regularly to get that 4 centimeters a week. So what we're doing is we're using a rain gauge, looking at the weather forecast and deciding when we need to water. Also looking at the crops and the ground. Simple pump that's siphoned over the edge of the pond and that pumps it up to the gardens where we use these impact heads to spray the different sections of the garden. When you're deciding what to grow, you've got to look at the profitability. Now, our market garden's been pretty profitable and that's because we've got a high percentage of high value crops. So what are high and low value crops? Well, profitability is basically dependent on the time that crop takes to grow, how much space it takes up in the bed, how much yield it gives per square meter, how long you can harvest it for. Do you harvest it once or over a few weeks, and the demand in the marketplace for that. And that will vary depending on cultural and seasonal factors. But this list is fairly, I would say fairly similar across the western world at least. This is a map of the market garden. So all the beds are labeled with a simple code. And that's important for creating a crop plan and communicating between different people working in the garden. And then we have a lot of planning sheets where this is, looking at the spacings for the different seeders we use, or if we're using a paper pot transplanter or direct seeding. We have all these sheets of data so that you know exactly how to sow this crop, how to transplant this crop, and ultimately, when we make a seed plan, how to order the right amount of seeds. I'm not going to go too deep into this. There's videos on my YouTube or my book explains this in thorough detail. So I basically put all the blocks into blocks of 10, and they rotate every year. What I found over my journey with working with no dig is you're building up such resilient soil food web health that you don't even need to rotate crops that would be traditional in organic vegetable growing because the soil is so alive, it's buffering against diseases and pests. We haven't had any disease problems in our garden except for rust spots on beet leaves, and they're not even a problem anyway. So it's by putting our focus on soil health and microbial health, we take care of most of the problems which are actually created through tillage, through oxidation and killing off of beneficial soil microbes. So basically, I divided the 200 beds into blocks of 10 and I start creating a plan. This section on the inlay here with the green tabs is showing which of the different crops I can have at different times of year based on their growing preferences. And then I have to start this long process, working backwards and forwards to have enough each of the crops throughout the year to be able to satisfy my customer demand. That's a big, long process that I haven't got time to explain here. And then all that material goes onto a calendar. And this is what runs the entire market garden. So here I've got these simple codes. Ho means harden off. That means take this crop out of the nursery and get it used to being outdoors underneath row covers. S means seed. TR means transplant. DS means direct seed. And later on there'll be another one for H, which will be harvest. So every crop finds its place in this calendar. And I do this work in, say, October, November and order my seeds. And then I put the market garden down until March when I start seeding again. But this is what I use to run every single day of the market garden. I just look at what I need to do that day and off I go and do that. So it takes all the thinking out of the busy growing season. This is where we start our plants. So we built a simple sunken lean to greenhouse. It's sunken a meter into the ground, built out of recycled windows and timbers. Very low cost. And because it's so cold when I'm starting plants here, it can be minus 25, minus 30 degrees Celsius. I wanted to have a small space that I can stack vertically. So I built these growing racks so that I can heat this space with the house. So I have a wood stove that's burning for six months of the year. And this where we cut the doorway here is the warmest room in the house. So I just have a thermostat regulated fan that's driving excess heat into this small condensed growing space. I have to use lights as well because there's not enough natural light at this time of year. And that's what it looks like when all our seeds are starting. We like to keep this space about 18 degrees and we grow all our own seedlings which then go out into the beds. But everything's planned, everything is made in a way that all procedures are the same every time so that it's very easy for anyone to manage. We use very good quality rigid cell trays for hand transplants and we grow some into pots for bigger transplants. These are Pak choi that have a big problem in Sweden because of the flea beetle. So we tend to grow them on bigger and put them out when they're a bit stronger. We use the Japanese paper pot system for laying out seeds. If you're not familiar with this system, it has a special seed tray that's made of paper chains at different spacings. And then it's got its dibbler and drop seeder. So you can very quickly seed trays in a couple of minutes. You can seed 250 seeds at precision. It takes a lot of the work away during the early part of the season. That's a drop seeder there. And spring onions that the tool was originally designed for sown in multiples of four. This is thinking of efficiencies. If we grow onions in bunches, we can harvest and band them ready for the customer in one movement. So we're not over handling all the different products. And then here's the tools we use. So a simple broad fork. And this is like a handheld keyline plow, which is what I showed at the very beginning where we built the topsoil in our pasture using this special tool. The keyline Plow breaks up subsoil compaction without turning the soil over. It's not putting subsoil on top of the topsoil. It's not breaking up the soil structure. It's aerating, which is very different to oxidizing, which is what tillage does. So in the first three years we use this to prepare the beds and then we have a 75 centimeter rake to make sure the bed is flat and level. And that helps with the harvesting tools, you'll see. And it keeps the beds the right width. And then I have a bed roller that marks rows or it creates a little bit of surface compaction, which is really useful when you're using a seeding tool. Like we use this six row seeder from Johnny's in America. So you can. This is half the width of the bed so you can walk along at walking speed. Plant six rows of carrots at precision, walk back the other way, you've got 12 rows of baby carrots. It takes a couple of minutes per bed. We also use the trusty JANG seeder which is a fantastic tool for precision seeding. And we transplant as many crops as we can. Because I can put a four week old crop out, it means when I harvest, I can already put a four week old crop back in, so I'll transplant everything possible. We use the quick gut greens harvester. This is a fantastic tool if you grow baby salad leaves like this is one of the most profitable crops we can grow. We also use this for harvesting microgreens, which are very, very profitable to show you that in action. So this is available from farmers friends in America. And fantastic tool for very efficient clean harvest of baby greens and microgreens. And then for everything else we use push cut knives or simple serrated knives. We use tomato scissors for the cucumber and tomato production in our hot houses. Everything just simple and organized. So we keep all the tools in the market garden on these tool boards where they're covered from the weather. But it means that you minimize the walking to and frozen, which is a lot of what gardening is. You can see there's each bed's worth of hoops is stored nicely so it's easy to grab a bunch. And then we use this cool tool, which is a coolbot. Most people in the west are starting to use this and it's a simple piece of hardware that overrides the. It's using software to override a standard AC air conditioner and turning it into a refrigerator so you can build your own walk in cooler for a Very low cost. We work a lot with season extension tunnels, inside tunnels. This can lift our climate zone by one or two zones. So very important when we have a three month frost free growing space, we also use these caterpillars. And I've worked with a manufacturer for polytunnels in the UK who's taken my design, and we manufacture and sell these to market gardeners here in Europe. So they can really extend the growing season. And another benefit is they're very quick to put up and take down, so you can move them around the garden in your crop rotation if you want to. It's about five times cheaper than a permanent fixed polytunnel and accessed by pulling up the plastic on the sides and clipped with these special little clips you see here. And it uses these special footings to allow the plastic space to move up and down. So they're a really important element of the market garden too. But it's very simple, you see, other than that, we use fleece row covers for improving the temperature inside, or here you can see we're using them flat to increase germination of things like carrots, etc. And then for pests and diseases, the solution is all in the soil care that I've been talking about. But we also use insects for, sorry, insect netting for butterflies and flea beetles, which are the main problems that we have. So this is a physical protection for them. Now we have a nutrient cycle because we have a mix farm. These are three eggmobiles. Now, in the wintertime, the eggs, the hens go into the tunnel. So we use our tunnel for either livestock or here, the hens. So they go in in the winter and they peck all the seeds from any crop residues. And then we start a deep litter system where we put down old wood chips and straw and things like this and build that up to 60cm over the winter to capture all the nitrogen from the laying hens. And then we take that out at the end of the year when the hens come out. They're sold as stewing hens or as smoked chicken meat. And then we dig out that material that can be 40, 50, 60 centimeters deep, and we put it into windrows to compost it down to make beautiful compost that goes back onto the garden. And then in the summer months, that tunnel is turned into growing space for 1,000 tomatoes or cucumbers. So there's 1,000 tomato plants. And in the winter it's producing us about €40,000 of eggs in this space. So this is what it looks like when the tomato crop comes in, and you can see that quickly turns into a huge amount of tomatoes. This is the wash pack station. So all crops are brought from the field using a map with the labels for each of the beds. Crops are harvested according to the demand. They're brought up to this wash pack station. You can see here where they're washed down, rinsed, put into a walk in cooler. That's off to the right here. And these are the delivery boxes. They're polystyrene box that we can keep vegetables cool for one or two hours to take them for delivery. So when it's time for packing and delivering, we bring all the crops out onto this bench and we can custom pack people's orders straight into bags inside these boxes. We also deliver to some restaurants where we can just take them straight out the chiller in a delivery van. And most of our crops are with the customer within 30 minutes. Haven't got so long to speak about this, but we also grow microgreens, the most profitable thing you can do if you have a market to sell them. I won't talk about this so long, but basically we soak these seeds and wash them very well for. We soak them for about 12 hours and then rinse them really well to stop mold issues. And here you can see the density I sow them at, the yield I get per area, how much it cost me to raise that crop and how much I can sell it for. So you can take these figures and extrapolate them for your context. But we grow pea, radish and sunflower like this primarily. So they are soaked and stacked on compost trays, and they're stacked with a weight on them to help germination for three or four days. And then they're put out in sunlight and in about eight to 10 days they're ready to harvest. And they're either sold wholesale, excuse me, or direct to customers in mixes like this. Very profitable. And what comes out as a waste product is very nice for feeding our chickens some fresh greens for vitamins and minerals in the wintertime when they have no pasture to be on outside. So that's a quick overview of the garden and not so much time to talk about selling. But there's a couple of slides here giving a summary of the gardens and microgreen enterprises from my book. So you can read that if you want to find out more. It's only available direct from the farm and maybe there'll be a link somewhere if you're interested in that. You can order a PDF copy, or we can post them out to you direct from the farm too. We did a lot of work in the beginning building up customer email lists. And so we did a lot of open days where we just invited the community in and showed them around the farm and spent the whole day talking to them about the innovative farming methods we have. And that's how we built up a customer base in the beginning. So we started with pre sales and subscriptions. Here's a currency we developed in the early years where people could buy a meat chicken in advance and they would get one of these vouchers and then when we produced them, they could swap the voucher for a chicken. So it allowed us to say, okay, 400 people want a chicken, so we'll produce 500 and we'll have 100 left to sell. It means we didn't overproduce something we didn't have a market for because we just moved to the area and we're not familiar with the customer base. Same with eggs. We sell subscriptions for three months. You can buy one tray of 30 eggs every week and you pay for three months up in advance. And that means we have a constant supply base. And we did the same with vegetables in the beginning. We started with the CSA community supported agriculture where people pay you the price of a box of mixed vegetables a week for 20 weeks in our case because of the length of our growing season. And so they would pay for the whole season in advance. We knew how much to produce and we got the money up front to buy tools and seeds and compost, etc. So that's a big problem with any farm operation really is that all your costs are in the beginning and you don't get your money back till the end, as it were. So it was really important to do that in the early years. Then we moved to buying clubs where we would turn up in different locations in towns around us for 30 minutes and people would pick up their products from there. So it's very quick because a lot of farmers end up having to spend a whole day at a farmers market, not sure they're even going to sell their products. And often they're perishable products like vegetables that if they can't sell, they're no good afterwards. So we already pre sold our products and then turned up at drop off points and delivered them all in 30 minutes flat. So very efficient. Restaurants are obviously another outlet, different method of sales. I don't have time to talk about that, but I'll end on talking about Rico Ring which is something you could look into online if you're interested in. Some of my students have taken this to North America, Canada, South America, South Africa, the uk, other parts of Europe. It's a pre sold farmers market on Facebook. So you gather a bunch of producers, hopefully some that are bakers, some that produce meat and charcuterie, some who sell fish, some who sell bread, some who sell vegetables, eggs, etc. And then people order on the Facebook group and you bring what you've sold in a 30 to 60 minute window. And it's handy because people can't buy products from you there, they can only pre order online and that helps get around some of the trading regulations. So we're not a market. You can't just turn up and buy things. You're only collecting what you've already bought. And that Facebook comment is a sales contract, as it were. I hope that makes sense. It's an innovative thing that I think is worth looking into. It's a new sales model that saves the farmer a lot of time, which is important. This is a slide from the Enterprise Matrix from my book Regenerative Agriculture. Looking at the return you get out of an enterprise for the amount of time it takes. How much does it pay you back? Unfortunately, market gardening is on the lower end however, you see, microgreens is very high up. If you live in a dense environment, urban environment, for example, microgreens can be very profitable. But that's not to say it's not worth doing. It's more just to make people aware that there's other farming enterprises that can give you a better income and quality of life. But no dig. Market gardening is a fantastic way to do things on a very small scale. You only need a couple of thousand square meters is to make an income and you can do it without big investments and without a previous background in farming. So I think it's a fantastic enterprise and I hope you've got some insight from how I run my farm and after over 20 years growing vegetables, I don't think there's a better way to look after soil and grow healthy bountiful crops than by taking a no dig approach. Well, if you made it that far, thanks for watching and hope you found it useful. Obviously very quick amount of time to go over what's a complex subject, but hope you found that useful in some small way. As always, you can find out a whole lot more in my book Regenerative agriculture. It's a 750 page manual detailing all aspects of the farm as well as market gardening etc. Also, my other book, Richdale Farm Builds Equally big manual about how to build all of the infrastructure you see in the videos. Eggmobiles, boiler pens, detailed CAD plans of how to do all that. And soon, I'm excited to say, we'll be launching a crowdsource campaign to get the printing costs covered for bringing the third book in the trilogy to you. It's going to be incredible. So thanks so much for watching. As always. Don't forget to subscribe. Click like if you enjoy the videos and see you in a video soon. Bye for now.
More from Richard


A review of short and intensive season on a mixed farm and restaurant/event space in Sweden






Alskade Kyckling Exploring complexities of poultry production in Sweden and what we stand for


