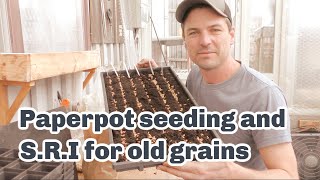
Richard Perkins uses paper pot chains to transplant spring onions and leeks, then outlines trials of ancient grain varieties with wide-spacing inspired by rice intensification methods. He also updates plans for a new pond and outhouse.
Chapters
Okay. Welcome back to another video, folks. This is a big seeding day. I'm testing out different old varieties of grains. I want to grow out some of those grains in the market garden beds. A little bit too high nitrogen probably, but I've got six different old varieties of grain and what I want to do is try growing them at conventional spacings and also try growing them at a sort of system of rice intensification method where you plant single plants very far apart, 25, 30 centimeters apart, to allow the plant to grow fully and be able to photosynthesize down to its base, which in rice produces much bigger, much deeper rooted, stronger plants that have many more heads of rice per plant and require virtually no water compared to traditional methods of growing rice. I've seen it done by a farmer in Belgium with grain, and I'm curious to try it myself with some of these old varieties. I'm also seeding all the spring onions, some kales and various other things. We're going to be using the paper pot as well as our standard 64 and 144 cells. First thing to do is to sieve some potting mix for the paper pot chains. In other news, I talked to my digger driver, Eric, who's a fantastic machine operator that dug our ponds, if you remember back to the early days of the farm, and we looked at the platform for the aterfelshus, the outhouse and the natural swimming pool build. And he can see good ways to do that. He had some good suggestions for how we're going to hook up water and sewage, etcetera, to the existing systems. And it seems like we will start digging that in April. So just in a few weeks now, we'll break ground and start that project, which I'm really, really excited about. I've been waiting many years for that. So if you weren't here for the previous video where I was starting the seeding, these are the paper chains that I use in the paper pot system. Very efficient for spring onions, onions, leeks, things like that. However, because these are paper cells, if you don't have a really fine potting mix and there's lumps in the mixture, what happens when you press that down into the cell? You actually crush the paper and then you can't use the dibbler and then the seeding doesn't work effectively either. So it's really important we have sieved potting mix. I'm just going to run my standard potting mix through this basket, shake it around and produce a pile of sieve material here that I can then use for the paper chains. The reason I'm buying the lumpier pot potting mixes, it's much cheaper and I'm not using the paper chains for most crops. I prefer to have bigger, healthier transplants. Paper pot chains are great for saving time in seeding and saving time in transplanting. But in our cold climate, it's good to have bigger transplants that can stay in cells a longer time, particularly at the cold start of the season. Today it's been minus 5 at the night, but it's still 1012 degrees in the greenhouse, which is totally fine for me. It's using very minimal power to keep it that way because of the benefits of the house. So let's get on with it. We'll sip some compost and then we'll get into seeding. So the cedar is what makes this piece of kit so effective. I'm putting down 256 plants and the paper chains come in three different lengths between the cells. 5cm, 10cm and 15cm. This tool, the paper pot transplanter, was actually originally developed 45 years ago in Japan for spring onion planting. And I'm multi sowing spring onions in 5 centimeter chains. I'm using two of these chains per bed and I'm putting four beds in. So I've got eight of these to do for now. And you can see these plates have different size holes for different crops. And so what I want to do is select the right size hole that will allow me to multi sow. So, so I'm taking a middle sized one. It's about 4 millimeters because what I'm looking for is to get three or four. This is actually an alternate skip plate. So you miss a hole. I don't want that one. But I want to have three or four seeds in each of my cells and then I get a very high yield per bed. And it's a very effective way to grow onions. So three or four seeds every 5cm and there'll be three rows of that on a bed. Okay. So I'm going to walk you through the process slowly and identify and describe certain things and observations as we go. When you're in the flow of things and typically every spring I've been seeding all the vegetables. I'm literally filling and seeding a tray in less than two minutes. And it's what makes the paper pot system so fantastic, especially for things like spring onions. First thing we do is take the spreader and then we use the spreader bars and what's important is we have the writing facing upwards. And that's critical because that's what allows the edges of the cells to line up with these metal pegs that hold this open. One thing I found with these is you've got to be really careful to push the metal in very carefully that you don't come out the sides, because then you can't stretch the paper. Now you can see we can open this up and it lines up perfectly with the hooks that we have at the end here. And that's what holds this open. Now we can remove and flip this over into the tray. Now, with the spreader bar, you can't take this out until it's full of compost and seeded. So you can only be doing one at a time in that way, unless you have multiple spreader bars. But you'll see now the tiny cell size, why I wanted to sieve this compost nicely. So, same principle as always when filling trays is you really want to work the edges. And that's really critical in the paper chains because they're so small that you don't want any to be under filled or they really risk drying out. So again, little tap, and you can see it's the edges that need to be worked on. And it's important that you can just about see the paper chain sticking out the top. So it was important here that I didn't have any large lumps that would block up cells, and they wouldn't actually be full and not squash down any of the cardboard because that gets in the way of the dibbler. So when I'm dibbing a tray, I'm looking at the top corner, the bottom corner, and if I line those up to the center of a cell, then I know that I'm sitting evenly across all the cells. Give it a good push. And Now I've got 264 dibbed holes, like so now I'm doing spring onion, and I want to multi sow them four to a cell. So I'm taking a seed pack and just being very liberal with the seed. And then to fill the tray, I can just gently float them around and then get the excess back off. And I don't know how well you make that up, but there are about four seeds in every cell. And if I again squaring up that hole, the top and the bottom corner, then I can just open this. And you need to tap to get any seeds that are blocked out. And that's it. There's a thousand seeds precisely sown in 256 holes. Now, again, I'll top this with vermiculite. And it's only at that point that we take the spreader frame off. And it's important you fill the cells properly, otherwise they'll shrink in concertina. So I shake this a bit, take it off, and there we have it. So that's a thousand precision sewn spring onions. Put a label on the next. Sa. Okay, spring onion, done. So now it's time for leak. And I only want to have one leak per cell. And they go on a 10 centimeter spacing. And so I'm going to change the plate over and then we'll do those. Okay, so here's the smallest hole that they offer that's going to be good for leak. Now, it's important to always look what's going on. You can see this chain has been wet in the past, and it's delaminating now. If I can save it, I'll try to, because these trays do cost, but I think that one is no good. Probably it could be filled manually, so I'm not going to throw it away. But I'm not using very many, and I have a big supply, so I may as well use good ones. Especially for critical crops coming at the start of the year, we don't really have the opportunity to mess them up. When you have less seed on the tray, you really have to make sure that you're getting seed in every hole. It's very easy to miss some when you don't have a high density of seed on the plate. So just go through manually, checking that they're good. All right, next job is potting up Grace's artichokes. So when you're transplanting on, it's important not to pull the plants by their stems. They're not designed to hold the weight of their soil root balls, so you just need to be very careful to tease them out. That's why I use this dibbling plate that's specially designed for these trays. And we'll just gently pop each one into the bigger trays where they'll stay hopefully till they get planted out. I was going to save this job for Gracie, but I'm just getting in the flow of it now. You can see it wasn't the best germination. These were domestic seeds. They weren't from professional growing company, but still, there's plenty there. Grace is very keen on having globe artichokes this year. It's the first thing she thought about when we talked about planning the garden this year. All right, Next thing I want to do is test the germination of different grains. So they've got. I've got Emma wheat and iron corn. I've got Kamut, got some rivets and a couple of other things. So I'm just going to test them in the paper pot tray to see how well they germinate. And then I'm going to do some just experimental plots, probably in the market garden. Probably I'll choose some beds that haven't had much fertility put on them recently. But for now I just want to see if the seeds are germinating and what to expect. As I said before, I'm interested in the idea of yield comparisons with wheat grown at wider spacings, similar to the system of rice intensification. It's just for fun. It's just for me, because why not? And part of this year for me is just enjoying this process. Now then I'm just going to do, in fact, what I'll do is make some little trenches. So this is just for testing germination so I can decide if I want to do some more interesting experiments. So that's the Emma wheat. Then we've got Einkorn. All right. I'm going to cover these up really well because I want them to stay really nice and moist to germinate well. So I'm doing quite a thick layer on these. And that should be fine. Okay. Got a bunch of kale seeds to go through and a few beds of that. I've got onions and spinach to seed, but that's all just in the standard 64 cells and 144 that you saw in the video yesterday. So I'll leave it there, I think. Hope everyone has a great weekend and looking forward to seeing how people's gardens are developing. I love this time of year when I see social media posts from all of the farms, students of ours and farms that I follow to see how their season is progressing. It's always a bit frustrating because I feel like we're so far behind with our climate here, but really looking forward to seeing this place start, fill up and be growing all kinds of wonderful things this year. Look forward to seeing you in the video soon. Don't forget to check all the links below. Have a great weekend, Sam.
More from Richard


A review of short and intensive season on a mixed farm and restaurant/event space in Sweden






Alskade Kyckling Exploring complexities of poultry production in Sweden and what we stand for


