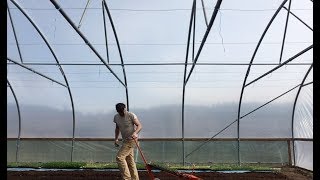
Richard Perkins tests a paper pot transplanter on his farm's lumpy, homemade compost made from old cow bedding. The machine struggles with the coarse texture but he adjusts the wheel pressure and remains hopeful it will save time planting mustards, tomatoes, and kales.
Questions this video answers
Richard Perkins.
April 16, 2019.
Chapters
Well, it's the first signs of green growth in the pasture. The trees are still to leaf out yet there's little bits of pollen on the willows, but that's about it. But it's busy times at the farm and I haven't really been making videos because I'm still a bit under the weather. And I've been basically working on my own outside, clearing up after the winter like always and just getting all the seedlings, hardening off, planting trees and taking cuttings. I've got a thousand cuttings of currants, putting, putting in some of our favorites there and all kinds of things going on. Busy times with the decoration. Johannes brother is here decorating the house. We've got beautiful wallpapers up. I'll do a tour of that another time. But today I tried the paper pot transplanter for the very first time in very lumpy compost. So I thought I'd show you how that went. So this is my first time using this and what I'm doing is just playing with the pressure because this is really lumpy compost. So I want to see how much pressure to put on the front wheel to really bury the paper but still leave the plant sticking out. So liking it so far. This is the first time I've used it and this is not the nicest compost. This is old farm made compost that we've smashed up with the tilther. We're quite happy with the result. Look, that's pretty even. So pretty impressed. I mean it's definitely way faster than hand transplanting. Now the beds in here are quite different to the beds out in the yard where this is just tilled up old bedding out of the barn. So it's lumpy and there's patches with straw and stuff where it gets stuck. But I'm pretty impressed for the first time. I mean this is obviously going to take a little bit of fiddling with as we go through the season and working in different types of compost. But that's like the third line I've put in. Need to work on my straightness. Just putting in some mustards and this will be tomatoes down the middle of here. I just get a cropping in the meantime. But I'm pretty impressed. You can see like here it's not fully buried the paper so you could come along and cover all that up. But it's not really so important as the plant having good contact. That's pretty happy. And I think we're on the second height, second lowest point with the wheel on the machine just testing it out on the second to lowest setting there and just applying different pressure on the wheels to see how that goes. And we'll just see. It'll take a bit of fiddling as we work on in different beds. And we've got a lot of spring onion and crops to get out. I've just put these off to harden off on plastic so they don't root into the ground. And we're not normally hardening off in here, but we're doing that this year just for logistics. And it's going to get busy here soon. We've got wood chip and compost already here. We're going to resurface all the beds outside. That's going to be a major job at the start of the year. And every five years or so it's worth putting new wood chip on. And first peas are going to go out soon. Some really nice spinach here coming up. And first peas that we're going to transplant. And kales. So all actions go here. And we're waiting for them to come and fix up our pasture. Also, because it's dry weather now and it's going to rain a lot next week, so I'm hoping that they will fast track that and come and clear up the mess they made from logging. I still didn't release a video about that, but I've just felt so bad about it because it's made such a mess. And I feel like half this year is just going to be about cleaning up the mess, really. But anyway, I'm going to transplant the rest of these little beauties and then get some water on in here. And I've got some other jobs to do. Certainly lumpy compost does not help, and finer tilth beds outside are going to be a lot easier. But you get the picture. It's pretty sweet. And it doesn't take long to seed up multiple rows. I think clearly it's going to take a bit of experimentation with this tool to just really get it right for different types of beds that we have, with these being some of the worst. Just really lumpy, strawy material under the surface. So when you hit a big clod of that, it just clogs up the tool. This kind of stuff here. And so I've tried to smash that up with a tilther, but I haven't been able to everywhere. Now in beds like this, I don't think we're going to have any problem at all. The majority of our beds are looking like this, but we have some beds that are Extremely lumpy. And this is just a lot of straw from old cow bedding from the farm. Whereas now we're using peat moss as a bedding. And it's a lot fun finer and it's easier to crumble up. So we have some beds like this. Maybe 30 out of a couple of hundred that we're gonna have to either take the tops off and resurface it with compost, or we will smash it up with the tilt. I don't know yet. We're expecting a bit rain next week and that will soften it up. But many of the beds are ready to go, and I think, you know, we'll be trialing and erroring and seeing what goes and documenting it here on YouTube and think it's gonna work really well. And even in the patchy areas, even if you have to go in afterwards, it's still going to be way quicker than hand planting, which I'm excited about. This is a big pile of compost we got to move, and this is quite fine stuff. So I think that's going to be really easy to lay it into. I think basically trial and error is going to be a big part of the getting used to the paper pot. But that's okay. That's way it is with any new tool. And a tool like this that could bring such significant time savings is obviously, you know, really worth putting a bit of trial and error in. So this is all ready to be covered up. And I'll put row covers on this tonight, especially on the young seedling plants. See, we've got a lot of spring onion. We've gone crazy on spring onion this year, but it's nice, really exciting to get some plants in the ground. It looks like we've got lovely weather for the Easter weekend. And I'm going to be just keeping an eye on here, see how the weather goes, and doing a bit of propagation. I'm putting in a thousand of our favorite currants into root trainers and just getting ready. We've got people arriving. Really small team this year, but people arriving at the weekend. And then it's time to really get all this stuff in the ground and get the gardens up, get the yurts up and get the season going well. It's really hard to imagine this full of tomatoes. It's going to be. Where are we now? It's going to be at least a month, maybe six weeks till we get the tomatoes out here. This time last year, there was still snow all over the gardens, and a couple of years ago we had snow Even into late May when we got the first of the pasture boilers out onto the ground. So you never know. And it feels all spring like and lovely and the birds are singing. But you got to really be careful at this time of year, especially as we get these iron nights laid in even into June, the first week of June. So you've got to be careful and stick to your crop plan even if you think the weather's going ahead in a different direction. And with this new setup with the paper pot stuff, it's going to be really a case of learning about the timing this year and not having things stay in their pots. Some of these onions have grown really much faster than I anticipated because it was very easy to keep temperature in the lean to greenhouse this year with a better electrical system and just warmer temperatures generally. But timing is going to be key. And so I'll be showing all the little tricks and tips that we learn using this in compost specifically. Because a lot of videos have been made about the paper pot system, but I think very few in a totally no dig setup. So that's going to be learning the nuances of using that tool in compost specifically. Now I'm not very organized with hardening off just because the weather has been fluctuating. These are all spring onions and the key is going to be learning about the timing. You see, you want all this to be basically a nice sprouted shoot that is not becoming root bound underneath. See, these peas are quite large already, but they've been air pruning in the pot. So they're going to come out really easily out of here. They're not going to be jammed up. So that's important. Part of this setup is timing. Well, I'm very happy. I think for the first time my, my rows aren't that straight, to be honest. I think I can improve that. But you see, it gives a pretty fine result and I'm very happy with that. And this is not the nicest of compost. It's very lumpy and I hit a lot of lumps where you just clog up the tool. But generally it's gone fine. And you know, it took maybe 20 minutes to put in eight rows for the first time I've used it. And I think in some of our fine, finer beds you're going to be able to just blitz through really quickly. I was taking my time and just checking out different pressure settings. You see like the result it gives here, just learning about how, you know, how different pressure affects that. But now, you know, I'm very happy with the. The results and I look forward to it through the season. I think it's gonna save us a huge amount of time in the seating room as well as in the field. So that's it today. It's just a very quick video to show you the paper pot and just a few considerations as we start to use that. But very happy with the results of today's first trial. But I'll be making more videos regular starting when the season starts after the weekend, hopefully getting more out. There's been a big delay with the book. My editor has told me I need to lay that off for a while and do a bunch of editing and really turn it into a really fine book. And I'm really listening to that because that's her job and expertise. And I have been rushing this to try and get it ready before the season starts just because I know that my time is just so flat out. When I get going on the land here, spring just lasts a few weeks and then boom, we're in summer again. So it's, you know, that's the way it is. And I really appreciate that feedback and responsiveness. And so there's going to be a lot of editing and thoughts to, you know, how to restructure bits and develop the prose and just put it into a more cohesive piece. And it's an epic book. It deserves that attention and a little bit of patience from an impatient man at the end of the winter season. So that's really appreciated and I'll. Yeah, I'll keep you updated on that, but it might be, you know, a few months push back now as we get it finalized. I don't know until I get the. The draft back with all the notes on it. Just quite how extensive that work will be, but we'll see. But just to give you a heads up that that's delayed for now and I'll let you know whenever I know more about it, but that's it. Hopefully bring you some videos of getting going in the gardens and having all that resurface this year with wood chip again, which tends to take every five years or so. And so we're going to have beautiful, clean, fresh gardens again, ready to have an epic season. Hopefully not as dry as last year. And we'll see some of the results out in the fields. It's had quite an impact last year, the big drought. So we'll have a look at that and I'll talk about that in the forestry. I'll make another video specifically about the forestry. I'VE just been a bit heartbroken to put that out there, but thanks so much for watching, folks. Look forward to sharing the season with you. It's going to be lots of interesting things to share this summer. And thanks so much for your support and for following and we'll see you in the next video. Bye for now.
More from Richard


A review of short and intensive season on a mixed farm and restaurant/event space in Sweden






Alskade Kyckling Exploring complexities of poultry production in Sweden and what we stand for


