S4 ● E74 Mushroom Gardens (King Stropharia), Ropes and Pulleys
Video transcript documents hands-on work in a peat-swamp property: marking boundaries and felling birch/other trees to harvest wood and peat, preparing and inoculating mushroom patches (King Stropharia / wine cap) using spawn, straw, cardboard and peat casing, and demonstrating wood-chipping. It also covers practical rope-and-pulley techniques, tree-climbing tips, and safety guidance during felling and chipping. The tone is practical, instructional, and observational.
Chapters
So here we are in the peach swamp and we're just defining the edge of our property here to cut down birch and alder for making King's trafaria patch. Here's some chaga mushroom. It takes about 20 years for Chaga to mature and sporulate. And so the big craze of taking chaga for its health benefits has led to widespread depopulation of chaga. These are cloudberries. They only grow in this peat swamp environment and we make jam with them and put it on ice cream. So we'll be taking trees like this birch. There isn't really any alder down here in our patch. Quite big trees, but this will turn into very little wood chips, maybe a third to half an ibc. We're not taking leafy things. We just want branches, bigger branches and stem for the patch. And so we're going to try and cut 8, 10 trees, cut them into lengths that we can carry out. We have to get out onto the road. There's no access in here. The neighbors actually want to cut this whole patch down because it's turning back to forest. But this is an amazing resource. Remember we showed you in previous videos, the place where we cut the peat is out here. But this is all peat swamp that this is growing on and it's drying it out. So there's a neighborhood desire to turn it back to peat swamp, but not many people are utilizing it as a resource anymore. Works if you expect.
So basically the risk of, what would you call it, jumping is either 90, 90 or 180. So your escape route is always the risk of injury and escape.
Sorry.
Getting hit by the stem at 45 is minimal.
So we're also at the same time marking out what we believe is our property boundary. Not marked very well these days because no one's used them for 50, 60 years, I think. And we know where some pegs are. Kent, our neighbour, helped us mark them out, but we're just unclear because there's a straight line that follows some of the old ditches. However, the next point, right out to the side, it seems to get much wider down this bottom part. So we want to then GPS tag this and go check it against the map. But the map is really poor. The other side of the strip is a red mark on the tree here. So it's about 15 meter strip at the top, but it appears to get down to like 40 meters down the bottom. So we want to know that we're taking trees off our site. We're pretty confident about this size. So where we just felled the birch tree. And you can see a red marker right here. And so I think we know that these birch are in our patch. And we're just a bit unclear about this corner. So it's nice to know because it's something we can use for animal bedding, etc. So out this end, it's a lot clearer marking. This is actually a cut where someone has taken the peat moss before. And you see it's a little shelf. This is the drying racks of the stuff we cut last year. It's dried up nicely. It's a beautiful little habitat. In here you get these wonderful little honeydews, these carnivorous plants. Very pretty. And here's some. We just dug some peats so people could have a look at that. So it goes down many meters and we're not totally clear. We never reach the bottom. But then it dries out. So you would typically come here. This is just pure carbon. Sometimes King's Triferia is capped off with this material. If you're growing it in bags, for example, down at this end, it's, you know, it's turning back to wood again. It doesn't feel like a peat bog if you didn't know what's under. But here's a couple of Scots pines that have fallen down. You see, it's just pure peat under here. Beautiful material, just pure carbon. So basic component of the start of soil. Seeing the power of mycelium to just rip through cellulose, lignin, all these hard fibers in nature. That's why saprophytes are called the teeth of the forest, and just turn this extremely tough material into pulp. Feeling really excited about fungi. Right, Go. Just. Do you want to catch more shorter ones? I'm just collecting some of the peat moss and we're going to grow some of this out in an old fish tank we picked up in the dump site. And we can make some medium and put some mycelium in there so we can actually visibly see the takeover of the mycelium. So we've got some peat moss, beautifully dried. You'd always cut this in the field, let it dry all summer and then pick it up and use it for animal bedding. But we've got some wood and we thought we'd go chip this after we've done animal chores, just to know much. We got probably 2 cubic meters of wood. Just sweaty. It's Mae's birthday today, so we get cake. Whenever it's anyone's birthday, we all get cake. They're just Singing Happy birthday to it. So it's back for chores and then we're chipping and seeing what we got. So we're gonna chip what we got so far. I'm just splitting logs because these are too big for the chipper. And then we're going to inoculate some in the fish tank to be able to watch the mycelium run and watch the rhizomorphs grow up through the capping layer. Beautiful broccolis. Where are you off to today, Matt?
Today we're going to Soona. We have about 40 customers there. Chickens, eggs, vegetables. And we're going to Torshbe where we're growing our veg box, customer base and egg base. And we have three restaurants we're delivering to today and. Oh, and then back to here to Vastramtevik for a couple of chickens.
Nice. How did the Rico go yesterday?
Rico went really well. It was similar to the first week, although the second week was a little bit of a lull for everyone. But picked back up, we had a nice lineup and everyone's super happy.
A nice floor.
We have a new receipt printer getting more set up.
So here's a bag of mycelium. This is Striferia rugosa annulata. King strufaria wine cap. And what we're going to do is put potting soil in this old fish tank that someone found in the dump. And we're going to mix a layer a few centimeters deep with moist wheat straw with the mycelium. Put that in there, put some wet cardboard on top of that, and then put another layer of wet straw on top. And then we'll be able to see the mycelium developing on the straw layer. And it will be sending off rhizomorphs up into the casing layer, which we'll use that peat for on top. And when we see the rhizomorphs going up through the capping there, we know that the mushroom is about to make mushrooms. It's a good sign. So we put in a bit of the mushroom spawn. It's potting soil in the bottom that we've moistened. And then we're putting in wheat straw and we've put in just a couple of big handfuls of mycelium and mix it through. We want to save most of this. We have two bags, which is enough for about 2 1/2 meter squared. Patch a couple of inches deep, which we want to focus on over there. So we've mixed mycelium in here and now we're putting A layer of cardboard on top that we need to soak and that will just help it not dry out. Then we're going to put another layer of straw on that's moistened and then we're going to cap it with the casing layer of the peat moss that we've just minced up by hand. This is non nutritive, so we would expect to see the mycelium run and you'll see that from the outside. That's why we're doing this, just for curiosity's sake. And then it will send up rhizomorphs into this non nutritive material so the mushroom knows that this is not needing to be consumed. There's nothing in it that's edible. So they're going to be consuming the things from here. And when we see the rhizomorphs come up, we know mushrooms are coming in the next couple of weeks or so. So we might get mushrooms out of here this summer. It can take four to 12 months for King Splutharia to pop up probably on the longer side here. But the temperature is good. It's about 20 degrees ambient temperature. So we see. So now we put a cap of the peat moss on top of another layer of molten straw on top of the cardboard. This is the inoculated layer. So we'll leave this and this is in the shade always. South is over here and we'll just keep an eye on it and moisten it and maybe put a plastic film as a lid to keep the humidity up.
Through that thing. You're going to get some the two risks. The biggest risks are of course, getting clothing caught. So just make sure everything is tucked in and nothing hanging. Clothing hanging loose and then of course the kind of swinging momentum of branches. So when you're feeding a branch, you wait for it to get pulled in with the feed rollers and then you stand back until the log or the the branch is cleared, this last part, and then you're safe to work again. So just work in a really controlled, methodical fashion and don't rush.
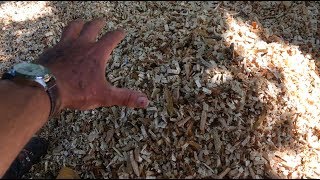
So it's going to get too noisy, but we're basically going to chip down into a pile here and rake out around all of the herbs and things we want to keep. I don't mind if plants grow up through this. That's totally fin. It's. So turns out the chips have been quite sufficient. Now we're watering this really heavily from the pond and we will inoculate patches. We don't have so much mycelium so we're going to inoculate two main patches and then because we've got leftover willow, we're thinking we'll make a little living willow fence on each side because many people come and walk across here, visitors and customers and interns and the postman. So I don't want them walking over there anymore. Albert's on Hardy Kiwi training. These are our inoculation piles, but we have a full bag and partly used bag. So let's take a big handful out of this bag and add it to this one. And then our goal is to mix in these, mix in the sawdust form of the pile, and then we'll spread it out to cover about 3 square meters or 4 square meters if we can. And then we'll put some wet cardboard on so we want to spread it out, knowing where the limits of that are, so we can cover it with cardboard that's wet. And then we'll put the rest of the chips over that and then spread some out if there's excess as well. So we're mixing mycelium through the piles and then we'll spread these out to cover a few square meters and put the rest of this wood over that as a casing. So mycelium has been mixed through and spread out into about two by two square. And we covered this with cardboard, which will just really keep it moist under there. And then we'll use the rest of the wood just to chip and put on top to cover that up, water it again. So it's lunchtime and the patch is complete. Very nice. Good job.
One thing I could suggest is just double checking your carabiners and that can't come undone. So to tighten your side spot, if you've got the tree gets narrow also. So you tighten it like that and you lean back. This will take your weight. Just let that go and that takes your weight. And then to smash.
Don't want to slip. Did you get on the side of it or were you catching? Yeah.
So sitting on the side of the tree, you'll need to look where your legs are going, your spikes are going. Pull yourself in a bit.
And then how are you going up there? So it's.
You're letting your. You're supporting your weight. Once you're confident that your spikes are in, you transfer your weight into your legs.
And then your. There is a thing called. In the rope, like a branch.
You need to pull yourself in a little bit.
So ideally you want to be as close as possible to the trunk. Yeah, exactly. Are they on tight enough on your bottom of your shoes because it looks like your feet are quite mobile in there and that's maybe why you feel slippy.
Is that okay? So the one thing that you just need to focus your attention on is making sure that once you've got your main anchor onto your harness then you can rely on that. And that's going on.
How did you learn, Joe? Just getting out and climbing. And do you recommend that's an okay way to do as long as you know you're not in safety gear?
Yeah, I would say take, take an experienced climber. Basically you can pull yourself tight now and then essentially you can just transport all of the weight and all of your body weight onto your harness and then you can sort of relax a bit more. It means I can use a running bowline. I can use a figure of eight as well. And then I'm putting my cut here as the top falls. This is of course still attached. I'm putting the cut between here and the strop.
What do you use it for?
Normally we use this for zip lining. So that would be lowering big branches and stems down and tightening sort of. Yeah, you could say tightening lines.
So like to put tension on stuff.
And pulling logs. Yeah, pulling logs. Right. So we can. Someone on a tire timber hitch.
Someone go get Reuben up here and see what you can pull.
You can put a straw in the timber hitch around that tree. The blue one.
Whichever. You know how to make one of those. See if we can pull a tree along just in case.
If you do it like you, you can put it.
All right, pull team. Pull.
Four to one.
You are multiplying your fours by four.
Yeah. Four to one ratios make light work. That's quite a big trunk power of pulleys. Okay, so this is the test. Can we pull this mighty tree? There's my hand. It's quite a big tree. And it's a full size tree. It's a big old tree. Why are we doing this? Because we can. You.
So this is a slippery, slippery sheet band. It's a friction knot like form of belaying yourself. Okay, so pull it over. I think the reason we took this tree was to make the the track big.
It.
More from Richard


A review of short and intensive season on a mixed farm and restaurant/event space in Sweden






Alskade Kyckling Exploring complexities of poultry production in Sweden and what we stand for


