S5 ● E24 Seeding, Egg Mobiles, Mulching. It's all go....
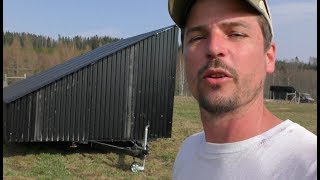
Richard Perkins plants seedlings in new caterpillar tunnels and prepares three eggmobiles for incoming poultry. He walks through tunnel setup, building yurts, and livestock management, including recent bull castration and plans to lighten one eggmobile.
Questions this video answers
20 degrees (C) in the day.
30 metre tunnel.
Plastics: 9 metre wide; hoops: 4.26 m wide.
€4,000 for two yurts (combined).
About 140 trees and about 400 berry bushes.
Chapters
So the last of the snow is going now in some of the sheltered shaded spots. But it feels like life is really happening again. The birds are singing. You can probably hear in the background, insects are all waking up and first signs of grass growing in the pasture. And that's great. We've got chickens arriving next week. First broilers coming in a couple of weeks. We've ordered turkeys for the season. Busy direct seeding and transplanting out and it's all systems go here at the farm. Hi, Ragnar, what have you found? Wood chips. Thanks for not picking all the baby plants.
I still have the beds in the big caterpillar tunnel to seed. I've been direct seeding a lot. I've been doing different radishes, different turnips. I've been doing one Asian green called Green Wave.
Like a mustard green?
Yeah, it's a mustard and I didn't do it for baby leaf, but I did it for bunching. So it's wild roast. So I'm curious to see.
So first, carrots are in radish and radish spinach. Let's all go. So the glorious spring weather is upon us and we've been busy seeding and transplanting and the tunnels are mostly full now. Have a quick look inside. So far we're really liking these tunnels. We've transplanted out lettuces and there's kale and spring onions over here. And we've got more kale, spring onions. And we've just been direct seeding with the six row seeder. So that's gone. First carrots, radishes and Asian greens and some rocket. So things are really getting going now. It's really warm. It's 20 degrees in the day now, which is a massive contrast to a couple of weeks ago. Still very wet in places underfoot. These beds, this is the north beds and we're on a heavy clay here, but the beds are really nice when we're uncovering them. This is essentially what it looks like sitting there after winter. It's very nice, ready to go. So there's very little to do. There's a few odd weeds that come up, particularly on the edges of the path. It takes very little time to put prep a bed ready for direct seeding. And so now all of the 30 meter tunnel is ready and done now. So this is the 30 meter tunnel. This one shades out earlier in the day that you can see at the end section there. It's now half past three and it's going into shade at the end and Carla's been calculating grams of seed per bed for different crops. We're trying some different spacings this year. Down at the end we've just got more spring onions and there's spinach in there. And we're just weighing these out on some very accurate little scales and just recording what we're doing as we do things differently, but really liking these tunnels. Sent off a few pictures to first tunnels and showed them the pieces that we've been putting together and they, they think they're going to have no trouble sourcing or making those. And yeah, I'm really looking forward to seeing how that goes with the creation of a kit. I'm really hoping it will be available this summer for those people in Europe that want to extend their season at the other end of the season. But we haven't had high winds yet to test these end assemblies. But you don't have to do the ends like this. We've done them, as I said in previous videos, to really be able to send the plastic down very quickly at the ends. But so far they're holding up fine and we, you know, we're feeling like they're really good. About half the price of a, you know, larger polytunnel structure. So I think really good value for money. We had some questions about the caterpillar tunnels. How do you get in and out? You get in and out on the sides and you lift the sides up for venting. It's quite windy today, so you might hear a bit of noise in this. But then you see these are the parts from farmers friends that hold the plastic up and they just twist around and you can pull the plastic back down. Had a question as well about what you do if it's really windy and you could put sandbags down as the plastic comes back down. In between the carabiner here, there's enough plastic overlap. So we got these in 9 meter wide plastics. The hoops are 4.26 wide, but they're not circular so you can't work out the length like that. So we just pulled the whole plastic over and left about 40cm on each side and then just cut the excess plastic off this greenhouse, like polytunnel plastics, kind of no rip. So, you know, as long as you cut it fairly smooth and straight, there's no problems there. And that's how you manage them every day. You need to sort of lift the sides up because they get very hot. So this is how we vent them as well. But they make a super nice little microclimate. In there. It's obviously holding a lot of humidity and it gets very warm. They're very functional. I really love them. I think they're a fantastic investment and that's why I've been working hard to try and get this model available for people in Europe in multiples of 10 meters. Because I think it's a game changer really, especially at the price point they come at. But yeah, you could hold these down with sandbags if you wanted to. We haven't got that much wind yet that we've even tried and sandbags is not something we usually use. We've got metal pegs that we hold row covers and fleeces and stuff down with, but if we need it, we'll put them on and I'll be updating how that process goes. I've got a huge amount of frog spawn laid in the paddy ponds this year. I'm hoping to grow Cancun just as an experiment. It's a tropical green, a Chinese water spinach. I'm going to grow it on in root trainers I think until it's really hot in the middle of the summer and place it out in these ponds just for fun, just as an experiment. But I like eating it. And this time we have. We've got very few ducks at the farm right now, so I'm hoping a bunch of these frogs survive and help us out in the gardens with insect control this year. Today we set up the yurt. So this is where we eat throughout the summer. And we have another yurt this size for a classroom space for the summer, for the trainings that we run here. Someone was asking about an instructional video of how to build these and I've talked about it in the past, but I started building these as a small business before I found the website called simply differently.net I believe it is. And I just. I've been recommending that website for years now because it's just a one stop shop. If you want to build a yurt or gir, this is technically a ger. It has straight roof poles. A yurt has steam bent roof poles that put the weight of the roof straight down into the wall, like a reciprocal roof. The only two roof structures that put weight straight down into the wall, it's much stronger, obviously you can put a lot heavier weight on the roof. This is technically a ger, we just call it a yurt because people don't know what a gher is. But that website has for teepees, domes, gers, yurts, all the dimensions you just type in the dimensions you want. So this was a 9 meter diameter yurt. We wanted 25 degree angle on the roof, which is pretty standard. And we wanted the wall height to be about 175 so you could stand up next to the wall and use all the space in the earth. And then it calculates everything for you. It's amazing. It calculates all the number of roof poles, where to drill the holes, how to make the karnas, the walls here, how long the lathes need to be, where to drill the holes, how long to make the. This is the steel cable that holds in the walls. Because these roof poles are obviously pushing outwards against the wall. It tells you everything you need to know about building the tunnel. The centering, it tells you everything. How to sew the canvas. You can see my. I just sewed this. I started making these on an old Singer hand sewing machine. Now I have an industrial sewing machine. But you can see in the lines of the fabric where the stitching is and then the pattern where obviously you're making a flat shape and then cutting a wedge out to make a cone shape that fits really like a glove on the roof. And then it has to come down the side somewhat as well to stop water coming in, but also stop wind coming in. So it shows you how to cut. There's several different patterns for sewing the roof canvas and it shows you all the different patterns. And then you write in the width of the canvas. Like here we've got a meter wide canvas, which ends up about 94. When you've done the seams, it's the same seam that you get in your jeans, the same overlapping pattern that you have on here. And it gets really easy to sew. In the beginning you're learning, you put pins in, but that's really slow. So in the end you're just learning to fold as you sew really fast. But these are yurts that they cost us €4,000 to build two of them. It took two weeks and I'd built a bunch before. So it's a lot of quick, repetitive work. Basically, it's a lot of repetitive work. The most painful bit being burning the ends of the nylon rope here and twiddling with your fingers to stop them fraying. So obviously there's a lot of knots around the karna. It's about 30 meters around in circumference. But these spaces are amazing. It's really nice to have circular spaces. I used to live in yurts when I was younger and it's a really different space to Inhabit. Because you have to arrange things in a very different way to a house where you have typically square rooms. This is a very heavy yurt. It's got 400 kilos up in the roof essentially. And so you can see these little metal brackets here and here that stop this twisting. If we took these dragon posts away, this whole yurt would want to twist and drop, which would obviously not be very pretty. So we just deal with it with that. We've built this around old door frames. This is a 120 year old door frame from an old cottage that we used to live in and just adapted that to fit. And then you can see here how this model, because it's so big, it has six of these karnas, the wall constructions. And you see they're overlapping here where two are joining. So they fold up neatly to pack away. And then they concertina out and we just lash them together. And then the wire that retains the roof. You can see the roof post. You might just be able to make out there's a metal pin that holds the roof post in. And then it's bolted up at the top so the roof post can't come out at all. Last year we had five. We had a swallow made a nest up here and then five, five babies flew out of here. So it's soon that time of year again when we might get some swallows turning up back at the farm. But super nice to get this up. And it feels like each day now we're getting more and more organized, getting to know the team better, setting up things to have our daily routines in good order, which feels great. These two beautiful boys are indoors. They've just been castrated, which is a heavy duty operation really. All the cows are outdoors now. But we've decided because we're breeding Hereford onto these. These are Fjell Ku, an heirloom native Swedish hardy mountain cow. Milk breed primarily, but good for meat too. But we don't want to. We were thinking we might line breed, but we've decided we want to put some beef breed onto the Fialku. So they've got to stay in a nice dry, clean environment. So we're keeping them in for some days as their wounds heal up. But it went well and they seem very comfy in here. But they're eager to go out and join the cows again. So Eggmobile 3 is out on pasture and pretty much finished. Just got a couple of bits to fix up inside and ready for the birds. We're going to start grazing in Nutfield this year. We're normally starting in top field over here, but because they've been digging, it's super wet. And we actually got Eggmobile 1 stuck trying to get it back to the yard. It needs to be modified. I'm going to show you a bit inside and what we're going to do just for reference. This is egMobile3. And it's much less wood in here. You can see there's much less wood in the roof and in the construction. Generally it's a lot lighter weight. And eGmobile2 is like this too. And we don't have problems with it. Eggmobile 1 is over built. So you can see Eggmobile 1 and the Rhino are fairly stuck in the mud. We're waiting for the van to come back to be able to get this out. But this is where they've been digging to put the electric cable under. And it's just a little bit too much for the rhino, which is strong. It's just not got enough weight. You can see it's just marshy under here. But they've dug all the way along here and inside to get to the pylon there. And we consider starting in nutfield to let this dry out so that we can cross here to enable us to get to the lower part of the field. We're hoping it dries out in time for when we get into here in the grazing pattern. But it's the way it goes. But let's have a look inside because Eggmobile 1 was the first Eggmobile we built. It's got a very heavy car trailer that it's built upon. And it's got a lot more structural timbers. It's maybe a bit dark. I don't know if you'll be able to see. So our plan is to take it back to the yard. And we're going to have to take the roof off. It's just held on with roofing screws. And then we're going to strip out half the wood, basically and then start cutting away some of the frame underneath as well. It's very thick steel for a car trailer. It's just way too heavy. I reckon we can halve the weight without any structural differences. EggMobile 2 has had no problems. And that's definitely only 2/3 of the weight of this one at the Most. And eGmobile3 is a lot lighter. So that's the mission for the weekend. It's meant to be our first weekend off, but we're just easing into our first week here. And the hens are coming early next week, so got to get the mission done. We let the chickens run through the tree lanes at the end of last year and so we're just trying because we're not putting the winter bedding on this year, we're going to make compost for the market gardens. And so we're hoping that these will keep the grasses back, that we don't need to come in here and deal with that at all. You can see we've lost some berry bushes. This is where the voles have been coming through. That's the sort of damage they do to the root systems over winter. And so we've got a few berry holes where we've got to replace the berry bushes. But having these on already means that the planting will go a lot easier. We'll be able to see where any gaps are. We've got about 140 trees to put in and about 400 berry bushes we're putting in. Putting some new lines in the front field that were never planted initially because we didn't have enough berries. So looking forward to getting into planting hens coming next week and ramping it up. So that's it for today, folks. Just a quick update at the end of the week and the team are off. Nicholas is off buying a vehicle so the team can get away for the weekend. I'm going to be fixing up this egg mobile all weekend, but looking forward to next week, lots of planting and I'll be making a few videos of the process as we go. So thanks as always, for watching our videos. Click. Like, share the video. If you know people that will enjoy that, you can find out more in our book, Making Small Farms Work. See you in the next video.
More from Richard


A review of short and intensive season on a mixed farm and restaurant/event space in Sweden






Alskade Kyckling Exploring complexities of poultry production in Sweden and what we stand for


