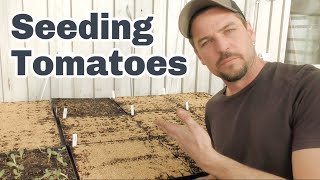
Richard Perkins (YouTube) documents starting the season by sowing tomato seeds and planning crop layout across his ~1,000 m² farm. He explains greenhouse and lean-to heating/lighting strategies, seed tray types and potting practices, crop counts and bed plans (25 m beds, 22 cm tomato spacing → ~113 plants/bed), and outlines other crops and a homestead/camping enterprise for the year.
Chapters
Welcome back to another video, folks. I'm fresh back from Gotland. I had a wonderful week away without the kids, which was refreshing. And now we're back at school, back at the farm, and I'm starting to sow vegetables for the year. Got a thousand square meters under cultivation and even though the beds look snow capped and frozen, the leanta greenhouse is staying at a nice temperature. Now it's time to get the tomatoes in. Super exciting for me to get the first seeds of the year in. And it's a bit of an interesting year because we've got to have a homestead year and we're going to have maybe five, six adults and seven or eight kids here, which is a totally different setup to normal. But we're also looking to start up the camping on the platforms in the forest that I built last winter. We've got two huge yurts that we used to have in the yard over here, as well as three teepees. So we're going to try that out as an enterprise. And what I wanted is to have eggs and meat and vegetables from the farm as part of that package so people can come and stay close to nature, forage fish, go for walks and eat from the farm. So we're going to over produce now. We're going to grow on a thousand square meters. This year I'm planning to grow primarily here in the old north beds behind me in the new north. We're going to leave that fallow covered up with the row covers that you're familiar with if you follow the channel. Now the ground is way too frozen to even be able to lift these covers up to have a look. But I've shown in videos in the past, activity in the soil gets going much quicker when the beds are covered. And not only that, a really big bonus of covering the beds up like this is that weed seeds and tree seeds don't blow in. And that means we can only. And that means we only need to uncover the beds when we actually come to plant them. And in a strategic planting plan, many of the beds are not planted for weeks into the warm weather where they could be taking in seeds from the spruce trees. And we saw that in the one year that we didn't cover the beds and we had hundreds of thousands of spruce seedlings because of that drought year in 2018. The following year they made a huge proliferation of seeds that was no problem. Once they're raked out, they're gone and they don't come back. But I always like to cover up these beds. It's a non woven geotextile, almost like a fleece. It lets light and water through. It doesn't rip and degrade onto the beds. It's much higher quality. It lasts for many, many years. And we just hold that down with landscape pins and use the same holes each year so they don't disintegrate. And it's far more aesthetically pleasing than black plastic or any of the sort of nasty disposable plastics that are often used in vegetable production. So the big tunnel behind me I plan to be totally full. I'm going to do four, five rows of tomatoes on 25 meter beds. Two rows of melons, which is a new crop for me this year. I do them at the same spacing as cucumbers every 45cm. And I'll just have one row of cucumbers this year. That's going to be ample for all our needs for fresh melons. Fresh cucumbers. But then I'm going to have a lot of tomato that I can put away and can for the winter and have that sort of homestead element to the farm this year. These little beds beside the barn I'll put down to corn and squash. And then behind me on the east and west beds it's all full of perennials now. So here on the east beds it's mostly asparagus and then some wildflowers. Up near the pond towards the house and then on the west beds we've got several rows of strawberries and a lot of rhubarb. So really nice crop to be able to put down in the freezer to make pies and cakes for the summer. And then if we just turn around a bit here on the south beds, I plan to just put the whole block of south beds, that's 30 beds, down to potato, onions and perhaps a bit of garlic as well. And they can be storage crops that will last us in the season, but through the next winter as well. I don't think I'm going to be using any of the caterpillar tunnels this year. They don't really benefit our crop plan. We've got successions of salad crops and things before the tomatoes go in the big tunnel. And we've also got the small tunnel in the background. I haven't fully decided what to do with that. I might fill it with squash or something simple. The aim is to keep things very low maintenance and very low key. And I want to be flexible in the plan. Depending on the people that come to homestead with me this year and I want them to Be able to grow what they want to grow too. So I'm making a loose plan, getting things started because I'm the only one here until May. And we'll see how the plan evolves over time. It's going to be a long time till we're seeding out here in the wall, but inside the lean to things are surprisingly warm already. Nine o' clock in the morning, the sun is out, but it's sitting at 18 degrees. It's a long time since we've been in here. So for those of you that are new to the channel, I'll explain a little bit what we've got going on. This is a lean to greenhouse on the south side of the house and it's primarily heated. There's a fan on a thermostat up here that takes heat from the room where there's a fireplace in the house and can put it out into this room. We've gone with a vertical stacking because it's so cold here at the time we're sowing seeds. We must use lights because there's not enough natural light at this time of year that we chose to go with a vertical stacking system to keep this space minimally sized because heating a space in this climate doesn't make much sense. I do have an ancillary greenhouse heater and I've been using that at night times. And that keeps it from going below 10 degrees Celsius, which is ideal. So it's a low cost, low energy startup system for a pretty extreme climate. We've got these T8 bulbs, two above every shelf. They're all just on a switch at the end of each row. And pretty quickly in the season this starts filling up. Now I've got my potting station over here and I'll run you through that. I like to keep potting mix and vermiculite. It's an expanded clay compound that I use to top every single tray. So I've got three different seed trays that I'm typically using. These are my 64 cells. We have very hard, plastic, rigid trays that last for a decade or more and don't break when you lift them up full of soil. These are from a Swedish company. People always asking me where to get them. You can get them in England, but so you can get them in Sweden, but hard to get them in other countries. You can find good quality trays in other places, but I can't help you with that. 64 cells. That's why I'm doing the tomatoes in Today and I do things like lettuce, kale, things that spend a longer time in the tray. Then I have 1, 4, 4 cells. And I use these for things like spinach that will be transplanted quickly. And then I have paper pot trays that I use for microgreens and any of the paper pot seedlings that I'll be doing peas, spring onions, leeks in. Right now we have all the gear and the seeders for the paper pot trays. And I have a dibbler for my 64 cells. So to start with, I got 10 trays of tomatoes to go in. And here's the varieties that I'm doing this year. I'm away from Italy this year. These are from Bingenheimer in Germany. We've got yellow submarine, Berner rose, another one with strange numbers and letters. And then I've got some old seeds of black opal, Sungold and F1 and Sakura, nice cherry tomatoes. So that's the tomato varieties this year. So in this kind of setup, the key thing is to not let the temperatures get too low. We have the benefit that when the sun does come out, this place gets pretty warm. And so we monitor the temperature with vents up at the top above the doors, or by putting the doors on a jar. And then I've got these mesh screens so the cat or birds etc don't get in. And that works pretty well because it's sunken 80 centimeters into the ground. That stops it from freezing. That means we can have water year round coming from the cellar where the hydrofloor is. And then I have this table for doing microgreens on the table in the summertime. But also I can hang lights off here. And it's typically where I put the tomatoes once I've potted them up into 10 centimeter pots. I either have them under fluorescent or halide lights under there because we don't plant tomatoes out until the last week of May here in this climate, I like to work clean and tidy when I'm sowing and I like to do things methodically. So to start with, I'm just going to fill 10 trays and then I'm going to dip them all and then we'll start planting. We've got our labels here. Everything's labeled with varieties, dates and the beds. Obviously I've got a crop plan that I'm working to and simple brush and I just keep things nice and tidy as I go. So that's the first get all these trays full. Now I'm just using a very simple potting mix, it's not got a lot of nutrition and in the case of the tomatoes, when they get potted up into 10cm pots, I will put a bit of fertility in that mix. This is quite a lumpy potting compost and so I'm just removing any larger sticks. Whilst you can make your own potting mix. I find to get a good even consistency, it's far more effective for me to just buy compost. As always, I drop the trays a couple of times, sharp taps, and that allows me to see especially around the edges of the tray. That's really important to really make sure the edges are full because you're typically putting soil into the middle of the tray. When you're filling, you've got to pay all your attention to the outside cells because they will dry up quicker anyway. And if you've got too little soil, that can be a problem. Then you can see this dibbler is specially designed for these trays and how hard you press on them gives you different cell depths, seating depths. These are actually 3D printed replacements that we've had to put on. And I line that up with the side of the tray, give it a good old press and then that is ready. So once I've put the measured amount of soil in, you can see I've worked it into the edge like so. I'm pushing it away from the middle and pressing it into the edge of the tray. It's really critical, this stage. It doesn't need to take long, but it must be done well and any of these lumpy bits and just discarding. An important part of this process is bringing in potting soil. I have a pallet of outside and I'm bringing it in in advance to warm it up. I want it to be about 10 degrees. I'm not doing any heating underneath the trays. I don't use a germination chamber. I just want a base temperature in the lean to and then that keeps things simple and easy, always working through the edges of the tray. And as I said, once we've seeded, we'll top the trays with vermiculite. And for me, that's the quickest, most effective way to guarantee good moisture retention on the surface. It's a very quick way to cover your trays. That's the way I've done it since I was a teenager. I like to work clean because we've got a gravel floor in here and I don't really want things growing out the floor. And it's just a good principle. In general, work tidy, clean and efficiently. Now, you can see this potting mix is a little bit rough. There's bigger, coarser material still in here, but it's much cheaper than buying really well sieved, fine potting mix. And when you're using the scale of, you know, couple of cubic meters a year, it adds up. And that makes a big difference to the running cost. So what we do in these trays is no big deal. But in the paper pot trays, where the cells are so much smaller, what I'll do is sieve this first and you could cut it with sand or whatever also if you wanted. But it's got some sand in the mix, but it's just a little bit too coarse to be used for paper pot chains. These are the chains that I'm talking about that fit in with the paper pot sieving system. So when I fill these, I always sieve the potted compost first. So it's warming up already. And you can see we've got this bubble insulation on the roof and the walls, well, the window walls. And that just helps keep the heat in at night. Light is not the big issue for us because the light is so low in intensity at this time of year that we need to use lights. And that also has the benefit of creating a little bit of heat. We keep the T8 bulbs about 4 or 5 centimeters above the top of the crop, and that makes sure we get enough light that they don't go leggy. If they were growing just in the sunlight now, they would get leggy. And we don't want that. We want good strong transplants in our short growing season. But that insulation really helps. And it's pretty warm. I'm in T shirt weather and it's only 9, 10 in the morning. Now. There's no automation process for tomatoes. Doing them single seed per cell and just doing that by hand. So this takes longer than some of the automated seedings like with the paper pot, etc. But still, it's no big deal. And so I'm always sowing a little bit extra than what I need. I need per row, 25 meters. I'm planting at 22 centimeters, so I need 113 plants per bed. And here in this case, I've got 64 cells, so I'll have 128. That allows me to select the stronger seedlings and I'll do a bit of a selection when I come to pot them in the 10 centimeter pots. And then I will select the best of those to Fill up the bed with. Alright, job done. So 10 trays, that's 640 tomato plants. I only need five rows of 113. That's 565. That gives me about 12% spare, which is great. And a couple of them probably have double seeds in that. I can always prick them out and make up the numbers. So I'm happy with that. I've got the numbers. All that's left to do now is top them with vermiculite, water them down and we'll leave them here in the warm to germinate. Now, I've always topped my trays with vermiculite. This is an expanded clay compound because it's just a fast way to cover a whole tray. It keeps a little bit of moisture up on the seed on the surface, prevents from drying out, and it's just an ideal quick way. I go through a large sack of it every year and I've done that since I was a teenager. But these are ready to be watered. I like to keep the vermiculite dry and crispy, so what I do is I sweep all this into the potting compost and that will just go into the potting mix when I'm filling more trays. So because I have a gravel floor in here, it's very convenient to just give new seedlings a big soak. Make sure you water over the edges of the trays. As I said before, it's the edges that dry out quickest, so pay attention to the edges mostly and they're ready to go. So job done. That's it for now. I've got some other trays that I'm going to be seeding in the next couple of days with paper pots, 144 cells. I'll make a little video, show you how I do those and talk more about the planning of the garden in the context that's quite different from previous years here at the farm, but that's it. Got to catch up with some administration after being away. Hope you found that interesting in some way. And don't forget, you can find out a whole bunch more in the links below. If you don't follow me on Instagram, I post a lot of stuff on there daily on our Facebook page. Also, you can find a lot more information in my books and other offerings that you see in the links below. See you in a video soon.
More from Richard


A review of short and intensive season on a mixed farm and restaurant/event space in Sweden






Alskade Kyckling Exploring complexities of poultry production in Sweden and what we stand for


