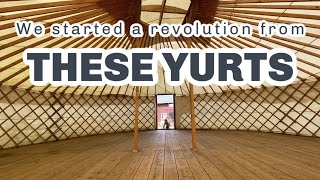
Richard Perkins sets up two large yurts on his farm, walking through the construction from wall leveling to roof poles. He uses oak frames, spruce poles, and heavy canvas, and shares costs and timelines for builds that can host up to 50 people for courses.
Chapters
Welcome back to another episode, folks. A special day today. We're putting up the yurts and I wanted to just show you a little bit about how we made them, how we do that so you can see what's become very special features on our farm. Okay, good. Heavy rain, just what we needed in the gardens. Perfect weather to put up yet. Maybe not. Sky is looking a little thunderous. It's veg harvesting day. So Fabian and Selma on that beautiful asparagus, we've been eating some of that this year. But we've decided to get the yurts up because we've got courses on still a couple of spots for our farm scale permaculture design course if you want to join us for that. This is where we eat during that course and this is our teaching yurt in the background. Okay, so corners are up the wall sections, they're just lashed together at each join like you see here. And then we have a five tonne retaining strap. Because these are nine meter diameter yurts, they're gers, technically straight roof poles. Whereas yurts have a steam bent roof pole which I've made plenty of in the past. That puts the load straight down in the wall. Whereas a ger is pushing out a force against the wall like a, like a house like this. It needs inner retainer. So we use a five tonne strap. And now the trick is to level the wall height as evenly as possible. And that really facilitates the roof going up. And we're ready to jiggle the wall around, get it even height, get the door in. Then we'll work together with the other team, lift up the dragon posts with the center ring, the tonneau and then we can get the first few poles in. When we've got four or five poles in, it's stable, we can go and help them do theirs. And then it's a two person job just putting all the roof beams on. So the guys in the background just leveling up their wall. We've unloaded the roof poles because we normally store everything in the barn. But we decided to store it in place to save moving. Did get a little bit damp, a bit of surface mould. So I'm not sure if I like doing it like that. But they're also 7, 8 years old now, so they have a bit of that anyway. We've screwed the dragon posts onto the tonneau. Normally you would in a smaller yurt when I used to build up to 6 meter family, yet you would have the dragon post removable. You'd also slot the roof beams into the tonneau. But this is. There's a couple of ways you can do steam bent. So you have a thin bit of wood making up a circle. And that takes a little more skill. That's how I used to make them. But it's more work and not really suited to this large size ger where we have like half a ton of roof up above our head. And so we've gone for quite a big turner, about 1.8, I believe. And we're bolting the roof structure in and then we peg it in at the other end onto that retaining wire with little clips. So when this. This clips onto that metal wire and is held in place like so. So then every roof beam is impossible to. And that does wonders for alleviating nerves when it's full of 50 people. So that works well for us. And I would say anything bigger than 6 meters, I would consider this permanent approach. You can see how we've made this tonneau with two overlapping circles essentially cut from straight planks. So it's a very quick and easy way to make the structure. And we will leave the dragon post in with these. Yet another additional safety concern is we actually use these little clips to secure the roof beams as they come in. They get bolted onto this and then every three or four we screw in just to give it rigidity. Because naturally these structures can want to twist from the center, especially in strong wind. So that just gives us extra security that makes us feel safer about them up in the storms. We get here first. Baby carrots. Look at those beauties. Very nice. What else is in the chiller today? Lots of beautiful hakari. More baby carrots. Pack choys for kimchi. Look at these beautiful hacker eyes. Lots of hacker eyes. More Pak choys, kale salads, radish. Okay, first five poles up. So we had four of us to do this. We have to lift it. We've got a bit of rain too. I don't know if that was in the previous clip. We lift it by hand and then get this under it to lift it right up. This is my hand height on the wall, so it's quite high, three and a half meters. And then the trick is just to get five poles or six poles just to give it structure. So you can wobble this now and the whole thing is solid. It's not going to fall over in any way. And so now what we do, because we're just getting poles up quickly to alleviate the people holding it. Now what we want to do is put them in the correct place mathematically. So you can see there's three open slots between these two posts. And that corresponds to 1, 1, 2, 3 roof poles that we screw into the door frame, which we have here. And then what we'll do is just count out the crosses and make sure the poles that we've already put in place are in the correct place according to how many pegs are up here. And then we just keep adding posts on until we've got the stretcher up and then it's ready for the canvas. So pretty straightforward. Building yurts is straightforward. Lots of monotonous jobs like drilling all these holes and burning the ends of the nylon string to get it through. It's finger bleeding work, same as putting up these posts, but it doesn't take long. Just simple structure. A very elegant and very beautiful structure. Up on the ladder, Ragnar's looking for toads and frogs. This is what we do now. I think you can just make out. So Akos is passing up a post the right way round. And then I've just got to get a bolt in and screw it down as quick as I can to make sure it's safe. In the meantime, he's plugging in that bolt to connect it to that wire. So it's all safe. But fairly quick job now at this point. So got this one up. I'm just going to fix the inner brackets to secure the middle there. I built these two yurts with Johanna. I did all the woodwork in about eight days for two of these. And we sewed the canvas with an old 100 year old Singer sewing machine. So it took about 10 days to build these two. Cost £4,000. €4,000. And that was mainly the canvas and this oak. So I bought oak with no knots in it, so that was expensive. The roof is just spruce, so that was cheap. But €4,000 each. We've had them now eight years, same canvas. And they facilitated us having courses for up to 50 people. So more than paid for themselves. I really love these structures and I think they're really easy to make and really beautiful spaces to inhabit. And I use a website called Simply Differently, which gives you instructions of exactly how to build yurts. Gers, geodesic domes, teepees, and gives you all the cut patterns, all the drill patterns, everything you could possibly need. I actually started making yurts as a small business before I knew how to actually build them. I just observed them at festivals and things and built them. And then I saw that website and that revolutionized it. So I'VE been recommending that ever since. It's a donation based website. If you use it, you can chip in and support them. But pretty quick stretches to make. If you were to buy a yurt this big in Europe, it would cost you about €20,000 and so five times cheaper to build it yourself. And we built two in about 10 days. So it just goes to shell. Okay, working finishing up this second move. Nice view of the garden from here. Spring onions coming up. Nice. Now a bit of rain was really necessary yesterday and now we've got peas coming. Lots and lots of peas. Small batch, small bats. So 14 and a half crates of eggs out today. Do you need anything else? So raggy. What do you think of the new trailer? We don't know how we used to do without it. Pretty handy. We need more kanga boxes too. Just have a Danish army man. Takes two or three of us to lift this normally. Pistons off. Okay, ready for the canvas. But this is eight year old canvas. You can see we've got a few glue patches. This is actually where the string that holds a central piece that goes over the circle on the roof just wears over time with the winds we get. So we've actually glued on reinforcing strips. But just checking the canvas now. This is actually sewn with pretty normal polyester thread. It should be sewn with a thicker thread. This is my old Singer machine, but the seams have come loose in a few little places. Just strips like 20 centimeters long or whatever. So we're just touching up the canvas now before we get it back together. Handy machine. Always worth having an old Singer sewer machine. This one is an industrial model for going really fast on long lengths like curtain making, etc. But I bought this second hand for 80 pounds. Beautiful. Love this machine. So wall canvas going on. This canvas just gets tied in at the top with little threads. Let me stretch it around as we go and overlaps with the door there and then the roof sits over the top and overhangs about 40cm to make it wind and waterproof. Okay. Roof canvas fiddly. This is how we do it. That was a bit of a fiddle. It's better with a couple more people. It's a heavy canvas, maybe 45 kilos on the roof, but you just got to be careful not to rip it as you come up against these edges. It's nice to have a protective band that covers that to protect it, but we never got around to that. But there you go. We have got a ginormous tent. It's about 60 square meters in here. So it's a very big space ready to host big groups. Very nice. Going to cover the roof up. Now these screws include this wood. Well, you need a powerful drill because these are big, but these are actually going into stone like a breeze block. That's what they're for. They're big, aren't they? Okay, getting there. Now this one's a bit different to the other yet because it's up on the raised platform. What we do is hold down the canvas with a strip of wood that's just nail gunned into a strip behind it. And that keeps the fabric nice and taut and drains off the edges really well so that it stays wind tight. Totally waterproof. So there we have it. Got this yard up and this is always a special day. It's the latest we've ever put it yurt up here. But this place is a special place for most of the people that come here. Incredible farm meals served here throughout the year. A lot of business and relationships have been forged in this space. I think this one year has a more beneficial contribution to farming than all of the Scandinavian ag schools. What do you think about that, Ragnar? It's your birthday. When? When's your birthday? Tomorrow. What? Ragnar wanted to fill the year with frogs and toads for his birthday. Alright folks, that wraps up another episode. Thanks so much for watching. Hope you found that interesting in some way. Don't forget to check out simplydifferently.org if you want to learn how to build these amazing structures yourself. It's really easy if you've got some basic tool skills and can measure accurately. And it's fun sewing canvases. Once you've sewn 100 seams on the yurt, then you'll feel like you could sew anything. And it's a really nice skill to have. So don't forget to check out our book Regenerative Agriculture. It's the broadest, most comprehensive manual on the subject out there today. As well as the Farm Like a Hero experience on farmlikeahero.com where we are sharing hundreds of hours of interviews with Europe's best regenerative farmers as well as weekly Q and A's with myself and making a book out of all these amazing farmers. A burgeoning scene happening in Europe and we have some of the best examples on the planet right here in Europe. So check that out. See it in the links below. We'll see you in a video soon.
More from Richard


A review of short and intensive season on a mixed farm and restaurant/event space in Sweden






Alskade Kyckling Exploring complexities of poultry production in Sweden and what we stand for


