WHY I LOVE THE PAPERPOT SEEDING SYSTEM Manual drop seeder makes super quick work of spring seeding
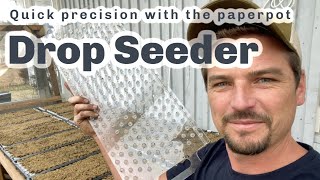
Richard Perkins walks through the paper pot seeding system, a manual drop seeder that speeds up spring planting. He shows how to assemble trays, dibble holes, seed accurately, and transplant seedlings still in their paper pots, which works especially well for onions, leeks, and turnips.
Questions this video answers
Four seeds per cell.
5 centimeters (5 cm chains).
256 cells per tray.
About 2.2–2.5 trays per 10-meter bed.
About 2,400 seeds ("2,400 odd").
Chapters
Welcome back to another episode, folks. I'm doing 50,000 precision soon, spring onions. And I want to talk a bit today about why I love the paper pots seeded. What are you seeding there, my love? What is it? I don't know. It is spinach. Spinach in these one four fours. And how many seeds are you putting in each hole? One. Just one. You are a good little farmer. This little baby makes moving bales super easy. Someone asked who it's from. Chapman Machinery from the uk. We like it. Winches in both directions and double wheels are a must. It's super wet on the pastures right now. So this is a good bit of kit. A couple of thousand euros, but really worth it if you don't have a tractor. Love it. So no calves yet. They're due in the next couple of weeks. But we've had three lambs so far, all healthy and looking good. So it's exciting times seeing if we can get a few more pink pigs on the farm this year just to raise them up as food supply for the farm because our freezer is getting empty. As I said in the video recently, we're not doing much by paper pot this year we're going to be doing spring onions, leeks and turnips. They're all things that are much more efficient in the paper pot system in my mind. And both with spring onions and leeks, we will multi sow. So we will have four seeds per cell. Especially in the case of spring onions. We're planting them every 5 centimeters on the 5 centimeter chains. Now. It's much quicker to broadcast things like spring onions and leeks in one single tray. You can do that in seconds. We're buying seed, 10,000 at a time. And I could just portion that out with a credit card into five portions. Put 2,000 in a tray and I've got a bed ready now. It's much quicker to seed like that, but the downside of that is when you're transplanting. And that's where the paper pot really comes into its own, because I can put four seeds accurately in each little hole and two and a half, 2.2 trays will go for one of our 10 meter beds. We're doing three rows of spring onions and we'll have 2,400 odd precision sown seeds in the bed and that's what we're looking for. If you look at this image, this is what we want. Big bunches of onions you can just pick up and band to make harvesting extremely effective. So componentry wise, these are the standard Japanese paper pot trays, very rigid, really nice aeration. We love these. They're the ones that you can see here. I've done a bunch of seeding already. These are trays that are open ended from Curley's over in Australia. And we're going to be testing out the curly paper pot planter which has got a few different specs on it. So we're going to compare the two as we get into our spring planting. Then we have our spreader board. Spreader board goes with these handles to open up the paper chain. We have a dibbler. Doesn't matter what size paper chain you use, 5, 10, 15 centimeters. They all have 256 cells. So they all work with this dibbler. And then we have our seeder and I'm using small hold, I think it's 2.8 mil. Can't remember off the top of my head. And here we've got coated spring onion seed. So let's have a look at the process. First thing I got to say is that I'm not using standard potting mix. I'm actually using a stronger compost with animal manures like we would put on our beds. Now some people might find that weird, but the reason I do that is the little cells in the paper chains, they're so small and the plants have to stay in there so long that if you've got four baby plants in something that big, it just hasn't got much nutrition. Compared to our standard seeding trays which are the 64s like you see here with tomatoes coming up, these are going to get transplanted on into 10 centimeter pots. But the point being that standard potting mix is much finer so it's much easier to fill your paper pot trays. So I've had to sieve this because it's generally more lumpy. Now that's a little less inefficient. But as I explained, using the paper pot transplanter to plant these a matter of minutes per bed. If you took, if you save time now by broadcasting into a tray, you would pay multiple times, 10, 20 times in the actual transplanting. So it's worth the time to me. And I've specifically chosen to use the stronger compost because that's how I've always done it for the last six years and it works well for me. So that's how we do. We're going to walk through the process really slowly. First you take your spreader and I like to just have it on my tray there and Then very carefully, you need to feed the arms into the white sleeve here. And you have to do this. You can do all the things I'm showing you really fast, but you want to do this bit really carefully, because if you go out the side, you rip the connection. That gives you the ability to pull this chain. So if you go too fast and go out the edges, you destroy the chain. Then you can concertina these out, and you've got to make sure that these fit properly onto the metal framework. And I'll show you up close. The important thing is that the metal pegs tuck in to the actual brown paper, and especially on the end, and it's the opposite way around there. That's super important for holding this out, because this spreader frame is needed until the tray is finally seeded. What happens is you can fill this with soil, and then if you took the frame away straight away, you would get a little bit of a concertina effect. And neither the dibler or the cedar would line up with the tray. You don't want that. Next, we're going to fill. So I'm using quite a lumpy compost, and so this takes me longer than it would if you had a really fine potting mix where you could just spray, spread this around and bash it down, and you're done. This one takes a little bit of correction because it's still got a few lumps in from the sieving process. So it's important you focus on the edges, A, because they generally have less material in when you're just pouring material in the middle of a tray. And B, they will dry up a lot quicker, so it's important they are full. Then I give it a good drop, and you can see there's quite a big impact from that. So that allows me to come back over and just really work material into any deficits like so. And I'll drop it again. And when I'm confident that's full, I can scrape the top off. And this is where the magic really begins, because this thing just lines up beautifully with the tray. And all you need to do is line up the bottom and top corners. And if they're in the middle of a cell, you know, the whole thing is lined up. So quick visual check, Boom, you're done. And as you can see, that's a perfectly dibbled tray ready to go. And then the real magic happens. So paper pot cedar has different hole settings. So you have the bottom tray with big holes, and then you have different plates. Here we have the standard 4 millimeter holes, that's for bigger seeds like SP. Then you have, I think, 8 mil holes for even bigger seeds. And then you have your alternate holes. So that means you can double the spacing of any particular paper chain up to 30cm. You can also do the same thing by taping with masking tape just diagonally like that on alternate strips up to you. But it's good to have plates if you can. And then one important thing. This has a spring mechanism that when I open the seeder, it should pop back. But what happens is dust from seeds and grubby stuff gets in there and it stops it springing back. So I always like to hold it with my fingers with pressure there, so I know it's closed. Because the worst thing you can do is have 5000 seeds just dropping on the floor. So I always do that out of habit just to make sure nothing ends up where I don't want it. You can see I've got a lot of seed on there. I would say there's about 10,000 onion seeds there. And the more seeds, the easier because I just shake it over the whole lot and you can see full of seed perfectly precisely. Then again, I line the top corner and the bottom corner up to make sure it's square. And then I know it's sitting in the right place. Pop that. And then we'll have to come in closer to see if we look really close. We see some seeds didn't make it through due to the way they tessellate. So we can just pop them and a quick run over the entire cedar just to check that they all came through. And then if they're really stuck, you can poke them with something like this to just get them out. And then it's always a good idea to check when you remove this. So we close that again and we check that all the holes are filled. But that's beautiful. Much quicker than you could possibly do by hand. And that's gonna look beautiful out in the field. Can't wait for these. Final step is vermiculite. Now, some people don't like to use this. I love it. So all seeds that I plant, I cover with this. It's way quicker than adding more compost. And you get an even covering. And it helps to hold moisture, nutrient up on the surface as plants germinate. That is done. Now, you can do this process in a minute flat. When you get into a rhythm, Then the next thing is to carefully remove this frame. So I like to just wiggle it to make sure it doesn't cause any disruption. That one's good to label water. And away we go. Some people have bigger working spaces, and they like to have a big setup where you can fill up the compost, fill multiple trays at once. That's fantastic. If you've got space for that, I would be doing that myself. We've got a tiny space. You remember, if you follow the channel, we're up here where we're seeding in minus 30 degrees sometimes. So we have a very small space for our seedlings, and we're working vertically with that space to minimize the amount of heat we need. So we've got this tiny heater that basically powers the entire thing. In our extreme cold climate, it's running off the thermostat from the house, so we get heat from the house, too. And we dug down a meter into the ground, as you can see, so that helps buffer the heat. So I like to do it like this because it's minimal energy needed to start our starts. And so therefore, I like to work clean. So between each tray, I will clean up and start again. That's how I like to work. Keep things clean, organized, tidy, and efficient. All right, that's it for another episode, folks. Hope you found that useful and interesting, and I look forward to seeing you in a video soon. Don't forget to hit subscribe and click Notifications Bell if you haven't already. And you can find details on our book and online training in the links below. See you in a video soon. It.
More from Richard


A review of short and intensive season on a mixed farm and restaurant/event space in Sweden






Alskade Kyckling Exploring complexities of poultry production in Sweden and what we stand for


