Descript Tutorial: Edit Videos 10X Faster (2-Clip & Transitions Walkthrough!)
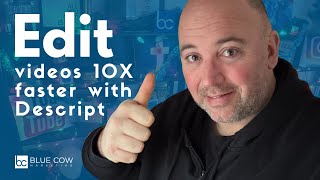
Shaun Whynacht walks through editing a two-clip video in Descript, from importing iPhone and Loom footage to adding transitions, correcting captions, and exporting. He shows how to add end-screens and bumpers, use AI to generate YouTube metadata from the transcript, and create a second version for social media.
Chapters
You know, now like video is one of the mainstream contents that we put out there, one of the mediums, and shooting your video is easy now with your phone. But when it comes to editing, maybe you don't want to purchase a big editing software and you really just don't have the skills to do it in your phone. So I'm going to show you in this tutorial how easy it is to edit your videos and do all the things you need to do with it using a program called Descript. If you want to go down below the video in the comments, I have a link there that'll give you 50% off the first 2 months if you sign up for Descript. So let's hop into the video right now and let's learn together. So what I want to show you in this part of the video is how to use Descript to edit together a 2-clip video. Now, just like this one you just watched where you saw me talking on my phone and now we're doing on the screen recording is exactly what I'm going to show you in here from a previous video that I created. It did the exact same thing. Shot it on my iPhone, then did the Loom, downloaded the Loom video, transferred the video through AirDrop to my computer from the phone. And now we're going to work with that. So let's go in here, we're going to create a new project. And we're going to call it a video project. And we're going to call this one here. This is called GoDaddy delegate access, right? So that's going to be the name of the project. So we're going to hit enter. Now you saw that I could have dragged the files up there. When I do that, sometimes it puts them in the wrong order, right? So I want to have more control over this. So what we're going to do on the project side, if we click project on the right-hand side and we can add the files to it, just like you would with any other editing software, you would add video files or audio files to your bin. This is where all your media is going to live. So we're going to go and we're going to add the two files, which is this one and this one. And it's going to go ahead and put them in here. So now what we can do on the left-hand side is put the order here. It says add file. And you could have done it here as well. You could have done it that way, but we're going to go ahead and pick the first video clip here and we're going to drag it over here. And if I did it up here, it says add the script without transcribing. I want to transcribe this because I want to show you how to put captions on the video. So I'm going to go here and I'm going to drop it in and it's going to start to transcribe that video. So there I am where I'm starting to talk. So if I hit the spacebar down here on the timeline, The video starts. Okay. So what I'm going to do then is at the end of this, I'm going to hit enter. And then it's going to say add file. I could upload that one as well, but I'm going to pick the second one and I'm going to drag it down here with that line. And now we're going to see that there's two clips in this timeline. Now I can expand or decrease the timeline scaling by clicking the end handle on the scroll bar here. Go back and forth and make that a little more manageable. Now there may be some time at the end of the clip, right? And then that could be the beginning of the next one. But I was pretty tight in that. Now you see between it, there's a little— put your mouse over here and it looks like a little hourglass. That's an add a transition. If we click on that, we can go ahead and pick the transition that we want. I absolutely personally love the cross zoom. I'm a big fan of the cross zoom. And then I can do some, you know, durations and all that fun stuff we want there. But this is what it would look like. And it jumps over to there. All right. So we're going to go to the end of the video here. And there is some seconds at the end where I stopped talking. I want to tighten that up. Now, if I put my mouse here, you're going to see it looks like a bracket. That's just an end handle. I can drag it back and shorten that up to where I stopped talking. So just like that. Now that's, that's the clips and the captions can go in next. Now, if you're putting this up on, let's say YouTube, you may want to use the captions that YouTube gives you and you don't want to overlay them on top. But if you wanted to overlay them on top, you click on the clip on the right-hand side, you take captions, and then you can go ahead and pick the captions that you want. Maybe you want this, this lovely karaoke style that you see all the time, just like this. You can go ahead and change all the colors and formatting for that. So, so we'll see that over top. Now, if you're going to throw it on social or LinkedIn or everything, maybe you want to put these, these captions in here for that part as we go through, and then it will crossfade over. Now what you can see here is the contrast doesn't look that great in there for the captions on this one. Because I'm going to be putting this on YouTube, I'm going to not use these captions in this video. What I'm going to actually do is I'm going to export this as a SubRip file, which is the caption file that we can upload to YouTube in there. But you want to make sure you go through and make sure that everything is said properly. If you said names or anything, you can go and edit them in here. I know that this video doesn't need any editing in here because I just recorded it and it was just a tutorial, but you can go ahead and you could go in through this and, um, you know, just edit like an editor, like a, like a text document. You hit backspace and that type of stuff and it will cut the video. You'll have jump cuts and everything, but that's okay. Those videos are actually pretty mainstream now. Now, one thing that I commonly come up against, especially if I'm saying my name, is that it will always misspell my name. It's S-H-A-U-N. It'll come in here as S-E-A-N. If there's a word that's misspelled, let's say delegate, and this one isn't, if you double-click on it, you get some options up here that says correct. So you would hit correct, you'd write in the new word, and you could do correct all. So every time it's misspelled, it'll actually replace the word that's in there for that, right? So that's a way to, to edit those and update all that content along the way. So this is going to be what I would use. Now, what I'm going to actually do is go back to my project here and I'm going to go add file from my computer. And I'm pretty sure somewhere here in my drive, I have an end screen. I think so. Let me just see if it's in here. If not, I know it's in my Google Drive under my Blue Cow Marketing. And we're going to go down to, I think it's in video. Nope. Logo. It's in my logo file here. Here we go. So we got an end bumper, which would be an animated bumper, which would look like this, right? So maybe I'd want that on LinkedIn, right?, or I have my end screen, which is where I can throw these graphics over top for YouTube. So I'm going to go ahead. I'm going to grab both of these lovely assets here. And I'm going to go down to the end of the video, just like we did before. Right. Move my face a little bit. I'll move me over here. And then we're going to get rid of that. And we're going to put in the YouTube end screen first. Now I could have dropped this in without transcribing. Doesn't matter. There's no words in this one. And the same thing as before, maybe I want to put in that cross zoom transition. Remember what we did? We clicked here, we went cross zoom, and then it puts it in there. So now it'll go from this to that for the end. All right. So I need to export two different versions. I need the one for YouTube and I need the one for any of my social stuff that I'm doing. So we're going to export in the top right-hand side. And the first thing we're going to do is we're going to do the subtitles that are over here. And that's that SubRip titles file. So we're going to go export and we're just going to save that to my downloads. Uh, GoDaddy Delegated Access, just so you name it, you know, what it needs to be. And then we're going to go to video. Now by default, it'll do Descript web link. You don't want that. You want to go local export. You can connect your YouTube account and have it upload directly. I prefer to do a local download and save those, uh, along the way. So we're going to go and export this. Make sure you check your resolution. Sometimes it'll set to 720 and sometimes it'll be 480p and all that kind of stuff. One little trick. If you know that one of your clips is, uh, you know, higher resolution and there's a smaller clip in this that's a little less, it will default to the lowest one that's in that timeline. If you're going to export and you don't see 1080p here, it's grayed out. What you need to do is click on this little box up here. Go to other and make sure that you choose 1080p from here. If it's not selected, if it's down in 720, it's not going to allow you to export it to that. So that's a little trick there. If I wanted to go 4K, I could do that. If I know that the footage is going to be that in there, otherwise it's going to be too blurry. But for, for most of what you're doing on YouTube or any social, 1080p is a great quality to export on. So we're going to export and that's fine. We're going to say export there. It's going to pop up. Where do you want to save it? No problem. We're just going to put it in the downloads and you're going to see it's starting to export down here. Now we're going to let that process and then I'm going to show you what we also do for the transcript side of it. So that's going to export in a minute and I'm just going to pause the video and come back once that's done. Okay. So that export only took a minute or two. Now we're going to go ahead and export the transcript. Now you can choose to export any of these different documents that are here. And actually download the physical file. If you're going to be taking this and putting it into ChatGPT to maybe write your descriptions for YouTube and everything, you don't need to actually download the file. If you choose plain text TXT here, you can just go copy to clipboard and now you're able to go ahead and put it into, um, you know, any AI tool. All right. So I'm just going to show you here. I'm going to go back here and I'm going to go to Gemini because I like Gemini. And I'm going to say, take this video transcript and write the YouTube title and description based on it. And I'm going to paste that in there and it's going to do its thing. Now we're not going to go here and look through all this and do all the uploading. I just wanted to show you how it would just take that and be able to go ahead and put that information in there. So like I said, I did this one for YouTube. Now what I'm going to do is I'm just going to delete that by clicking and hitting delete. And then back over here, we're going to pick the bumper, the animated one, and I'm going to drop it over here. And it's going to go in and it's not going to transcribe it anyway, but we also have to go through and do that crossfade, cross zoom in there. So now when it ends, There's our logo and brand. We're going to export that video as well. And in this case, I'm just going to throw social in the beginning, just like that. And we're going to download that video. So hopefully this tutorial has helped you understand how to do some quick edits and everything. We're going to do more as we go through and learn together more features to make it easier to, to edit your own content, create your own content, and use tools like Descript to do this. It's a great tool. It can do a whole a lot more things that we're going to discover together. So if you have any questions about anything I showed you in this video, as always, hop down in the comments, put it in there. I'll do my very best to reply to those comments and answer your questions. Make suggestions about things that you want to know as well. And as always, if you found this helpful, please hit that like and subscribe button. If you want to be notified, ring the little bell as well. Thanks for watching.
More from Shaun


Julie Vanexan recognizes Shaun Whynacht from Blue Cow Marketing at the Nova Scotia House of Assembly








