EhSpeakers Monthly Tech Tutorial: Canva, Podcasting & AI Tools for Speakers, Trainers, and Coaches
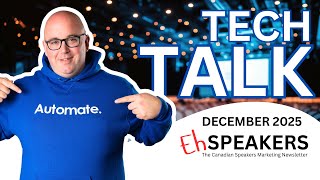
Shaun Whynacht walks through tools he uses for his speaking business: Canva for YouTube thumbnails, Squadcast and Descript for podcast production with automatic transcription, Superhuman for email management, and GoHighLevel for CRM organization with clean tagging systems.
Chapters
Hey, it's Shaun here from ASpeakers, Canadian A. Well, this is the first episode or email or video blog, whatever you want to call it, to this newsletter. This is a concept I came up with because I absolutely love technology and I love teaching people how to use technology to not only market their business but also improve their own productivity so they get more time to do the things they love, and that could be anything. It could be exercising, it could be, you know, doing some cool artwork just like that. It's a picture my son made, we absolutely love it. We actually put it on a mug, but anyway, what I decided to do was instead of writing out this long email every single month is we're gonna do a YouTube video every single month, and you'll be able to go through this video. This is the first one, and I decided to put one out before January because you just signed up for this newsletter and I wanted to get it to you. There's so many things that I've been using, that I've been doing for my own workflow, for my client's workflow, that I know you as a speaker, trainer, coach, whatever it is that you're doing, would find value in it. So it's all about your lifestyles, although getting more time back. So let's do that. Walking into my office, my home office right now. I don't know if I should show you this, but boom, love Christmas. There's all my stuff right there in the background. So I'm going to hop over the computer and we're going to go through some different things. We're going to talk about some Canva tips. I'm going to tell you some video tips, some podcasting tips, uh, some of the software that we use. So go ahead, either watch this video all the way through because you're a trooper and I know you're probably going to want to do that. Or if you want to skip through the different chapters in this video to get to the exact thing that is important to you, go ahead and do that. Anyway, let me know in your comments if you've got any questions about what you see coming up, and I'll be happy to answer those. So let's get right to it. This part, we're going to talk about Canva. I'm going to show you a technique in Canva that I use quite a bit, and it will actually take your images that have yourself in them to a different level, whether you're making YouTube thumbnails, which are absolutely crucial, or you're doing episode graphics for your podcast or anything along the way. All right, so let's jump in here and let's get started. And hopefully you understand what Canva is. If not, I don't know where you've been living because this program is absolutely a powerhouse. It has actually replaced my use for Photoshop that I've been using for many, many years. So what we're going to do first, if you don't want to use the templates, right? So if you go into your search here, you can go and search for templates as well, and you get a lot of different cool templates that you can start with. But you know what, one thing I've learned is, is if you start from the ground up with a blank canvas and you make things look great, you're going to become more skilled at this. So let's go ahead and we're going to create something here. So we're going to do, let's say, a YouTube video thumbnail. So we're going to create a custom size, and we know 1080 or 1920 by 1080 is the HD version size of video. So 1920 by 1080 pixels is in here, and that's what we're going to do. Now, you could always just look up video, and they do a great job of telling us that. So we're going to go and we're going to create that canvas. Here we got it. We got a blank slate. Now, what I'm going to do is I'm going to go to my upload section, and I'm going to look for myself. And we're just going to search here to see what comes up. So I'm going to take this photo— me in a suit. You don't really see that too often. Normally I'm in that hoodie that you see there. Shorts, if I can get away with it, because shorts are awesome and who doesn't want to wear shorts all the time? So here we go with this. So let's say I wanted to go ahead and turn this into a YouTube video thumbnail. So I got a photo of myself on here and we're going to throw some text in here. Now we're going to have other videos in upcoming months. We're going to get into all the different tools and how to make the text stand out. But for the sake of this video is we're just going to go and put a headline in here and we're going to call it Shaun's awesome YouTube video, right? Pretty, pretty, for lack of a better word, pretty bland, pretty crappy, right? We don't really want to have that like that. So what we're going to do is we want to put this behind me. Now there's different parts of Canva where things can be layered, right? And depending on which program you use, on a Mac I would use, you know, the Command and then the the box bracket, I call it. It's above the return button. But if you hold down the Command and hit the left one, it'll go behind. But the problem is it's going behind the image, right? Back and forth and back and forth. I want it so that I'm standing in front of it, but it's on the background there. All right, so what I'm going to do first is I'm going to position my background where I want it to be. So I'm going to move it so that I'm off-center a little bit here. I'm going to show you a couple different techniques as we go through this. So I do that and I pull this little handle pull out, it's actually going to pull it out to the width. And then I can go down here and I can just play with this a little bit to kind of get that full effect that I want. Now my head's being cut off, so we're going to play with that and bring that up there and just la la la da. There we go. Okay, so we got some room for text on the right-hand side and we can pull this in and it still doesn't look that great. So here's what we're going to do. We're going to click on the background and we're going to duplicate it, right? So we're going to have two versions of it. So we're going to put that back there and we're going to use this amazing tool called the BG Remover. And if you're a smart cookie, you know that stands for background remover. So we're going to click on that. All the magic wizards in Canva are going to do their thing and boom, it's done. Now you may be saying, Shaun, nothing happened. That's because you didn't see the magic happen. You're not supposed to. But if I click on myself, watch this. I'm cloned. Look at that. The background's in behind, which means if I line myself up perfectly with the image in behind, I could now go ahead. I'm just going to— now this is the other thing too. There's still a layer over top, right? So it still thinks that the file is that big, but I'm going to pull the handles in here and just crop it so that I can grab this text behind. Now we're going to have some more fun with this text. Right. We're not going to call it Shaun's Awesome YouTube Video as all one font. I'm going to get rid of the video part and I'm going to blow this up. Right. Just like that. I'm going to use some of the cool tools here to make it a little more, um, larger here. And now I can go into the effects and I can do some other fun stuff, right? Can make it look like this. And so forth. You know, do whatever you want with it. And, you know, maybe I want to go and do it this way, right? I want to, you know, make it that way. And then I can use some of the tools of space. Now, if you see me do some stuff and you're like, hey, I don't even know how to do that, don't worry, don't worry, and it'll come, right, with time, to Grasshopper, right? So all about contrast and things. So we want to make sure that No, we really make it stand out. So maybe we're going to put an outline on this and choose the color, right? We're just going to go and use some red or whatever. Actually, let's, let's go ahead and use some blue because, hey, you know what, we're Blue Cow. And see, when I do that, it kind of goes in behind me. That starts to make it stand out. So now what I'm going to do is I'm going to go and I'm going to say, and we're going to go in here, it's going to call YouTube video. And maybe I don't want to have it blend in like that. I'm going to go and grab an element in here. I'm going to grab a shape. Um, and we could go ahead and just do this, pull this out, make it seem like that, blow this up a little bit more, right? Maybe we want that to go behind me. Oh, it's in front. Why? Oh, right, because it's layered. Command arrow. Oh, hold on, click off it here. We're going to bring it in behind. So now we're doing some cool stuff with that. Now we want to make me pop a little bit more and maybe I want to put a little outline around me, around my head. Now here's the other thing that I've learned. You can use these strokes here, but here's the problem. It puts it on the actual box, right? You don't want that. How do you put an outline around a cutout image? Well, the trick is that what you're going to do, you're going to go to Edit, Once you have that, and you're going to go to Shadows. Now you got some options in here for shadows, right? You could do a glow. Now the problem is when you do some of these effects, it shrinks it down. You do have to blow it back up. But we're going to go and do an outline here. And now we can choose what kind of outline we want. Maybe we want it to be white and the size, maybe drop down the intensity. I like it being that way. All right. So now we can just have some fun with that. All right. Now for the sake of this, I just wanted to kind of show you the functions of the layers, right? You know, I wouldn't probably publish this one yet. I'd still want to do a lot more with it. So that's one thing you can do. The other thing that you could do is I can actually go here and get rid of the real image that's in the background. Oh, not that one. We'll do an undo. Let's get that out of the way. We're going to click on this. We're going to get rid of that background. That's there. So now we've got me. That I can really put myself anywhere because the background's not there. So what we're going to do is we're going to go and we're going to go back here. We're going to look for something fun, right? So maybe it's going to be, um, you know, um, conference room, uh, conference event, just because we just had caps and everything like that. Uh, let's do conference event empty room. Oh, not tomb. You're like me, every time you're doing a video, things— there we go. So let's just do that one. That's kind of cool. It's kind of funky. So we're going to drag that and blow it up. And now we're going to go and do the layers. And now we're— we've got the chance to now play with this a bit more, right? So we can move stuff around. So that's the part of Canva I just wanted to show you in this part of the video, is the ability to go ahead and take an image, cut yourself out if you want the original background that's there, right? You don't actually have to keep the duplicate background. Background if you wanted to do something like I did here, right, and cut yourself out and then put the text in behind. When you're seeing some of this stuff, the, the larger the word and the least amount of characters, the better it looks in behind, right? So what I mean by that is if I get rid of all this, and this is Shaun's awesome, a lot of characters, right? We could say, um, Speaking. Oh, come on. Speaking. Okay. So we're going to go ahead and we're going to pull this in just to get the crop and then pull the corner. Now we're going to pop that in there. Copy. Tips. Tips can be even bigger. So we can pull this in. We're going to do that. And now we can pull. Let's see how that works. So I can kind of lose the tips in there a little bit. I don't want to see it like that. Speaking can be a little bit smaller, right? You know, something like that. Just have some fun, right? If you want to do a video on speaking tips or what— whatever you want, right? You're the expert. But, but this is how you can start to use Canva to, to do some of the work that you do. Within the platform. So let me know if you have any questions about this one right now below the video or in the comments to this video. And what we're going to do is we're going to hop over to a different platform. So now I want to talk about podcasts. Now this doesn't necessarily always have to be just for podcasts. This could be for training videos or anything like that. But podcasts are really something that this platform is used for. This is called Squadcast, and Squadcast was an independent software until it was acquired by a company called Descript, which I'm going to be showing you after we download the video clips here in this platform. What Squadcast allows you to do is record these live recordings, right? Just like you would in Zoom. Now here's the difference. How Zoom works is each camera of the people that are in that meeting or recording are streaming their video and audio to the servers of Zoom, and then Zoom is recording on their side. This works a bit different. This records on the local computers of each person that's there with their video feed, but it's uploading at the same time. What that means is at the end of the recording, you get an extremely high recording of each individual camera that now you can go and work with in your editing software. So what we're going to do here is we're in one of my clients' accounts and we just list a bunch of the podcasts that they've done. And I'm going to show you how this works. So we're going to go into this one for Susan Reed, uh, and my client Wendy, uh, does her podcast. So as we see here, there's a breakdown for Wendy's video feed and one here for Susan, but we can go and we can say, okay, click here and we can download. Now it allows you to download the high-res MP4, WAV file or an MP3 in there. What I like to do is, even though we're doing a podcast, we're also taking video clips from it. So we download the MP4 of each of the cameras. So we're going to take one from Susan and one from Wendy. So now they're being downloaded to my computer. So what we're going to do now is we're going to take this and we're going to hop over to Descript. So just give me a second. We're going to flip the app here and we're going to load up Descript. Actually, we're going to wait for these to download. You don't need to sit here and wait for that. We're just going to pause the video because that's what technology allows us to do. All right. And we're back. Took a little bit for that to download. Just a little transparency. I went and ate some wedding cake. Yes. Got married in October and thought out some of the cake because we had a hankering for some cake. And yeah, that's what I went and did. Guilty. So anyway, let's hop in. We're going to look at Descript here because In my opinion, if you are creating content for yourself, right, if you're able to record video or need to record video or audio, there are two programs that I think are absolutely crucial, especially if you're publishing your videos on YouTube or doing your podcast. And that is Descript, which I'm going to show you here. And it's, it's a very powerful tool that over the course of the upcoming months, we'll be also talking about Descript. In, in more detail about what it can do for you. But today we're just going to show you one of the features that's in it. All right. Oh, and Canva was the other one that's there. So if you don't have either of those, in the description of the, the video and also in the email, I'm going to put a link to my affiliate code. Hey, you get a couple bucks from it or whatever. Sign up that way. It's great. Doesn't cost you any more than you would normally. So what we're going to do here is in Descript, we're going to go and we're going to do a new video project. And I love these, these things that are allowing you to just drag things over, right? So we're going to go and we're going to grab the two files. So here, hopefully you're seeing this. Hopefully I am sharing the whole screen. It would suck to get to the end of this and not be doing that. So we're going to drag this and just drop it into the application. So what it does is it goes through and also transcribes the videos, right? Which we then can use for other content. So we're going to go in here and we're going to say, okay, let's name that speaker. So this is Susan. This is going to be key for part of our workflow that we do, just so the software knows who's who in the zoo. So we're going to say combine into a sequence. And what it's going to do is now it's going to go ahead and it's doing all its little magic wizardry here, but now it put them side by side in a video. So I can go ahead and click on this and I can double-click and I can go ahead and crop it down just like this. And then, you know, pull it back up. So, you know, headway, it's a little better there, just like that. I can move them around any way that I want within the screen, but also it allows me to do things like save layouts. So I have a saved layout for this podcast already, which I'm going to go here and I'm going to create— or not create, I'm going to change the, what's called the layout pack. I'm just going to show you how quickly this changes. We'll do videos on how to create these later, but I'm going to go down here and see the different layouts that we have for this client. We're going to say this one here, and we're going to change that layout pack. And there it is. So it puts the podcast logo and it has a spot for the title at the top. That's here. And we can obviously click on this and change it. If we want to caption it, we can once the transcription runs. Now the transcription, because of the length of the video, can take some time. Give it a few minutes for it to go through and do its thing with that. So what we're going to do with this is be able to export that as a video file to YouTube once we've got the right title in there and everything. I use ChatGPT and I create different projects for each client's project or client and then lock it down. And we're going to do some ChatGPT stuff in future episodes as well so we can see how this all comes to play. You stick with me, you stay here. Hey, go ahead and subscribe also to the YouTube channel. I know you got this probably because you subscribed to the email, but let's subscribe to the YouTube channel as well. And let's get this, get this rolling and, you know, help grow, grow all the content. All right. So there we go. As that happened in front of our eyes, we have this whole transcript that's there. Now there's also a timeline down below, so we can bring this up and we can do things like, you know, pulling, you know, clips. And what I love about the editing in here is if you want it to get rid of something, so maybe, you know, you're listening along, spacebar, right, and it plays the audio. I don't know if you're hearing that, but if you highlight the text and go Delete. It just deleted that video and audio from the whole project. So that's one of the key things in Descript that people absolutely love is the ability to edit their video and content from the transcript in here. Right? So go ahead and you can do all that. You can change all the content. The other part is we then would then export. Just the audio. So we can go here, local export, export as a WAV file, and then we can go ahead and put that into any kind of audio editor if we want to do anything outside of it. Or we could actually edit our podcast in here as well. If you wanted to do things like do some reels, you could go ahead and change the landscape of this from landscape to portrait, right? So now we have this layout and we'd have to change some things. So we could go ahead and change this to a different layout pack and we could go and say, okay, here's the real one that we've created. So we're going ahead and change that. And now it's pulling in that. And here's the, the captions that would show up. On the video, and we could have reels that we could work with in here. So that's what we absolutely love about this tool, is now we've got the independent video clips that are in there to allow us to do certain things that we want with it versus uploading it to the Zoom, and then you actually only have one video file that you could work with. Like I said, there's a lot you can do in this. We're only scratching the surface because I wanted to show you the difference between using, you know, a Zoom recording or using something like Squadcast and bringing them into Descript. So if you have any further questions about this part, please put that in the comments too. And then I can dive even deeper into that because we could do a whole masterclass on how to use Descript for your content as well and all your different production needs. There is a part in here that under the AI tools, if the audio in the clips is not that great, you could go ahead and click on it and you could do studio sound and apply studio sound. So if it's a little hollow sounding or a little bit of an echo, it actually will make the audio file sound like you're in a real studio with a real studio microphone. How cool is that? Now lastly, the last application I want to show you is in regards to email. Now I've used lots of different email tools over the years on the Google ecosystem, and I do still love the, the Gmail login platform inbox. But when it comes to emails getting missed and everything like that, it happens. It happens quite a bit actually. So I started to use an email program called Superhuman. Now, if you've already used this and you've vetted it and, and you know whether you like it or you're currently using it, then you would be able to just skip through this part of the video. So what it is, is it's an email management inbox. So I connect my Google emails to this, but it really goes and does a great job at a simplified platform, but has AI elements built into it. So we've got an important inbox, we got our VIP, we got our calendar, and we got other. The goal is to get to inbox zero. So it uses keyboard shortcuts along the way. And if you've got something like a Stream Deck, you can actually program the keyboard shortcuts, the buttons for things like, um, like, uh, deleting the message, forwarding the message, uh, things like that. So what I find the best about this is its ability to bring in your important inbox, all the emails that really essentially are the ones you need to respond to. And then you can make some of your contacts VIP. So you can go ahead and put them in there like that. Any of your calendar stuff will show up in here. And then all the rest are under Other. All right. So when we go ahead and, you know, hit C to compose, just like this, you can go ahead and send a message to anyone. So I can go ahead and put myself in here. Subject line, hello. And then in here, I could go ahead and hit Command J if you're on a Mac, which it knows I'm on a Mac, or I can click this AI button. And this is the part that I use all the time, especially on the mobile app. So in here you can actually tell it what you want it to write. So it could be, um, write a message to set up a time to meet next week for coffee. And what it's going to do, it's going to go ahead and write that message, and you can do other things to improve it and rewrite in your voice and all that kind of stuff and send it. Doesn't seem too impressive on the composing side on a blank message, but where it comes into play and really saves you a lot of time is when people have asked you a question. All right, so for example, let's go here. Here's a client whose web form, they said, you know, one of the submissions hasn't come through in there. Now I can go ahead and spend the time to say, okay, you know, yes, I'll look into this, but I want to respond a bit better. So on my desktop, when it's up, I just hit enter It goes into reply mode, and then I can hit AI and say, let him know I'm looking into it. Now, that's pretty quick and short, but what it will do is it knows what it is. It'll bring and it'll make it a bit longer. It also knows the entire thread, so it can reference— if you're going back and forth, it can reference things from previous emails that you had sent or received from that client, which is actually pretty good. Now, if it doesn't do a great job of it, you can actually ask it to do a bit more, and it will then go ahead and remember that in the way that you work with it. The other part is if somebody says, hey, can we meet next Thursday, it will automatically know that from the email, and on the right-hand side, it'll bring up your calendar and tell you when you're available so that you can go ahead and in the responses you can say, hey, you know, let them know sometimes I'm available next week, and then it will go ahead in your calendar and pull that all in to the entire system, right? Which is, which is pretty powerful. So there's sending options for sending and marking done, and then there's smart send. As you start to email your contacts, we know that it's crucial that you want the inbox to— or the emails to arrive in their inbox when they're most likely going to be opening them or checking their email. Well, it will start to monitor when they're opening the emails because it is checking for that. And you can use Smart Send and say send to the client when they're most likely to open. So in this case, Fred opens his emails usually around 5 o'clock. So it knows that, and I can say Smart Send, and it's just going to schedule that and hold it until that time comes to go ahead and, um, send out that message for them. So one transparent thing about this, when I first started using— I've been using it for about 2 months now— I did find it a bit of a learning curve of how the platform works. Once you get through that and you understand the shortcuts to the emails, you can go through your inbox extremely fast, saving you a ton of time. I can honestly say probably cut about 60% of my time in my inbox off of my day by using this platform versus going through Google and everything like that, just from its sorting and being able to get to those important messages. The AI replies, the smart sends, and I don't know, I don't know if it's something about how it's delivering at the right time, but I get a lot more responses from emails that I'm sending from this than just out of a regular inbox. Now, lastly, before we wrap up this entire initial edition of ASpeaker, I want to talk about naming conventions, and this is more so around your CRM. So most CRMs have the ability to use tags, and tags are like labels that you add to a contact to start to segment everything. This is where your, your entire CRM can start to get, you know, pretty gnarly by not having proper naming conventions that make sense. Okay. So what I'm showing you here is in our template account that we use when we are setting up new speaker accounts within our client connector, which is GoHighLevel in there. So what we're seeing here on the screen is a very clean organization of tags. So for example, active in nurture. My belief is that every tag that you look at, you should be able to know exactly what it is and what it means. So active in nurture. Means that that contact is active in a nurture sequence. Invoice, 15+ days overdue. Pretty self-explanatory. Speaking, cold lead, nurture, active. Speaking, cold lead, nurture, completed. Speaking, hot lead, nurture, active, right? And so forth as we go down, down the line here. Welcome, introduction series, active, completed. I like these vertical lines versus the dashes in here. Just keeps things organized. So look at your tags. If you've got a CRM and you can clean them up and make sure that if you look at that tag and you're like, I don't know what it is, it's probably either not needed or it's not named properly. So go ahead and give that some thought and also come up with a naming convention for yourself and your team moving forward. What I like to do is basically if we're doing any type of workflows in there is going in, you know, what's it for? What part of the business is it for? So speaking Maybe you're doing consulting, so you could have one for consulting. You know, what type of contact? So it's a cold lead, hot lead, warm lead. What are they in? Are they in a nurture? Are they in a sales cycle? Are they active in it? Have they completed it? Those type of things. That's how we take a look at tags, naming conventions, so they keep your database, your CRM clean and useful for yourself. So, um, please leave a comment, leave a question with this video. This is here to help you along the way, and be looking forward to putting together the next video coming out in January.
More from Shaun


Julie Vanexan recognizes Shaun Whynacht from Blue Cow Marketing at the Nova Scotia House of Assembly








