Shaun Whynacht shows how to set up Facebook custom audiences using pixel data, then boost a post to reach them. Create audiences from customer files, website visitors, or page engagers, then target by age, gender, location, and interests while tracking conversions.
Chapters
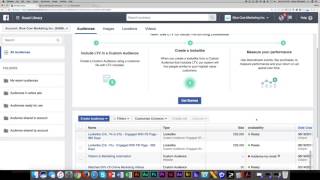
Once you have your Facebook pixel installed, you'll be able to go back into your ads account under pixels and see here that your pixel is actually installed and working because it's gonna have a green dot. It's gonna tell you the last time some data was received. So at the time of shooting this video, the last time that my pixel fired on my website was 60 minutes ago, and you can see here on this breakdown chart how many times that pixel had fired, which means that there was some activity. So somebody went to a page and clicked around and so forth, and it actually fired that pixel and gave us some data. So what we can see here down below under events is, you know, some page views— viewed the home page, viewed the about, um, you know, viewed one of our training libraries and so forth. So we can see some data here And this is over the last 7 days. We can also see some of the URLs that were viewed and so forth and how many times they were viewed on our site. And how we really leverage this is we're able to then create what are called audiences. Now an audience is a group of Facebook users that are a collective of either a set demographic or they have done a certain action. So we're gonna go ahead and we're gonna click either Create Audience here, or under the top menu we can go to Audiences. So either place will allow you to do the exact same thing. So once this loads and it brings up the audience section, we're gonna create a very basic audience because there are so many variations that we can do that it would just take an endless amount of time in a tutorial to actually do that. Now you're gonna notice that there are some custom audiences that I've already created in here that we use in some of our marketing and promotions. So we're gonna do is we're gonna go down to Create Audience and we're gonna drop it down and we're gonna create what's called a custom audience. So we're gonna click on this. Now we've got some options and I'll explain these for you. Really only 3 of these 4 will relate to you. So a customer file, this would allow us to upload a CSV, which is an Excel document saved in a format called CSV, comma-separated value, that contains either a list of email addresses or a list of phone numbers. And this can be exported from a customer list or a newsletter list that you currently have. And what it will do is when you upload this, Facebook is gonna then start to do the matching game. It's gonna try to match those email addresses with users who have a Facebook account. They're also gonna match phone numbers with users that have the Facebook account. Account. And in most cases, those are gonna be the actual people that you have that information from. So then you have an audience of this. So keep that in mind that you can market to your newsletter list and you can market to your customer list. So that's one thing you can do. Website traffic— so this is using the Facebook pixel that we just installed, or you installed, or your web designer had installed, and allows us to pick different specifics about what they're doing on your website. That's what we're gonna actually do. And the last one in here that pertains to what you're doing is engagement on Facebook. So allows us to create a custom audience based on people who have engaged with your page, have watched videos that you've posted, and you can even break it down to watch, you know, less than 3 seconds, 10 seconds, 50%, 90%. It's endless, the criteria that you would be able to do. So let's go ahead and click on website traffic here, and it's basing it on the Facebook pixel, which is what we have. It's going to say all website visitors in the last 30 days, so we can do that. We could do people who visit specific web pages, visitor time spent. You know, this is from our events, so page views, visited homepage, visited a post, visited different pages, sales automation pages, CRM pages. These are actual pages that are on your website, so your list would be pertinent to what's on your website. Um, you can go ahead and, and pick that information, but we're going to say all website visitors in the last 30 days. Let's make it last 60 days, and we're going to call this all website traffic 60 days. And we can go ahead and create this audience. And it could take up to 30 minutes for audience to get ready to use, and that's okay. And then we can go ahead and click Done. All right, so here it is here, and it obviously says too small because it's got to analyze some of that data that's coming through. Once we have an audience For example, here I have, let's find one here. So we have Blue Cow CRM prospects. So this is a list of people that we have uploaded to Facebook and they are a CRM prospect list. So we can then go ahead and take this group here and we can create an ad and promote to them. And we'll do that in a future training video. So that's how you can create audiences and leverage their actions to then have a group of people to run promotions to. Now let's go ahead and look at one of our ads or one of our posts and how do we boost it. So let's say it's this one here that we did in a previous training. We come down and we're gonna click Boost Post. Now it's gonna pop up and it's gonna allow us to then start targeting those people. So by default, it's gonna be our target demographics we set prior. We can click Edit, and what we can do here is we can start to pick a new criteria to target to specific ages, men, women, where they're located, what their likes are, and and so forth. It's going to tell us how broad and estimated reach of those people. We can also then see all of our audiences that we have created. So once you create those custom audiences in your ad account, you'll be able to see them here, choose them from that list, and actually boost that post to them. Now, if you don't want to get overrun with costs and worry about overspending, here's where you set your budget. Now it's going to base it on the amount of fans you have, and it can be as low as a few bucks right up to, you know, a couple hundred bucks. The less you choose, the less potential reach you're gonna get based on that audience. Obviously, if we bring this up to $200, we are going to then potentially reach more people. Even though that didn't change, it should change for that. So choose the audience budget that you want. I I think it changes here, $490. Yeah, okay, it does change. So from $2,900, and it will change here down to $490 to $1,300. And then you pick your duration and how long it will run. And if you want to track conversions, and a conversion is somebody who has done the action that's on there, so if the link to your website, the pixel will pick that up and say that you've converted that ad. So you can see the cost per conversion and the cost per click and the cost per view. So we could turn that on and everything will work just fine. You're gonna click Boost. It's gonna go through an approval process with Facebook to make sure that you're advertising legit stuff and you're not creating spam and so forth and it's relevant to your audience. Once it gets approved, you'll get a notification and your ad will run and the money will then obviously go down until it depletes that budget and then you will get charged to that payment device whether it's PayPal or credit card for that amount of the boost post.