In this tutorial Shaun Whynacht from Blue Cow Marketing walks viewers through the process of confirming that a Facebook Pixel is correctly collecting data. He starts by directing users to Facebook Business Manager, then to the Events Manager where they can locate their pixel, view total event counts, and examine detailed event data such as page views, URLs, and domains across multiple sites. Shaun demonstrates the built‑in View Analytics feature, showing how to analyze traffic by date range, day‑of‑week, and hour‑of‑day, create filters, and build custom dashboards to surface the most relevant metrics for e‑commerce or content publishing. He then introduces the Facebook Pixel Helper Chrome extension, explaining how to install it, verify pixel firing on a live site, and inspect individual events and custom conversions. Finally, he explains the purpose of custom conversions—defining them on specific thank‑you or confirmation pages—to enable more precise ad optimization in future campaigns. Throughout, Shaun emphasizes why each step matters for ensuring accurate tracking and making data‑driven decisions about ad spend and content timing.
Chapters
Hey everyone, it's Shaun Whynacht here from Blue Cow Marketing. In today's video, I'm going to be diving a bit deeper into Facebook Ads Manager and showing you how you can see if your Facebook Pixel is actually bringing data into your account. Now, why would you want to do this? Well, you know, when you first start and you get your Facebook Pixel installed or you have somebody installing it on your site, you want to make sure that the data is actually working. So I'm going to show you a couple of things here to help you out. So first thing is, where do you find your pixel? So I am in Facebook Business Manager, and if you are a business and you're using Facebook for advertising, I highly recommend you go to business.facebook.com, create that free account there, and connect your profile and all your accounts so that you can manage it here. You're going to have a lot more functionality and flexibility within this platform. So we're going to go to the top left, and we're going to click on the 9 dots up here, and we're going to go to Events Manager. Now, if you open your account and it breaks out across the screen with a bunch of different links, that's because you're in an older version, and that's okay. You're still going to look for Events Manager or Pixels, whatever shows up. Once we get in here— now, I have multiple accounts that I work under, so I am just going to keep switching these back to my company agency account. So in here, we're gonna then see the different pixels that we have. So I'm gonna go under my Blue Cow Marketing master pixel. So if I go ahead in here, first thing you're gonna look at is do you have total events? Do you have numbers showing up here? If you do, great. Top right-hand side, it's gonna let you know the last X amount of days— today, yesterday, 14, or 30 days. So this is a good sign when you've got the, the actual events happening here. But let's dive a bit deeper. So when we go into the pixel, what we're going to see then down below are the different, what are called Facebook pixel events. So by default, if you just have the pixel installed, it's going to show up as a page view. Then you can create other events throughout setting up your pixel and more advanced. We're not going to get into that part of it today, but in most cases, page view is where you're going to see most of that activity. So in my case here, all available days, 798 coming through there. Okay, now if we go ahead and we click on view details, we're going to get a breakout here. Then down here it says tracking type. If we break this out and say URLs, now it's going to show us all the different URLs that our pixel is on and the different events that were fired. Now by events we mean every time somebody has viewed a page, that is considered an event. We can also look at the domain. So if your pixel is installed on multiple domains, so for example, our pixel is on our Blue Cow Marketing, it's on my personal website at shaunwhynacht.com, it's on an advertising site, it's connected with our HubSpot, and it's on a site viewer site here. Okay. So if you want to see where your pixels are firing from, which domains, you can go ahead and check it out here. Just to make sure. Now let's just close this. Now because I have it on those different sites like my website, my advertising site, and my personal marketing site, if you go over the left-hand side, there's a link here that says View Analytics. Now we're all familiar with Google Analytics being able to tell you the traffic on your site based on the pixel that's there. Now the difference with Google Analytics is you have to go between accounts for different sites that you have. Now, if we go in and we click on this, this is a combined collective of all the analytics based on your pixel. So if your pixel's on multiple sites, you're going to see analytics for that. This is great if you've got sub-brands that you're using, or maybe you have a, a different site or a different install of WordPress for your blog versus your main site, because now you're able to go in here and and get a lot more clarity on what's happening. The biggest thing to always take into account is what date period are you looking at? So in this case, right now we're looking at the last 28 days.
So we can see new users, unique users, retention rate, uh, median session length.
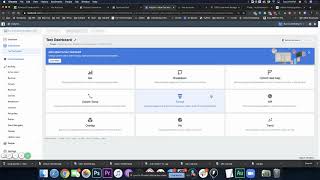
Uh, and then there's a bunch of different stuff by sources, social networks, and things of that nature. Okay. Now we can also add different filters. We can create a new filter. You know what, when do people perform a certain event? Now in my case, I don't have other events set up here because I don't run any commerce, but if I did have an e-commerce site, I could actually go in here and say, okay, performed a purchase. Okay, one of these would be purchase here, um, that would be set up and you could see of those people, when did they purchase? Okay.. But in this case, we're just going to keep it as it is. Now, here's an interesting thing to look at. This metric here for engagements based on hour, it's broken down left-hand side by days of the week and then hours of the day. The darker the time, the more engagement or the more times people are on your site. So in my case here, in the last 28 days on Monday, I've had the most engagement between 7 AM and 10 AM in the morning. Tuesday, 8 to 9. Okay, then it moves here. Now, for some reason here at 6 PM on Thursday, I've had really the most engaged here. Now, if I was going to release a post or launch something or, um, promote a blog or podcast or anything like this, Based on this information, it's best for me to launch because of my audience in the morning on Monday, based on this information. Okay, now looking at this, we could say 10 and 9, that's 19. Now we've got 10 and 8 and 8, so there's what, 26? So you can do it on either one of those. Okay, I'm not sure why this one here is such an outlier, we could go ahead and click on View Full Report, and then it's going to give us more details based on this. You also have the option to break down on the left-hand side. Now, for our clients that are in e-commerce, you're getting a lot more data based on products purchased, revenue generated, things of that nature. So you can really take a look at a lot of this. If you're doing a lot of Facebook advertising, then you can see really when are people coming to your site based on that information. You've also got the option to create other dashboards in here. We can go ahead and create a name for that dashboard. So I'm just going to call this Test Dashboard.
Create that.
And now that dashboard allows us to go ahead and break out different elements and build the data metrics we want to see within our analytics. So there's a lot going on.
Now let's take a look at another tool, which is the Facebook Pixel Helper. That is a Chrome extension.
All you have to do is just, you know, go to Google, do a search for Facebook Pixel Helper.
They come up.
Here it is.
You're going to quickly install it.
Now let's go ahead and go to my website.
I've got it installed and we're going to see it.
It's in the top right-hand side right here is the icon.
So when you go to a site, you're going to notice that it's going to light up and it's going to give you a number beside it. What this is doing is it's telling you that there is a Facebook pixel installed here and we can go ahead and click on this and I can see what events are being fired on my pixel, right? So here's my pixel. I can see there's a page view that's here. There's, um, some microdata that's showing up here, and there's a website view event, which I've got set up as a custom conversion that is generating in that lead category. Okay, so we can set up what I call custom conversions and see that information. Okay, now that is really helpful information. One, for the reason of testing. So if you build landing pages, you want to make sure that your pixel is firing and your conversion information is actually showing up. Now quickly, before I end this video, talking on the point of custom conversions, if we hop back over to our Facebook Pixel page under the Events Manager, we're going to see data sources, which is the Pixel, and then we're going to see custom conversions. Now under my Pixel, I have different ones that are showing up here. Okay. Now what a custom conversion allows us to do is is say, okay, when somebody hits a certain page, let's create a custom conversion. This is helpful when somebody does things like scheduling a consultation or opts into a lead magnet and hits a thank you page. This will allow you to then use that custom conversion for optimizing ads in the future. For example, when you create a lead generation ad, you want to, or a conversion ad, you want to tell that Facebook ad that when somebody actually completes this, they are the ideal type of person.
Why is this important?
This is extremely important because if you are picking an audience in Facebook that, let's say, is a million people in size, if you're basing on the entire country and you narrowed it down, it gives you a million people, and you want to target people to get conversions, Facebook is not going to show your ad to all 1 million people. It's going to start to then narrow it down based on people who have shown that they have converted in previous actions in the past in their historical data. So it's going to start to show it to them. When somebody takes action on it and they actually complete that conversion, meaning they go to your landing page, they put in their information, and they opt in, Then it's going to say, okay, this has— person has completed a conversion. This is the type of person we want to have. Now, Mr. Pixel, use the Facebook algorithm to narrow in the audience a bit more based on the details of this type of person. Okay, so your pixel is always trying to become seasoned, smart, educated, so that over time when you launch new campaigns, when you're putting out new information on the Facebook Ads network, it's gonna give you better results. So it's key to set up custom conversions for things of that nature, okay? So what do you take from this? Make sure your pixel's installed, you know where to find that data, you know where to check to see if it's firing using the Facebook Pixel Helper, and if you're doing any kind of opt-ins, make sure you set up your custom conversions. This has just been a basic lesson into Facebook Ads Manager and your pixel. We're hopefully going to be making more of these videos, so go ahead and subscribe to our YouTube channel to get notifications of our next video when we put it out. And if you want help with your Facebook Ads account, or even would like to just have a consultation or an audit of what you've been doing, you can contact me at bluecowmarketing.ca. I'd be happy to talk with you. Have a great day.