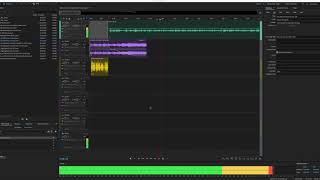
In this tutorial, Shaun Whynacht addresses the common problem of uneven audio levels in multi‑speaker podcasts. He demonstrates how to use Adobe Audition’s Effects Rack, specifically the Speech Vocal Leveler (also called Speech Volume Leveler), to automatically balance loud and quiet segments without manual key‑framing. Shaun walks through the interface, shows a before‑and‑after comparison, and explains his preferred settings—Leveling Amount at 100%, Dynamic Range around 45 dB, and adjusting the target volume until the waveform peaks in the mid‑range. He highlights that the effect can be stacked with other processing tools such as noise reduction or reverb, turning the digital Effects Rack into a flexible studio‑like workflow. The video concludes with a call to subscribe and a brief promotion of his marketing services for podcasters.
Chapters
Well, today I want to show you a great way to level the audio when you're producing your podcast or doing anything really. But really, we're doing a lot of work with podcasts, and one of the challenging things we get, especially when people are doing more than one person at a single time in a podcast, which is very common, is that we get different levels of audio. Now, the example I have here is a podcast that I just recorded for myself, And I did this on purpose. I had the audio levels really low here. So let's take a look at or listen here. So what you're gonna hear first is the main level. And this is the level we want for the whole show for the opening. So let's take a listen. Strategic elements to help you scale and grow. Okay, so we see that's registering down about here. Now if we skip ahead and we listen to my main audio track. From a distance and working from home. Right, it's coming up here. We've got a gap here in the audio. So one of the ways you can do it is you could go ahead and you can just boost up the audio here, right? You can pull this yellow line up and it's going to raise the audio level on that clip. Now, one of the challenges with that is if you've got multiple people, especially if there's somebody who is really loud and then the next guest is quite quieter, and then maybe a third person that's in between, is you end up doing a lot of nodes and a lot of manual adjusting You know what, like clicking on here and like doing this when the loud person speaks and then bringing it back up for the low person, right? Which is really annoying, right? We don't wanna do that. So here is a great way, and you may not have known this, but with Adobe Audition, you can click on any of the tracks and there's an effects rack here on the left-hand side. Well, it could be anywhere, you can move it around. But one of the benefits of the effects rack is you get to apply the effects you want to those specific tracks. And one of the best ones that I've found for this is called Speech Volume Leveler. So how do you go ahead and do that? I've already put it in there before. So you click on this little right arrow and here are all your effects, right, that you would commonly find up here anyway that you could apply just to the audio files. So we click on this, we go to Amplitude and Compression, and it's right here, Speech Vocal Leveler. So we click on that and it's gonna pop up. Now there's a toggle on/off button here. So watch this. I'm going to press play and it's going to play the audio without the effect, and then I'm going to turn it on. Okay. So let's go ahead and do that first. So here is the level without any processing. Forced, so to speak, to work from a distance and work. Okay. Now let's turn it on. I'm going to press play and then I'm going to turn it on. Working from home. And that's what I want to talk to you about in this episode. Now, did you see how the level jumped up and it was within that range? Now what I'd like to do here is I keep the leveling amounts here at 100%. I do the dynamic range at about 45 decibels, and I'm really adjusting the target volume level here. So I'm going to play it, and I'm just going to move this till the volume view level starts to hit the yellow in the mid-range here. So let's go ahead and do that. So it is— is how do you do that? How do you take a look at your business? How do you continue to keep that momentum going forward in a different way? So let's look at a couple of different things. That's really That's exactly what I wanted to do, right? That's what I wanted to do is level that out. So it's in line with the level here, tactical and strategic element. Right? So now I could throw multiple clicks, clips, excuse me, on that track. Some can be low, some can be high. This is really great because if you've got real high points on here and you got low points, it's going to level it out and make it really balanced for your audio. So again, check it out, the effects rack, it's going to save you a lot of time. With processing your elements. And again, you can stack other effects on this too. So you can go and you can choose other ones— reverb, noise reduction, whatever the case is, right? Just like a traditional effects rack that you would have in a studio. Now you've got a virtual digital one right here. So hopefully that helps you increase the quality of your podcasts and recordings. And, and I really enjoy doing these videos for you as I come across these features and what helps me build out my content, my clients' content, and now help you with your content. So don't miss another one of our videos. So go ahead right now and subscribe to our YouTube channel. Really appreciate it. And if you'd like to learn more, you can watch other videos. If you want help marketing your podcast, building the branding elements, or anything in between, please go on over to our business website at bluecowmarketing.ca, and I'd be happy to help you. Thanks for watching.