How to install Thrive Themes & Thrive Architect
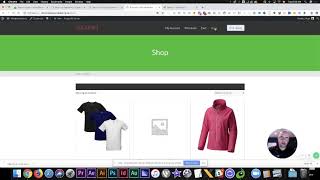
Shaun Whynacht installs Thrive Themes and Thrive Architect on a WordPress site, showing the drag-and-drop builder's advantages over the default editor. He creates a home page with headers, images, and videos, saves global colors for reuse, and demonstrates responsive design tools that let you preview desktop, tablet, and mobile views separately.
Chapters
Hi, so in this video what I'm going to do is I'm going to show you here on a demo site that we've set up on our company hosting here at demo.bluecowmarketing.ca, and it's just a basic WordPress install. So what I'm going to do is walk you through the difference between using the standard WordPress editor and then using Thrive Theme Builders. Now what Thrive Themes are is it's a suite of WordPress templates, there's plugins, there's an Architect Builder, which is what we're going to install here today. And I'm going to really show you the power of what you get with this whole Thrive Suite. Now, every website that we build for our clients, we use Thrive for that just because of its integration with all the other CRMs and marketing systems, but also the ease of use. So if you're very new to using WordPress, if you've never even actually installed anything, this is going to be helpful for you to get an understanding of how easy it actually is to do that. And then also, when you see the Thrive Theme Builder in action, that's going to be an eye-opener for you. So the first thing I want to do is show you what the standard WordPress editor looks like because nothing's been installed on this application as of yet. So what WordPress is, just to back up a little bit, is a CMS, a content management system, which means it's all online-based. You don't need to download any software or anything like that. Basically, if you can get online to a web browser, you can access your website. So here we are at demo.bluecowmarketing.com. We're going to go ahead and we're going to go /wp-admin. This is going to take you to the admin login side of the site. Now we've got our login already saved here, so we're going to go ahead and log into the backend of the site. Now what we've got is once we're logged in, we're going to notice across the top we've got a black bar. So if we go to the very top and we go back to visit the website, we're going to notice the black bar is here. Now the general public, if they come to your website when you're logged in, is not going to see this black bar, so you don't need to worry about that. We have a couple questions. Questions from clients who ask us that frequently. Don't worry, it's just because you're logged in as the admin. So the benefit behind this is really when you go to a page, let's just say we're going to go to— well, let's just stay here on the home page, um, and we're going to go to the page. Okay, at the very top we click Edit Page. Now we have a WooCommerce e-commerce platform plugged into this. This is really, in essence, the editor. So if you come here and you say, okay, I want to go ahead and put in, um, headline here, do that, highlight this, you can make it Heading 1, and then we can update on the right-hand side and go back and view the page. And now we're going to see it puts in that heading. Okay, so very basic in the editing side. Okay, so not a lot of functionality when it comes to using the basic editor. Now there is a, a place and time for for using this. If you're just doing a very basic site and you don't want to invest in using Thrive, this will work quite well for you for that reason. But in this day and age, we need a lot of different functionality. We need things like having web forms, being able to embed videos. And if you really want something that's true drag and drop, Thrive is really the best answer in my opinion. Now there's a lot of other ones out there. There's Divi, there's Elegant Themes, there's a whole bunch of different things, but I like what Thrive is committed to. So that's what we're going to talk about today. So here, here's what we're going to do. We're going to go, we're going to install the Thrive Product Installer plugin. Okay, now WordPress uses a bunch of different plugins to do different functionalities. So if you've got a WordPress site, most likely you've heard of a plugin, you have plugins, you've installed the plugin, uh, you maybe purchased a plugin, but this is what you need to do. On the left-hand side, you're going to go to Plugins and you're going to go to Add New. Now we've already downloaded the plugin file from Thrive Themes, so we're gonna go to upload the plugin and we're gonna choose a file and it's going to be in my download section and there it is, Thrive Product Manager. So I'm gonna go ahead and open this. And prior to this release, which was only at the time recording this video about a month or so ago, they came out with this way of doing it. You had to actually download each plugin, one for the theme, one for all the different, um, options they had, uh, install each of them individually. Now with this, makes it a heck of a lot easier. Just watch, we're gonna activate this. And then once it's activated, what we're gonna see here, it takes us here, we can see all the different plugins that are currently installed, okay? So I'm just gonna move my lovely face out of the way here for a second, and we're going to go to the product manager. And it's gonna say now log into my account. This is my ThriveThemes account, so I'm gonna go ahead and log into this, and of course I've got my login saved, so it's not gonna take me long. Take too much time for me to do this. So we're gonna log in, just wait for it to connect, and there we go, we're successfully logged in. Now here's what we see. We see all the different Thrive plugins that are available, so we're just gonna deselect all of them at the moment. And what we're gonna focus on in this tutorial is the Thrive Architect builder. So we're gonna go ahead, I'm gonna click on this, and then I'm going to install one of the, the many themes. There's 4, 8, 10 themes down here that we can choose from. And pretty good, I can count, right? So the one that I usually use all the time is the Square theme, so I'm going to install that. Now I'm going to go ahead and go install selected products. It's processing, it's just going to quickly download and install them in my WordPress site. And then once that's done, I'm going to get the option on the bottom to activate them. So there we go, so those are done, they're in there. Let's go to the Thrive dashboard. And just like that, they're all installed and they're ready to go. So let's actually— going to move myself over to the right-hand side here. Not sure if you can see me moving my face around the screen or not, um, but we're going to go and now we're going to activate that theme. So we're going to go into the theme side and we have this Storefront theme before. We're going to activate the Square one. The one we just installed. So now this is the main theme. So what I'm gonna do here is I like to, to go between two tabs. So keeping the, the one tab for the backend of the site, and I'm gonna go up here and I'm gonna actually view the site in another tab. Okay? I just hold down Command on my Mac and now we've got this, this theme here. So this is really the same thing, um, that's installed now. Let's go ahead here and we're gonna quickly add that primary menu. So we're gonna go to WooCommerce, Appearance, and Menus. And we're gonna make a menu, so we're gonna say create a new menu. And we're gonna call it Main Menu. You can give it any name you want. Doesn't really need to say Main Menu. You can call it Top Menu, Bottom Menu. You can call it Happy Day Menu. It's all completely up to you. And then we're gonna assign that to the memory loc— or the menu location. So in this theme there's two. There's a primary at the top and there's a footer at the bottom. We're gonna put it on both just for the sake of time. You can always remove that later. And now we're just gonna go ahead and we're gonna throw in some of these pages to that menu. Gonna add it to the menu, and we're gonna hit save. And the reason we're doing that is when we come back here, we're gonna see that the menus show up here, and it's fully integrated still with the shopping cart that we had with WooCommerce. Now let's go to the shop page. So this is the page that we edited before. Now in this time, actually, hold on, we gotta do one more thing here. We have to go back to the plugins. We have to go down here. Actually, no, we don't. Let's go ahead and actually make a new page. So let's just call this the home page, and we're gonna say publish. And now this looks very similar to the, the old editor because it is the old editor. We have to engage the Thrive Architect, and we've got the option to switch between using the old one or the new one. So we're going to see this green button now shows up for launching the Thrive Architect. Now remember, before, this is what the experience was— this little box here, you would have to type in content and so forth. Watch this. We click on this, opens up another tab. Now we've got a full immersive experience to edit this page. Now keep in mind, we haven't customized the theme and put logos and all that kind of stuff, but really what it is is it shows you what the site looks like. On the right-hand side, you've got a bunch of icons, so you can hit the plus sign here and you can see all the different things you can add to this page. So if we want to add a header, we just click on it. There's our header. So we can give it a name. So this awesome website header. You're like, oh, okay, I want to change the color. We'll highlight that. And now on the left-hand side, you've got your inspector. You've got all the different tools that you can use to adjust this element. So we want to change the color. Let's say that we want to go to a different blue, or maybe you know your exact hex code, you can put that in there. So the other thing that I absolutely love about this is once you find that, that sweet sweet color that you want to use, you can go, okay, let's add it to my colors, and now it's down here, okay? And it's going to be a global color throughout the whole site. So anytime you load another text element, you want that exact blue, you can just pick it from the bottom. So we can apply that. You want to change the font size? Oh, we love sliders, we can slide it around exactly the way we want. Want to center it? We can do that, okay? Now, Let's go ahead and put in some text so we can say, okay, let's, let's throw in a paragraph here. So we're going to go ahead and we're going to put, uh, this is where you say awesome stuff about our website. Okay, you can put in the paragraph there. Want to throw in an image? Hit the plus sign. We can pull out an image and we can drag it and move it around. So when we move it around, wherever that blue line is, that's where it's going to insert that image. So maybe we want to put it on the right-hand side, so we can pop it here. It's going to open up, it's going to say, okay, what images do we already have installed on our WordPress site? So we can choose one of those, or we can click upload and pick a file from your computer. So I'm going to go ahead and use one of the ones that's already here. We're going to insert that. We can change the size here on the right side. Go full size, insert that image. Again, just like the text, you can click on it, you can drag and drop and move it around. Maybe you want to go— you know what, you want to have this to the right. So we're going to go to the positioning and we're going to move it to the right. And then we're going to go, we're going to pull this text over so it bangs up against that. And now you've got like a 2/3 and 1/3 kind of split there. Let's say we want to go ahead and we want to put in a video. Okay. Okay, so now we can go ahead, and obviously I'm not taking into account, you know, laying out sites so it's aesthetically pleasing. I'm just showing you the different things and the most common things that you can actually put into one of these sites, and we do this all the time. So we're going to pull over a video, we're going to put it below this. Oh, we don't want it there. Okay, so here's a good point. If I dropped it in there and I didn't like it there, I can either delete it or I can click the little crosshairs and I can drag and relocate it. Okay, so I want to go below that paragraph and insert a video. Okay, so on your left side I can put a YouTube, Vimeo, Wistia, or a custom video. Let's go ahead and just grab a YouTube video of our choosing. And I keep in mind I've got kids, so there's a lot of Paw Patrol type of videos in here. So let's just go ahead and pick one of these. We won't spend some time watching it. Okay, okay, so that's great. Project manager cool is called monday.com. Um, so we're going to go ahead and come back here and we're going to go YouTube video, paste in that URL. There we go. It pulls in that video and now it's inline video. People can watch it right within the website. So there's a lot of different things that you can actually put into play here when it comes to using this builder. Here's the other thing that I absolutely love about this. You know that not everybody's coming to your website when it's on a desktop computer. So making sure that your site looks great on a mobile device is key these days. So one of the things that Thrive is taking into account is making it really easy for you to see what this layout looks like on a mobile device. So down below the editor, you can see these different icons. So you've got a desktop, you've got a tablet, and you've got a mobile device. So if we click on mobile, it's now going to give it in that narrow mobile view, and it stacks all the content. So we noticed that our page layout was left side, right side, but when we look here, we're going to notice it's stacked on top. And one of the great things about this is— and this is something that we did on our website most recently— was we wanted to give people who connected to us on our, on our mobile device, or on their mobile device to our website, the option to be able to text us. And there's no point to have that button on our website when it's on a computer because nobody's going to click on it and text through their computer, okay? Or they're not even going to write down the number and text in. So what we're going to do here, this is a little hack tool that I'm going to teach you, or a trick, is we're going to come to the, this tool side and we're going to throw in here a button. Okay, I'm just going to throw it right below here just so we can see it. Now buttons are used a lot within Thrive, and again, I'm just showing you some basic stuff in here. So we're going to go ahead and we're going to make this button. I'm going to click on the background. I'm going to use our standard blue color that we saved before, and we can choose different color buttons or shapes. I like the round button here. It does go back to the default color. And we're gonna give it a title, and we're gonna call it Tap to Text Us. Okay? Now let's program that button. Now, to get any button to link to a text message, what we're gonna do is we're gonna go and we're gonna put SMS colon and your number. So our number is 902-300-3030. And there we go, now that would be programmed. Now this is showing up on the desktop view, and it's also showing up on the, the mobile view. Okay, this is where we want it to stay. We don't want it to be here. And this is what I absolutely love. When you click on the element, you come down here to Responsive. You can say element visible on which devices. So we don't want it on the desktop, we don't want it on the tablet. Okay, we only want it on the mobile device. So you can see it's not showing up there. But when we look at the mobile device, it's there. Excellent, right? So now you can have a different experience and different elements and different links to people on mobile devices. So if you've got a lot of elements on there that people might not really need to see because they're just quickly looking it up on their mobile device, you can turn that off and only make it available on a desktop computer. So that's really what I wanted to show you in this video is really the difference between the two editors. Okay, you've got a lot more functionality. I mean, We could spend hours going through showing you all the different stuff that you can do in this. And really the best part about it is the flexibility and the functionality because you can do a lot of stuff within it. What I'm going to show you in another tutorial here in this post is the lead capture and the exit intent. So if you want to learn more about that, either find the second video on our YouTube channel or scroll down further in this post and you'll be able to see that video on using lead capture, using Thrive, and the exit intent as well. So thanks for watching, and we'll see you in the next video.
More from Shaun


Julie Vanexan recognizes Shaun Whynacht from Blue Cow Marketing at the Nova Scotia House of Assembly








