How to use the New Wordpress Editor
Shaun Whynacht walks through upgrading to WordPress 5.0 and using the new block editor. Learn how to add blocks like images and headers, configure SEO settings and link behavior, and restore previous versions from the revision system.
Chapters
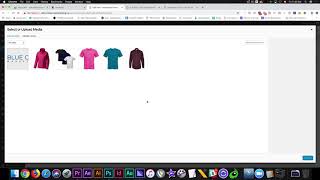
Hi everyone and welcome to Friday. And as we are doing on Fridays, we're going to be showing you something that you can learn from when it comes to marketing, website design, or even your business. But today's episode of the, the Fun Friday is about the new WordPress update that just rolled out this week. That's right, they went from a 4-point-whatever number they're at into the 5.0. Now the biggest thing that we're going to notice is that the editor will change, and that's the purpose of today. First, I want to show you how to update your WordPress if you don't know how to, and then show you the difference between the current editor and the new one, and we'll walk through that. So let's get started. Now, I purposely am working on our demo WordPress site, which is used for this purpose, and one of the things that I didn't do yet was I didn't do the upgrade because I want to show you the before, then show you how to do it, and then show you the after. So the first thing we need to do is show you quickly what that existing editor looked like. So the easiest way to do that is just to go into a post, and you can see here, this is essentially what it is. Now, keeping in mind that you probably don't have this Thrive Architect here, um, we use that as a different builder, but this is essentially the existing WordPress editor if you haven't done the update. And there's some options here on the right-hand side and so forth. So pretty basic and pretty straightforward. So how do you do an update? Well, one of the things that you can do is you can go to the very top where you have Dashboard, and if there's any updates, it'll show up right here. So we can go ahead and click Updates. Now it's going to show you at the top here, um, that there is an updated version of WordPress available. You can update to WordPress 5.0.1. There was a 5.0.0, they just updated to 5.0.1. It doesn't really matter, but as the numbers grow, that means they're making updates to certain features of it. It's really quite easy. We just click update. What's going to happen is it's going to go into the update mode. It's going to put your site into site maintenance, and boom, just like that. Depending on your internet connection, this can take a few seconds or it can be instant just like this. Now we're up to date. Now when you do that, WordPress does make a great effort to tell you what has changed here on that initial page with all the different stuff. Now let's go ahead and look at the new editor. We're going to go to a new post. Hold on to your socks, here we go. All right, this is it. The first time you go there you're going to get these little tips that you can click on. It's going to pop around and show you all the different stuff. Stuff that's on there. But essentially what we've got here is the editor for what you see is what you get, the text part at the top. So let's just say we're going to do a blog post. So, how to use the new WordPress editor. Okay, so that's going to be the title of our blog post. And then down here we can start to write. I'm just going to put in some text. We're not obviously going to pay a lot of attention to what's there. So the first The first thing you need to do is upgrade to the new version of WordPress. Okay, so as you go, you can put in, you know, enter and you can write more and more and more. One of the things you're going to notice here is every time you get your enter line in here and you put your mouse over, you've got this little box that shows up on the paragraph. This allows you to click and drag and relocate Let's just see if it does. Actually, hold on, let's just see. We can actually click the up and down arrows and relocate those paragraphs. The other thing that we're going to notice is these little plus signs. These are where you can add a block. We click Add a Block, it pops up and says, oh, what kind of blocks do you want to add? Do you want to add a paragraph, an image, a header, a gallery, a quote, audio? Then you've got different things here like inline objects, common objects, widgets, and so forth. Okay, most likely you're going to be dealing with the most used or the common objects. So let's put in what we commonly would put into a post. Maybe it's an image, so we can click on image. And now we got this block in here where we can upload an image or we can pick one from the media library. So I'm going to just choose one that's uploaded just from our demo site. So we click on this, we're just going to pick a, pick a t-shirt that was in here from before. And then it puts that image in here. You can caption it here by calling what it is, 3 shirts, whatever the case is. You don't have to put a caption on it. And then when we click on it on the right-hand side, now we've got what we call the inspector. This is where we can do different things of the object or to the object that we're currently clicked on. So alt text— now if you know good SEO practices, every time you put an image in, you should put the alt text. Now the alt text means it is alternative and it describes what the image is are if somebody can't see it or they have their images turned off on the website. So this would be, um, 3 colored t-shirts. Then down below you've got the sizing, so you can go full size, medium, thumbnail. You can change the dimensions here or the percentage of the scaling if you want to do that. Do 100%. Whatever the case is. Then down below you got the link. So do you want to put a link on this so that people click on it? Do you want them to go to a certain web page? And then under Advanced, you've got CSS classes for the advanced users out there. Now if we want to do something to this image, maybe we're going to click here and duplicate it because we'll put another image. We can, we can insert something before, before, after, edit the HTML, use some reusable blocks if we've got things that we've format it and we want it to save and put those in place, or we can just remove it. Okay. Uh, so that's, that's that part of it. As you scroll through and you use the page editor and you click on different things, um, you're going to be able to see that you've got options on the right-hand side here based on this. So this stuff for the document is referenced the entire post. Okay. So this will be for a page or for an actual post within WordPress. So you've got your visibility being public. When do you want it to publish? Do you want to stick it to the front page? Is it pending review? Um, what's the permalink? So that used to be at the top, and the permalink is the URL that's set up for that post. So you can go ahead and you can adjust that. Um, categories— so you have different categories for your post. You have tags, featured image, excerpt. So this is where, um, if you were to share this somewhere and it was to take an excerpt of that post, you're going to actually be able to control what that bit of text that will show up there will be. Then discussion, do you want to allow comments or pingbacks or trackbacks that are there? Down below you've got other options depending on what you have installed on your site. Now we're using Thrive Themes which you may or may not have, so these are options down below for the Thrive Themes. Section of it. Once you've got that post ready to go, you can go ahead and you can either save it as a draft to come back and work on it, or you can go ahead and click Publish. And then you're going to be posed with the next question here: how do you want to publish it? Public, immediate? Do you want to add any tags? You're going to click Publish, and now the post is published. Now anytime that you come in here, you can come back and you can edit this as well. Let's just say we want to go ahead and put a link on some text, we can go ahead and highlight the text, and then the link for that shows up up here. So we can go ahead and click link and put in the website, put in ours, hit enter as well. And you can come back and you can edit that at any point. Now here's the other thing too, is if you are linking out to a page or a website outside of your website, it's always a good practice to make sure that it opens in a new tab. So This is a common thing that you'll be using when you're doing links within content. Uh, but to find that is once you put that link on there, these three dots under link settings, if you click this, the open a new tab, you can just simply click that, turn it on, and now it'll open in a new tab. Once you're done with any adjustments you want to make to it, just click update. And now if we just go view the post, Basically, there's, there's the post. Obviously, we haven't paid a lot of attention to designing this website, but it's more so just for showing this type of purpose. You come back to the post, you're logged in, you want to go back and edit, just edit the post, and now you're back into the editor. So I really like where WordPress has gone with this. It allows you to, to have more functionality in here. Obviously, for some people, this may be a little bit of a learning curve for you to use the new version. But you will learn to love it, I guarantee it'll just become natural to you. But keeping in mind, if you do that update, you will get this new editor, okay? So if it goes from a 4-point-whatever number into the 5.0.1, whatever it is, you will get the new editor. You can't change that or turn that off. One thing to also know is let's say you go ahead, you make a big change to a page or to a post, and you're like, oh shoot, I really didn't want to do that. I wish I could go back to a previous version. When you go into that editor, on the right-hand side you see where it says 2 revisions. Every time you save, it creates a revision of that page or that post. You'll get this version here, which is going to show you really what the version before was and then what the version after was. So you can always come and go back here to a previous version. Let's just I only have 2, so it's either going to be nothing or that one, but you can go back to the previous version and say restore this revision, and then it will take everything you've made, eliminate it, and then just reload in that previous version of that page or that content. That's the WordPress editor. Like I mentioned, it's coming a long way, and I can see that they're going to be adding more and more to it. Thanks for watching. Hopefully this was helpful. If you've got a WordPress site, you do that upgrade, you're going to be having this editor. And if you like this content, wherever you're seeing it, on YouTube, on Facebook, on LinkedIn, like, comment, share, subscribe. We love it when you give us feedback. Thanks for watching and have fun growing your business.
More from Shaun


Julie Vanexan recognizes Shaun Whynacht from Blue Cow Marketing at the Nova Scotia House of Assembly








