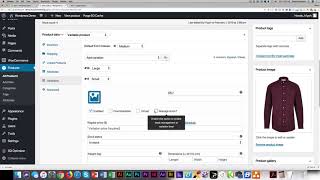
Shaun Whynacht shows how to create a WooCommerce product, starting with a simple shirt and converting it into a variable product with size options. You'll set prices, upload images, create variations for Small, Medium, and Large, and manage stock per size.
Chapters
Hi, thanks for watching this video here. We're going to talk about how do you add a single product to WooCommerce if you're using WooCommerce as the e-commerce platform in your WordPress site. And then we're going to show you how do you add a variable product and what exactly is that. So as you see here on the screen, very basic demo account that we have set up here at Blue Cow Marketing for this reason. Now I have WooCommerce installed and I'm assuming if you're watching this and you already have WooCommerce installed on yours. So what we're going to be doing is we're going to be adding a product to the shop page so that there's a product set up here. So on another tab, I've got the login for the backend already set up. So again, this is very basic setup. I'm not going to spend too much on the details of the product, but more so the functionality. So we're going to do is we're going to go to add product or add new under products. And we're going to then go ahead, obviously it's going to ask you a couple things here. New install, but we're going to add a product. So this is going to be, um, shirt. Okay, very basic, like I said. This is a shirt. And then as we scroll down on the right-hand side, this is the order I like to go. I like to make sure then that I have a product image. So I'm going to go ahead and upload a product image, and I just grabbed one off the interweb here of a shirt. And we're going to go ahead and upload it. And it's always good to put the alternate text in here. So this is going to be Maroon shirt and set. Now if you have specific names, your products, you would put them in at that point. And then what is the product price? And we're going to say this shirt is $15. All right, now if you've got different product categories, you can set them up here. So we're going to go a new one and we're going to say shirt, and we're going to add it so the shirt goes in that category. Perfect, excellent. So now we're going to go ahead and click publish. If we flip back to the site, we just refresh here, we're going to notice there is our shirt and we click on it and we can see the product and then the description and all that fun stuff in here. Okay, now this is where this demo has derived from, is I was asked how do I set up a product that has a variable. So you know how you go to some e-commerce sites and you can choose the different sizes instead of having a product for each size, uh, cluttering up your cart?, or your, your storefront. So let's go ahead, and what we're going to do now is we're going to use that same product and we're going to put in variables. So what we have to do is we have to go down to Attributes, and what we're going to do is we're going to add a custom attribute. We're going to click Add and we're going to say Size. Now the key in here is we separate the values of the size with this vertical line. So I'm going to go in here and I'm going to put Small, vertical line, medium, large. Now you can have, you know, 10, 20, you can have 5, uh, you can have 2, uh, it's completely up to you. But we want to make it visible on the product page, so we're going to save this attribute in here so that it is saved. Perfect. Now what we're going to do is we're going to change this from a simple product to a variable product. Okay, and once we do that, we're going to notice that the variations option shows up down here. We go ahead and we click on this. Actually, hold on, we need to actually go ahead and choose this here, used for variations under attributes. So save it again. If you get to the variations and this doesn't show up, that's what you need to do is you need to go back and make sure this is used for variations. So we come back here, variable product, add variation. So we're going to click Go, and the variation we're going to add in this right now is the size small. Okay, and we can then say add another one, medium and large. There we go. So now we got all 3 in here. Quickly click Save. It's always a good option to do that. One other thing is the default value. So what size is by default always chosen. Now, if you may be thinking, I don't really know, think about what is the most common size of the product that you sell. So let's just say it is a large, okay? Or we can go middle of the road and say medium. I'm going to click Save again just so it's locked in. So now we get to go in and change the variables on each of these, like the prices and things like that. So let's go ahead and look at the small. We go in here and we click on the, the three stacked Options here. Actually, that's not it. We're actually going to click on the down arrow. And if you got a SKU specific to that size, you could go ahead and put the SKU in here. And you can change a bunch of different stuff. So you can manage the stock on that option, you know, how many sizes you have. But in here, you can then change the pricing. So let's just say the small was $5. And, you know, you can change the weight and the size and all that stuff. Okay. And then here we're going to say the medium is going to be $10. And we'll go to the very top here to large, and we're going to make the large $15. Now let's say we want to have a different image for each one. So I'm going to go back to just a Google image search here, and I'm going to pick a different shirt, and I'm going to save this. I'm going to just call it Large Shirt. I'm going to pick the pink one and we're going to call this one Medium Shirt. And we're going to pick just another one. Obviously they would need to have the same style, so we use this one here as the, the small and the medium. Okay, so let's go back here and we're going to go to large. We're going to upload a picture for the large, so we're going to choose the Large Shirt. There we go. So it's going to be large. Go down to the small. The small, we're going to use the default one we have here. And for medium, we're going to upload the one we just saved, just like that. And everything is good. Now we're going to click Save. Okay, now let's flip back to the product page, and we're going to refresh this right here. So now what it does is it shows the range from $5 to $15, right? So if you choose small, then the price is going to be $5, medium $10, large $15. So now what we've done is we've created one single product item because if we go and click on shop, there's one item here and has the range. But now we have a single product that gives us really 3 different products that people can buy from. So that's how you use variables in WooCommerce to make it a lot easier for people to pick what they want. So hopefully that is helpful. Um, and by all means, thank you for watching this. And if you're watching this on YouTube, please by all means subscribe to our YouTube channel. I love doing stuff like this to help you as a small business owner learn more about marketing yourself better and using the tools that are out there. And if you haven't found us on Facebook, go to facebook.com /bluecowmarketing. And that's my little friend, um, Theo. He's a guinea pig here in our office squeaking in the background. I don't know if you can hear it there. So have a great day and thanks for watching.