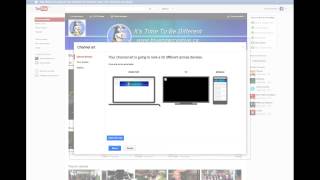
Shaun Whynacht shows how to update your YouTube channel graphics for the new layout. Channel art needs to be 2120 × 1192 px and crops differently on desktop, mobile, tablet, and TV. He provides a Photoshop template with safe-zone guides and walks through uploading art, icons, and trailers in YouTube's interface.
Chapters
Okay, this video is for YouTube users. If you're using a YouTube channel for your business, then you want to pay attention to this. Now, YouTube has made some recent changes to the way that they describe— not really describe, but display your business or your account channel. Now, if you log in there recently, you're going to be prompted to upgrade to the new format. Now, you can choose not to, but eventually you will be pushed into that format, as with every other online platform, as they do that when they roll out these changes. So I went and did this yesterday, and then I came in today to figure out the best way to upgrade the graphics, because when you do it, you're going to need to upgrade, update the header graphic, which is also going to format for the mobile phone and for the tablet layout. So what they recommend is that when you upgrade your graphic here, your channel art as they call it, you need to be 2120 pixels wide by 1192 pixels tall. And that is going to, I'll show you what that looks like here. Just gonna open up Photoshop. So here is a graphic that I've made for that. And I put these guidelines in here in the Photoshop file to actually block out once I figured out what fits perfectly, the section where your prominent content should be displayed. Now I originally did this, I had the text over on the right side, the graphic over here. And then when I uploaded it, it cropped it off on the mobile phone. So I did a little playing around and figured out this is the optimal spot for these graphics. So what I'm going to do is when I finish this tutorial, I'm going to actually throw this PSD, this photo file, Photoshop file on my website with a link to it so that if you're watching this video, down below in the description, you can click and you can go and download that file to use with the guidelines here so it's easier for you to create those graphics. So once you do that, once you create your graphics and you save them, you're going to go back and you're going to go up to the top. Now if you haven't upgraded these, there's going to be a button in the middle. But if you have the little pen that's here on the right-hand side, you go Edit Channel Art. You're going to choose the photo from your computer. I'll go find it again. Choo-choo-choo-choo-choo-choo. Time to be different. I'll show you here what it looks like. This is what it does. Here it is on the desktop. It'll put the thin banner across the top, which is what you're seeing here. If you're displaying it on TV, so if you have a TV app, you're displaying it, it's actually going to take the full graphic here, so the full HD quality. That's why the graphic had to be so big. And then on the mobile format, it's going to show you the smaller one that's here. You're going to go ahead and you're going to select it, and it's going to update everything that you have. Now unfortunately, the thing I don't like is your little thumbnail image that's here on the left-hand side. Even though you may update with a transparent PNG file, it's still going to put that white background around the image. To do it, to update it, you click the little pen. You can browse for the graphics. 800 by 800 square is what they recommend if you're building your graphics. It can be in JPEG, bitmap, or PNG file, or JPEG as well. You can choose one of the stills from your videos or a default image. I've already done it, so I'm not going to go ahead and change that. The other cool update is it allows you here to put what they call a trailer for your channel. Below, we got all your updates and all your videos, you can actually produce and record a video and upload it to be a preview for that. If you're doing training videos, this can be almost a channel where it's going to give you a trailer for what's coming up in the future videos. Really, when you play through this, it will go through the sequence of that. The best thing is on the right-hand side, the channel setup checklist. Set an icon, add channel art, describe your channel, add web links, add a section is the next thing I need to do, and then add your channel trailer. Once you do all that, click save and you should be off and running. Again, I'm going to put that PSD file here on our website with a link below this video, wherever you're watching this at, so that you can use that file and save yourself some time and some headache moving forward. Okay, check us out online at bluecowcreative.ca with lots of great tips, and also find out ways to market your business better using tools such as YouTube.