In this tutorial for Small Business Week, Shaun Whynacht of Blue Cow Creative walks small‑business owners through leveraging Facebook traffic by installing a Facebook Pixel on a WordPress site. He begins by explaining the purpose of the pixel—collecting visitor data to build retargeting audiences—and shows how to access the pixel in Facebook Business Manager, copy its code, and paste it into the site’s header.php file via the WordPress theme editor. After publishing the change, Shaun demonstrates the pixel’s reporting dashboard, highlighting URL‑specific visitor counts and how to create custom audiences based on page visits. He emphasizes the strategic advantage of reaching users where they spend most of their time—on Facebook—and previews upcoming videos on running ads and using other marketing tools. Contact information for further help is provided.
Chapters
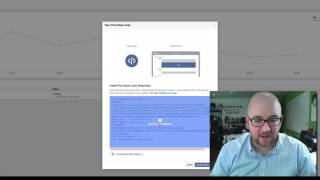
Hey everyone, it's Shaun Whynacht with Blue Cow Creative. Happy Small Business Week! I am extremely excited to be doing this video for you. What I wanted to do this week, because it is Small Business Week, is I wanted to give you some great tips, some great tools, and some tutorials to help you grow your small business and talk about some of the ways that you can market your business. So if that sounds good to you, we can get started. Now I want to talk to you today about Facebook, and more specifically, the traffic that comes to your website. How can you leverage that traffic into your Facebook campaigns? So what we see here on the screen is my company Facebook page. Now I'm using Facebook Business Manager, and you can do so as well the same way. If you just go to business.facebook.com, you can register there. It's free, it's a great tool for you to manage your business with it. But even if you're not using this, you're able to go in as the admin of your page and get to the exact same stuff. So what we're going to do is I'm going to walk you through taking a Facebook pixel, yes, a Facebook targeting pixel, and embedding it on your website. Now if you're using a site other than WordPress, then the steps might be a bit different, but because WordPress is the most common platform, we're going to talk about that here today. So the first thing we need to do is we need to go and get that pixel. So we're going to go to the top here and we're going to come down to Pixels. Now if you don't see it here, you can click More Tools at the bottom or All Tools, and it will be over here under under assets. Now this is why I like the Business Manager, because there's a lot more flexibility in what you can do with doing some targeted ads and retargeting to different audiences. So what do I mean by retargeting? This basically means that once this pixel is installed on your website and people go and visit your site, they visit different pages, Facebook is going to start to build an audience based on what they do and what they look at on your website. So we're going to go ahead and click on Pixels here. And it's going to come up and one of the things you probably need to do is create your pixel the very first time. I already have a pixel created here and it just shows you some of the stats. We'll come back to this near the end of the video and I'll explain what it's doing. So I'm going to go and you can go either create audience, so you could go create audience here and you'll create your pixel. Now I already have one done so I won't need to create it. I'm going to need to get the code, and that shows up under the actions. So we're going to go down to view pixel code. We're going to click on this. Really quite simple, and they make it extremely easy for you to understand. It shows you here what you need to do. So we're going to need to copy this to the clipboard. One click, boom, click to copy to the clipboard. And it says up here we need to go to our website and put it in the header of our site between the head and the head closing tag. So how do we do that? Let's hop on over to WordPress. So here is my WordPress site. Now when you log in, this is the backend. Any WordPress site that you have going, if you go to Appearance and then come down to Editor, you're going to be taken to the section where you can see all these files on the right-hand side and some code that for the most part means absolutely nothing to the average Joe. But for us today, what we're going to need to do is we're going to go over the right-hand side and we're going to find the one that says header. So in this case, mine says theme header, header.php. We're going to click on this, it's going to load this, and we're going to scroll down. It's going to be near the top, and here's the top of it. So we've got head, which is the top of the header. If we scroll down, we've got the closing of the header. So I've already pasted mine in here. What I'll actually do is I could go ahead and remove this. So this is what it would look like to you. You would find this tag, this closing, so /head, and you go to the beginning, you make a space, and you would paste in that code that we just copied from Facebook. We go ahead and click Update File, and once that says it's updated, you're now going to start to track the traffic coming to your website into your Facebook account, your Facebook Ads account. Really quite simple. So let's go back and look at what we can do. So now once we do it, we can start to see some traffic that's coming to our website. And we can see down below we've got URLs. So it's going to show us some of the, the website URLs that people are coming to. So for example, here if I look at my website, I've got the home page, I've got the digital marketing, you know, and there's 104 people that have come there since I've done this. And this is just in the last 7 days, you know, uh, benefits of marketing for small business, 48, and so forth. So how can I really leverage this. Let's say I have a product or a service that I want to run an ad on that's really targeting that audience that needs some help with digital marketing. Now I'll be able to go in and run an ad and say, let's create an audience for people who have only visited this URL. And in this case, if I ran that ad today, 104 people would meet that criteria, and then the ad would follow up with them throughout their social media. So why is this important? It's because people are not only just coming to your website, they're spending so much of their day on social media. I saw the stats that said pretty much on average every user of Facebook is on there between 7 and 9 times a day, and that's just average. You've got more and you've got less. So think about that. The best time to reach people is when they're in a place that they're in there the most. Okay, think about if you're out in your town, your community, you want to run into somebody that you know, you'd want to go to a place where you know they come frequently. So Facebook is that entity for you in your digital marketing. So keeping that in mind, this is just a, a kind of a quick demonstration of how this all works and how this can all come into play. Now coming up later on this week, I'm going to show you how to run some ads. I'm going to show you how you can leverage different tools to market your business and what are some assets that are out there that you can leverage as well. So hopefully that was helpful. Hopefully it gives you some insight into how your website can interact with your Facebook account and you can grow your business online through effective digital marketing. I'm Shaun, thank you for watching. If you need any help with your digital marketing, please by all means reach out to us here on our Facebook page or send us an email to info@bluecowcreative.ca. Until next time, happy Small Business Week.