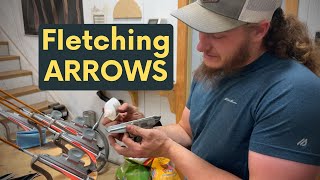
Pro Archer Shot-Coach walks through building flu flu arrows, which use oversized feathers to slow arrows for casual shooting. They fall safely within 100-120 yards, stay accurate to about 30 yards, and are too loud for hunting. The step-by-step process covers gluing, clamping with magnets, and curing.
Questions this video answers
Within roughly 100 yards (120 yards "somewhere in there" noted)
Three fletch (the speakers note they personally like 4-fletch, which produces more drag)
CA glue (cyanoacrylate) applied to the quill/back of the feather and insert
Not effective past about 30 yards for accurate use (speakers state you won't use them past ~30 yards)
An accelerant (forces CA to cure almost instantly)
Chapters
Today we're going to be making some arrows. So we're making flu flu arrows. These are categorized by these large fletchings.
Where on a normal arrow here, they're.
Real small and we're trying to cut drag. These are actually acting to add drag. That way your arrow slows down a lot faster.
And why do we want this?
It's for shooting aerial targets. We have a video on shooting aerial targets. Instead of having an arrow that just, just flies forever away, these slow down and should fall within 100 yards of where you shoot them. 120 somewhere in there. These go on just like any other fletching. So it's the same process between fletching these and others. We're doing a three fletch on these. All of our arrows that we go through here, we put on with ca glue. How I always start is with the odd feather out.
You start by setting our fletchings in there. I always pull it out just a little bit so that when I push.
Down on it, it's clamped in.
Take our glue, put just a little bit across, run that right up against the back, push down and that clamp.
With that magnet on there will hold the correct tension on that so that it can cure up. Then while that one's curing, we grab.
The next one, rinse and repeat on these. Just enough to hold it on.
We don't want glue running down into these. We don't want to cover the whole.
Arrow in a bunch of glue. One of the main reasons that people like flu flu arrows is for stumping or just shooting around. They are a lot of fun as target practice arrows.
They're easier to find. They're not going to get lost as easily.
And if you're shooting around and you're.
Shooting at stumps.
Random trash you find walking around. May as well use flu flus because they're going to be a lot easier to find. Can't really shoot big game animals with.
Flu flus just because there's a chance.
That it'll hear you and get out of the way. Flu flus make a lot of noise, but they make all that noise just because of how much drags created. You can also do flue flues without fletchings using.
Like yarn.
I've seen where somebody will take actually wooden arrow shafts and tie like what looks like almost a mop around the back of it.
And that's their flue flue.
Because all, all you really need is something that'll slow that arrow down really.
Fast because you're not going to be.
Using these past about 30 yards.
We got back to our first one.
From the last one.
We rotate that and we switch over and it's the exact same process.
Set the quill, measure it out, our jigs indexed. Make sure all that's right. I like 4fletched personally over 3fletch. But 4fletch just going to have more drag. All arrows are going to have drag from the fletchings.
And the shield cut are going to have way worse drag than the parabolics. The field cut luck better.
And the actual difference in them isn't that much. That's the monotonous part of arrow making.
It's really fun. That's when you're doing these and you got two dozen of the same one to make.
That'll get you half dozens aren't that bad to make full dozens gets a little tedious and we hit the end again. So we get to come all the way back, grab that and put on our five final fletching.
This might be the most boring video in the world.
Hey, this weird long haired guy, he's gonna. He's gonna make arrows for you.
Cool. It's just redneck ASMR at that point.
Oh, here's where we found. Now sometimes this will happen.
You've got two options. Where your jig didn't hold it down, right?
First option is to go in there, do what I'm going to do. Put a little bit of glue. Don't move your jig at all. Set it right like that. Grab your clamp, reset. Grab it up a little higher.
Push.
It right back down and let it get set.
Now this is why I like this stuff.
Accelerate. And back to putting on glue. Back to the first one. Now what we do is just put a little bead on each of those. And then I like to come in here.
Just take off that little bit. Come over here. Set those so that they can fully cure.
There's another one that all that accelerant is.
I have no idea what the chemical makeup is. I don't know where it came from. I'm assuming Amazon. But all it does is it forces that CA to cure almost instantly.
Does this smell like dog poop over here? Yeah, that's what I was thinking too. I thought I was crazy. Not gonna lie. There probably is some over here. That dog. Yeah. Don't get CA and accelerant mixed on your hand. It is altogether unpleasant. And lacquer thinner doesn't take CA off of your hands.
Alrighty. That's kind of all there is to it. Glue them, watch them, don't let there be any drips on them. And then after that, they're ready to shoot. Assuming that you get your tips in these. Already have them in there, but normally I set them like this. I'll put CA on the insert, push the insert, wipe off the insert, and then let the weight of the arrow as it all cures, hold it together. Yeah, that's kind of all there is to it.