Bear Kodiak 1961 Traditional Recurve - Full Rework - Part 1
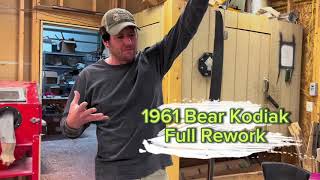
A Pro Archer Shot-Coach YouTube video ("Bear Kodiak 1961 Traditional Recurve - Full Rework - Part 1", Jan 29, 2024) documenting a full restoration of a 1961 Bear Kodiak 60" recurve bow. The speaker inspects condition (deep glass scratch, sight holes, medallions), measures and tunes the bow (three-under tiller, 43 lb marking, measured 44 lb then reduced to ~41 lb after material removal), corrects a significant lower-limb twist by selective glass removal and sanding, adjusts tiller and brace height (catalog recommends 7.25"; presenter prefers ~8.25"–8.5"), shapes the shelf and sideplate radius, and prepares for refinishing. Work-in-progress ends with file work and a pause to continue in Part 2.
Chapters
Hey, guys. So today we're gonna do another rework video. I'll probably film this in a couple segments, but that'll be okay. We're gonna start on it tonight. And what I've got here is a 1961 bear Kodiak. And this is gonna be a full rework on this bow. These are pretty good bows. Got a nice, nice curve, nice hook in them in the recurve portion, and a nice long riser with good fades. So we're excited about this. We're going to do a bunch of stuff to it, and I've got here the paperwork with the instructions. So let's see what we're going to do to this bow today. Okay. Please find and close my 1961 bear Kodiak. Only year in that time period they used green glass. So, yes, it does have green glass on it. Here's what we're going to do to it. So we're going to refinish and shape shelf. So obviously that's a straight shelf there. We're going to put a radius on that, make that minimal arrow, minimal contact to the arrow. So we're going to do that. Fix any tip or other issues. We find the tips look fairly good, but we'll clean them up and make them perfect. Blend in logos as good as you can. That can get a little touchy. We'll be real careful. Behr used laser screen printing, or I think they still do, and they just print right onto the bow. These are not decals, and you cannot find these decals. So you have to be really careful. When we get into this, we'll see how that comes out. The green glass will help us on these particular logos. The black glass sometimes tends to. I find that there's a little bit of yellow around it. The green glass tends to bend a little bit better. Blend a little bit better, what I found. So we'll just have to be real careful when we come up to these logos that we don't tear them up. There's one here, there's two. One on the belly, one on the back. So blend in logos fix slight limb twist. So we got a slight limb twist. Not a problem. Easy to fix and fill in sight holes. A lot of these bows came with sight holes. On this one, they're on the back. A lot of times they're right back here. They can be either side. But on this particular bow, they're right here. These are in the overlay. So we may have to use a little bit of imagination to fix these. I might have to do a little bit of thinking on that. To blend that in, might have to use some white resin that's in the very end of the overlay there. But we'll figure it out. Okay. There is a deep scratch in limb that just. That may be just in the finish, if deeper. Blend as good as you can. Okay. So here's the scratch. I'm going to show this to you guys. If you can take a look at that. That is not just in the finish. That is deeply, deeply into the glass. That may cause us some problems, but we can fix it. We'll make it as good as we can, but that. It'll be interesting to see what I can do with this deep scratch. In fact, that is so deep that I can see faintly the wood lamination underneath there. So it's. It's basically a full thickness scratch through the glass. That was a tremendous impact right there. We'll have to be careful when we string it, make sure that nothing explodes on us. Should be okay, though, because it's lineal. If it was going this way, I'd be way more concerned because you could have a shear lineal like that. It shouldn't cause the bow to fail. Okay, let's see what else we got. Okay. I shoot three under for tiller purposes. No problem. We will tiller it for that 43 pounds. Currently. 43 is good, but try to maintain at least 40 pounds. So legal for hunting. Not a problem. If it happens to be under marked, anything up to 45 pounds is good. Okay. Recommended brace height per catalog is seven and a quarter. I'm not sure about that, but that is the recommendation. Okay. And then he attached the catalog page. Check this out. This is pretty cool. This is a catalog page. Attached. This must have been. Look at the price on that. That's pretty cool right there. $59.95 for that bow. Back in the day, Bear Kodiak, Fred's personal bow. Isn't that cool? That's pretty cool. So, really, I gotta tell you, I gotta tell you, I love all my customers dearly, But a detailed set of instructions for me on my reworks is so invaluable, so awesome. I can go back to this. It's in writing, and I can say if I have any questions, I can go back and look at it, and it's all written out for me. Absolutely love that. So if you guys want to really make me happy when you stand in reworks, put it all out in writing. It makes me way more accurate. I don't make mistakes. Oh, One thing, if you'll notice, I've had a little confusion over the past on these medallions and I've learned a lot in the last year about, you know, whether they were plastic or whether they were metal or what. And it's been really interesting just looking at that. I'm gonna say that's metal, probably brass or bronze because it looks like it has a green patina on it. Once again, we'll figure that out once we get into it. But we're gonna shine that bad boy up and make it beautiful. And also most, a lot of the plastic ones in my experience are domed. This one is not domed, it is flat. So. So here we go. Let's go out to the shop and make this baby beautiful again. Alright, here we are. Here we are over here at the tuning tree, the tiller tree. We're gonna go ahead and string it up and check the specs on it, see where it's at. Check the twist. So it's a 60 inch bow. For that I'm gonna make a gift. It's gonna be this string right here. We're gonna give it a try here. Looks about right. I might have to twist it a little bit. I feel like the. The recommended brace height is a little low from the manufacturer. But we'll figure that out pretty quick. I twisted it a little bit. Definitely gave it more than what they say. I'll release that a bit. Okay. Maybe just a little more. I like that actually. I like that shape. But we'll get it a little closer to what they're saying. Try that. They're saying seven and a quarter. That's more like what I would brace this bow for what the limb design is. But we're gonna find out what we think. Okay, now we'll check the straightness. Oh yeah. Significant twist on the lower limb. It's twisting that way. What do we got on the top limb? The top limb is straight. You can see this. You look that look right down here. You can see how that limb is twisting out of the. The string is actually wanting to climb out of the string groove. So that's going to have to be corrected. One thing I want to look at. Oh, that groove is pretty much in line. So now you could, you could. Technically you could, you could correct this twist with heat and moving it manually back. But those twists, if you're doing it in a, in a professional bow shop, it's better to do it actually mechanically taking material off because that way it's going to stay forever. Not saying that some of Those that you do by hand don't stay. Sometimes they do. But if you're putting your name on it, you want to make sure that that twist stays out of there for good. There's all, usually there's a reason why sometimes I look at the fade out. If I put my thumb here at the fade and then I look over here. Let me just show you this. I'm going to grab a square real quick. So sometimes for sure, on production line bows, when the fade, when the fade gets ground on an angle, a little bit of an angle that can cause the limb twist. So what I like to do is just look at the end of it here and then I'll put a square across. And this is a very short area. So that because the profile of the limb would affect it. If I had a long area here, but I just have a short one. And then I'm going to look at where that fade is right there. That's the end of it. Let's look at this side. Okay, that's nearly perfect. They come to the same spot on both sides. If this fade, if the riser fade was ground like this on an angle that can make that limb twist, this one is not. It looks nearly perfect. So that's not what's causing it. If you can find out what's causing it, a lot of times it's easier to fix. So what we're going to do now is we're going to check the weight. Okay, so that's 44 pounds. It's marked at 43 pounds. I know my scale is correct because I, I calibrate it with this digital high tech one and they both say the same. And then if I don't trust those, I actually use actual weights to trust it. But so it's actually a pound heavier, which in our case is very, very good because we need that room. Let's check the tiller now. So we're gonna measure in around the page. 15 inches. 15 there. So it's significantly out of tiller with about, oh, a quarter inch of positive tiller on the top limb there. Again, that is really good in our favor because the bottom limb is twisted. Now I'm going to measure down and see if the limb thicknesses are the same in proportion. So measure down 10 inches and then across inch and 9. 16, 10 inches and then across inch and a half. So there again, everything is working out good for us. We can take a little material off the bottom limb, actually make them more symmetrical, more the same. And this is out of tiller. This needs to be reduced out of tiller this way, too. So that's really good. Let's go over to the flat sander and we'll start straightening this limb. Sam, see how much we took off 10 inches down. So now our limbs are perfectly even. We can go another six feet and they'll still look really close. We don't want to go more than that. So we're going to take a little bit more off. Ah, come on. About a 30 second under. Let's see how straight it is. Oh, yeah, we're working that twist right out of there. And do this a little bit more. And that's all I'm gonna do. A little bit more. Okay, let me check it. That twist is not out of there. But when you. When you take a twist out like this, when it's this significant, you want to take it off several different surfaces. Because. Because if you take it off all one place, a lot of times that's bad for the bow. Plus it'll make the bow disproportionate. Also, if you look right here, you see how much glass I've got on the belly there. I've got a nice amount on the back. I don't have that much, but I can remove a little bit just on this side to bring that thing into line. And I've taken a little off here. And that's what we want to do. So let's go check our tiller now. See where we're at. So 15 inches up. Let's see what we did. We're sitting about 6 and 5, 8. 15 inches up. Okay, so we're reverse tiller now. Not a problem. Our priority is to straighten this limb so we can change that tiller once we get there. Now, when I. When I take this glass off, I'm gonna have to be super, super careful that I don't get onto this here sticker here. This graphic. That's going to be really delicate, but we can do it. So we'll unstring this. What we're going to do is get me some 180 on here. Collector. Wow. All right. Now this is where it gets super sketchy. We cannot get onto that graphic. So what I'm going to do is I'm going to gently. I don't need a lot, so I'm not going to get on the aggressive. I'm going to get on the used side and put my fingers so that it puts force just on that side. Here we go. We're going to stop a ways away. Now. It looks Like, I'm hitting that. I'm to about not really hitting that. You can see I'm taking a lot more off there. I got to watch what I'm doing, how thick that is. Okay, coming off good. See, I'm not taking anything off that side. I can see the problem, why this twisted right away. There's a lot less glass on this side than there was on this side. So that was probably. That twist was built in from the start, and it probably was pretty straight, but over time, it just gave into it. Good. Now you can see I've basically made these almost the same thickness, maybe even a little more up here. I bet you that's almost going to take that twist out. This is. This is 120. This is 180. We're going to take these scratches out with this one Now. Now, on this one, I don't have to be as careful. I want to blend where I came up to that decal. What I did is overlap that. I can't even fill that seam. That's what we want. Want to stay away from that. Okay, Stringer up. See what we did. Oh, look at that. That's gorgeous. The sun shining across there on that wheat, please. Let's see what we did. Let's. Hopefully we took it out. Hopefully we took it all out. We took it all out. It is perfect. We still have the integrity of the width of the limb. So, I mean, we're a 32nd under inch and a half, and the other side is an inch and a half. So you're. You're never gonna see that. That's about an inch and a half. You're never gonna see that. You're not gonna be able to tell the difference. Sometimes when I look at straightness, the background is this brown table. So switch it over to, like, this, and it'll tell you. It'll give you a new perspective on if it's straight or not. Just from different backgrounds. It's beautiful. It's straight. Okay, now, by doing that, we carefully did that. We did a good job. However, we. We built in reverse tiller, so we have to fix that now. And because our top limb is straight, which it is perfectly straight, what we'll do is we'll check which side has more glass. So even on this one, I can see that it's pretty close to the same. Let's look at this side. Pretty close to the same. I would rather remove glass off the belly because less glass on the belly, more on the back actually makes for a smoother transition. Bow because this is all under compression. So if you have less to compress, the draw is smoother and you still have the snap when it throws it back. So let's see how much we need to remove. You can look at this. If you look right down here, you can see how this is bigger than this. That's the reverse tiller. That's what we did when we straightened this limb. This is now bigger than this. It needs to be just opposite of that. But how much is it is the question. So almost little over 7 inches. About 7 and a 16 there. So it's quite a bit. It's. It's significant at this point. Brace height matters, too, on. On where your tiller is. So it's like. It's like an inch and an eighth. Just quite a bit. But that's not a problem for us. I am going to take it off the belly for one reason. That's because we got this guy up here. So go ahead and unstring it. Now. I'm going to use the aggressive side to remove. The more strokes that you do on here, the more room for error. So if you can minimize that by less times across the paper. All right, that felt good to me. Now we'll clean those scratches off. Beautiful smooth strokes. Cleaning up our ends, our tails as we go. Okay, that's beautiful. Let's check it. I don't like how shallow these string grooves are. I may do something about that. However, there's not a lot of glass left there, so I may just clean them up and leave them the depth they are. Maybe widen them a tiny bit. Set this right in there. Now, just looking at this bow, I can tell I corrected that tiller a lot. I may have got it perfect the first try, but I doubt it. Oh, yeah, we did. We moved it nicely. So we're now at 6 and 11. 16, sitting at 6 and 11. Let's check it over here. A lot of times I put a mark here, and I'm not sure why I'm not doing that. I guess I'm just not. Okay. So we actually went above and beyond. So I need to take just a little bit off this side. It's always a guessing game. I wanted to take the bolt off the belly. I didn't want to have to touch this. So I'm happy with it because I don't want to. You know, this is here. I got to address that at some point. So we're just going to go on the 180, take a little bit off of here. It's not going to take much at all. Now we're going to keep it perfectly flat. I'm noticing something as I'm working on this bow. It seems like maybe a little bit of the collar is in the. I wonder if they dyed their finish. It looks like the actual finish is a little bit green. That's going to be interesting to see what color it is. After I'm done, I'm going to go ahead and mark these because I'm tired of measuring up from the side. 15 and 15. Now, I've got six and a half on the dot right there. Over here. It is so perfect for three under. It's just a hair under an eight. It's. It's absolutely perfectly tillered, and it's straight. See, we were at 44 pounds. Let's see what I took off of it. Let's grab that arrow. Oh, that. That. That took a lot off. Well, and it was a significant twist, but that should be about all we have to take off. That dropped us down to 41 pounds. Now, if you remember, the instructions said not to go under 40. We've got a pound to play with, but we're gonna have to be super careful because we still got this bad boy. And to be honest with you, Shane really doesn't know what he's gonna do there yet. So we'll have to figure that out as we go along. Okay. So the tuning. We've tuned it, We've restraightened it, cleaned it up. We're gonna shoot it now. Okay. So my little brother's building a cabinet here, so I got to shoot pretty close to target. Shit. Doesn't matter at all. I just. I want to feel the bow. I'm not even looking so much at where I hit. I just want to feel how this bow performs. So when I. When I test shoot a bow, I draw it. I feel what the limbs feel like all the way back. Are they smooth? Do they make noises? Do they. Do I feel something Give. And I feel perfect smoothness all the way back on this bow. Let me. I like it. I like it a lot. There's a reason that this was Fred Bow's favorite bow out of his lineup. On the recurve side. They're fast. They're smooth. They really are awesome. Oh, that's. That's gorgeous. Now, when you correct twist on a limb, a true test, if you did correct, the twist is after you shoot it. If you did not do a good job, that twist will move back into its original place. Yeah, it's good. It's good. It's good, it's good. Okay. So when I was shooting this bow, I noticed something, and he said, you know, do it. Total rework on this bow. So when I shoot this bow, I notice something I do not like about it. And that is the handle is pretty good. But right here, that is digging into my hand. It's not a perfect fit. It just kind of. Right here, it just kind of digs into my hand. So we're going to correct that and make that feel a little bit better. It's pretty good. You know, it's just a small detail. It's not that big of a detail. Now, one thing I will say, the recommended brace height is down here. I don't see why you would brace this bow that low. This, this brace height works fantastic for this bow. It's smooth, it's fast. There's no hand shock. There is a little bit of noise, but that, that is simply because of the limb profile you're getting. That noise. This type of limb profile, where it's a little bit flatter out here and it doesn't swoop in up to the riser, tend to be just a little noisier. And largely because look how much string contact you have on the hook portion of the limb. A lot of your noise comes from that. So this brace height, I say, is ideal for this bow. And it's sitting at little over eight and a half. You could go a little under. I'd say eight and a quarter to eight and a half would be about right for this bow. Okay, tuning, tillering, straightening done. We are ready to start refinishing this bow. Okay, this is the last step of the tuning process. Normally I do this with 80 grit, but because I don't want to reduce any more weight off this bow, we're going to do it with 180. I'm just going to lightly touch it. Basically what I'm doing is this is a really sharp edge. I could get this with hand sandpaper, but it won't have the radius that I want. And here at Great Plains, we don't skip steps. Never. You skip a step, you make a mistake. So we're going to do this step. We're just going to do it light. Here we go. I'm going to count the strokes. It's going to be six strokes per side of the limb. 1, 1, 2, 3, 4. Super light, super light. Okay, flip it this side. Doesn't you know, I didn't touch it. So we're just taking off. Finish on this Side don't want to take off much at all. Okay, now I'm going to trade places with you. Look at that, though. Look. Just a couple strokes and that brilliant white maple core pops out. There's the old yellow finish. Beautiful. This is gonna be a beautiful bow when we're done. Okay. Light touch. Ease that edge. We're just feathering this baby. We gotta be really gentle to this bow. She's a sweetheart. Yeah, give it some love. That's beautiful. Okay, that step's done about knock my head off. Okay, we will move on. First step over here. If you're working on your own bows, you never ever clamp on the fade out. That's how you crack a limb. You got a clamp up here on the lin. This part will flip. This part doesn't flex. It does flex a little, but you, you run the wrist. Okay, we'll pull this off. And now we're going to take this rug rest off. That looks like about the original. That glue on there. The adhesive is rock hard. We're seeing a lot of arrow fuzzy little caterpillar. So the dog is eating it down there and you can see how straight it is. That's not acceptable at all. The first step is also, if you look right here, this has just a slight radius here, but there's plenty of mass here. We can put a bigger radius on that and it's gonna add a lot of performance to this bow. So the first thing we're gonna do, we're going to radius the side plate. We do have to be careful. We don't want to compromise the integrity of this bow. The first thing we're going to do, radius the side plate. Then we'll radius the shelf. So let's go over to the knife grinders. So for this step, I can use the big knife grinder because I've got a nice open shelf. Look at how much site window you got. Six inches of sight window. That's. That's impressive. Very open bow. Smell that old finish and that old wood. Interesting smell. I'll be real careful here. I'm going to use the edge of that. I'm kind of just going to shape this as I go. I'll do some of this with files, but the more I do now, the less I do with files, which will save me time. I kind of want the high point to just above the webbing. So I've kind of got it to there. I'm going to start back here now. First thing I'm going to do is establish a layout that means a point that I do not want to go past. This hole right now is a little bit to that side. So I'll just kind of use that as my reference, establish my layout line, and then I'll work from that nice smooth, straight line. That looks really good. Maybe just a little bit more. Sometimes a guy can just zone out while you're watching the machine do its work and just. I like that. Man, that is beautiful wood underneath there. That is pretty. Okay. Always better to be really cautious. I don't know. There's a lot of material left there. We can measure this here. Got about an inch and 5 8. So half of inch and 58 is about 7, 8. So if you look at that, we've got a center shot bow already. So we really. There's no need to go further because we've already got us a center shot bow. And by the time we file do the file work, we'll be past there. And once we're to center shot, we're good to go. We don't want to compromise the strength of this bow. So I'm going to stop right there. Now we're going to go over here. This essentially could change the look of this bow just a little bit, but it's still going to look good. No matter what we do here, we're going to make it look good. But to radius this, you know, this little thing comes in here, this little hook. That looks pretty cool. We may have to change that a little bit. Still gonna look good. All right, so for this, you know, I kind of want the high point to be right over the webbing. That's where we want that high point to be. That's where the arrow is gonna rest, and that's where it's gonna pivot. So just need to keep that in mind. As I shape this shelf, I'm going to go up to that. All right, that's looking good. We're getting it done. Okay, now we're going to come from the other side. Now on this side, we need to take off quite a bit more. Because this shelf is so long, it's kind of hard for me to see on this machine hitting the bottom. As I work this shelf down, I need to keep this thing fairly straight. If I get that thing crooked, it's really hard to get out with hand tools. Then I have to come back to this machine, which cost me time and money. Okay, that's looking pretty nice. Okay, now if you just look at that and you're trying to look at the overall radius, you May say, well, we didn't do a whole lot. Keep in mind, this little bubble right here, that thing was clear across. We've taken from the. From the point out here, we're close to a quarter inch taken off the front of that there shelf or the back of that shelf. So we're getting about to where we want it to be. Okay, that's perfect. If you put a square on that, that would be awful close to 90. Let's just check it. Okay. Not even close. But we're not done yet either. So wait, you know the hand files, remove that plenty. Good. That's beautiful. I like that a lot. It's hard to see the radius because you have this straight line going across here where the original one was. There's a significant radius. Let me show you here. So you can see that. Look at that. That's. That's a nice radius. And the high point is right where we want it to be, right above the webbing right there. Okay, good. We're just creating that inside radius. I enjoy this part for sure. On older bows where the wood is nice and dried out, if the wood is retaining any moisture, it gums up. Or like bacoti, which is, you know, bacoti is really oily. So doing this with fresh Bakot, it can be pretty dry, but it still has that oil in it. Just gums that file up immediately. You can see that file is clean. I mean, you can see the sawdust on it. But it's open, it's clean, so it cuts real fast. I do enjoy working on these old bows a lot. I just don't have enough time to do it with building my own line of bow bows. Everybody wants to get paid a lot to do what they love, but that's not how life works. You got to put in the hours. Not saying I don't love building my line of bows. I'd absolutely love building my own line. We just all want the perfect boy job. Be a little bit careful there. It's getting a little hard on that glass. Switch to this file. Come in here. We're just going to connect the dots. Basically, that file work is creating landmarks once again, you create the depth you want to go, the angle you want to go, and then this half round coarse file takes out the material to that landmark that you created. When I get to here, I don't want to run this file into this radius. So I'll flip it over and I'll use the half round area. Comes off pretty fast. I could. I could be a lot more aggressive with it, but you want to be careful. We got one shot at making this bow perfect. We don't have another one. So if you look at this now, this is coming off of here perfectly flush, but obviously there's a deep groove there. We're just going to connect those dots. Keep saying connect the dots. That doesn't seem like the right thing to say for that, but I don't know what else to say. They probably think it was a raspberry snow cone. I'm almost there. All the file work is done and we're out of filming time today. We will pick up where we left off tomorrow.
More from Pro







Choosing a Traditional Bow for Beginners | Custom or Amazon? | Which is Right for you?


Vintage Bow Restoration | Ben Pearson BP-H52 | Very Twisted Limb, Bad Finish, Holes in Riser
