Bighorn Bow Restoration
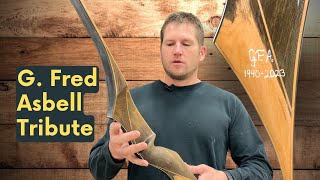
A Pro Archer Shot-Coach restores a Bighorn recurve bow built by G. Fred Asbell, bringing it from 58 lb down to 48 lb while preserving the original design. The work includes tiller straightening, grip reshaping, and a graphic dedication to Asbell, turning the bow into a functional wall-hanger memorial.
Questions this video answers
August 14, 1940.
January 7, 2023.
Over 500 articles.
Over 150,000 copies.
32 U.S. states.
Chapters
Today we have an exciting project that we want to share with you. I have in my hands here a Bighorn bow company recurve. This was built by G. Fred Asbell and we wanted to honor him and his legacy in the archery community by refinishing this and giving it a facelift, making it look brand new, making it a very happy bow. A little bit about Fred Asbell. He died when he was 82 years old. He died in January of this year, January 7, 2023. He was born August 14, 1940. So he was 82 years old when he died. He was inducted into the Archery hall of Fame. Kind of a legacy in the traditional archery community. He spent some time in the military and he began shooting in 1961. After he came home from the military in 1970, he moved to Colorado and he started the Bighorn Bow Company. He built bows from the late 70s all the way up into the early 90s. Probably what he's most notably known for is his writing. He was a tremendous author. He wrote over 500 articles in the Bow Hunting Magazine and Peterson's Hunting publication. And probably his most well known work is his Instinctive Archery Series books. They sold over 150,000 copies. He bow hunted big bowhunter hunted in 32 different US states, nine Canadian provinces and during the course of his Life he took 19 different big game species. So quite a role model for the traditional archery community. And today we're going to take one of his bows and to honor his memory and his legacy, we're going to give it a facelift. We're going to stay true to the original recurve design. We're not going to change anything as far as as design characteristics and features. So the structural integrity of this bow is actually really good. I don't see any glass grazing or cracks or anything. The fellow that sent it in requested that we make this grip a little smaller and streamlined. I'm sure for some people it would fit perfectly. We also are going to put new inserts in here. I think this bow has been tried to be refinished at some point. These sight holes here have been filled with black epoxy. I'm not sure yet what I'll do with those, but I'll see what I can do to make those look a little bit better. We're just gonna soup it up, make it look really crisp and clean and pretty and something that can be hung on the wall in remembrance of Fred Asbel. Let's string it up and see what we're dealing with here. Alright, let's see what we got. It's pretty stiff. Okay, so we got a 58 pound bow here. Lets see what this bow does when it comes to stacking. After 28 inches, it does start to stack. That has a lot to do with the this here portion of the limb. I can tell you that you're getting more stack from that. If this limb came off of here, deflects toward the archer and then recurved in a smooth curve, you would probably be able to draw this bow out to 2930 inches without stacking. Also, the hook on this or the recurve portion is fairly abrupt. I would call it almost a semi working recurve. There is a element of static recurve on this bow. As you can see, when I draw this, it is working, but there is also a portion that is staying fairly stiff. Let's check the straightness. It's just a little bit out that way, but honestly, not bad. I mean, you could shoot it its whole life with it being out that far, you'd never have an issue. Now the top limb is perfectly straight. Okay. So the tiller is way, way off. We're about 516 to 3, 8 off. Not a big issue. We can correct that. Tell you what, let's fling a couple arrows with it this heavy and see what we got. So what I got here, it's a little bit of a lighter arrow. I wouldn't hunt with this arrow. This isn't too light for the bow if you're gonna target shoot. Whoo. That's fast. Look at that. I aimed at the same spot. Those two arrows are touching. Look at. Okay, we gotta go. Look at that. I was aiming at this dot here. So up and down is perfect. Now side to side isn't because I'm not used to it yet, but I mean, that's the first three arrows out of that bow. If that ain't consistency, very impressive. Good job, Fred. We're gonna take these inserts out first because it's good to work on something like this before you do any finish work whatsoever. We're going to drill them out, which should work perfectly fine. I want it perfect, Josh. Yeah, man. Every time you move it, it moves. Isn't that ironic? And here we go. Smell that old wood. Little bit more. I bet you that's about perfect. Yeah, that's good. So that one's deep enough. Let's move over to the next one. Oh, we came through. No, no, we didn't come through. It's okay. So double check this. We got to be Dead on. Inch and 5 16. And it looks like we are perfectly inch and 516 for the quickie quiver. First step done. We didn't do any damage to the bow whatsoever. I don't think I'm gonna do just a whole lot. If I do too much here, I'm going to change the way that this actually looks and I do not want to do that because normally, you know, I would relieve these areas so it's easier to string. I'm going to do just one little thing. If you look right here, you see how this one is further towards this groove here is further towards the tip and this one is back. We need those to be parallel. So I'm going to take that off. I mean we're talking a 16th or less. So the best tool to do that safely is probably my Dremel. I don't want to go any deeper, but I do want to go further towards the tip. Okay, we did it. We are now parallel. So we're going to take and clean that up just a skosh. I may not be able to get in there with that. This is 220. I really don't want to touch this area again. I don't have a lot of stories or anything about Fred Asbell. I didn't know him really that well personally. I was at several shows with him where my booth was set up across from his actually two that I can remember. I was at Kalamazoo with him. He was right across the way from me selling his wool products. My little boy was with me and he found these knives. I went and looked what he was looking at and there's this cool little neck knife. It was a sheath knife, had about a 3 inch blade, little brown wood handle on it and it was hand forged. Correct me if I'm wrong on this. I think he said that he made that knife unless he had somebody make it for him. But his initials were stamped into the blade. And so I have that little knife still. And it came with a really neat little leather sheath with beads on it. So you know, Fred must have been extremely talented in a lot of different areas. Just gonna. It's really hard to finish to sand this on the pneumatics. It's a lot easier to do it by hand when you have it in this position. So I'm just cleaning this up. I keep noticing the thing on these old bows is you just, you just keep noticing stuff like there was some file marks right there. If we're gonna redo it, we want to redo it, right? We don't want it to come out of great planes. That looking like it's halfway done. Okay, that looks good. I like that. I've. I've paralleled those lines. I've cleaned up inside of there. I'm not going to do a whole lot with the string grooves. Now I shall just sand those tips. Like these are a little bit hard to work on because if this here was relieved you could get to all these areas. Okay, I'm good with that. Done with that Side tips are kind of time consuming on any bow. Definitely my least favorite part of building bows. A lot of bow your enjoy doing the tips. Not this one. Okay, we lucked out here. These are parallel. The string grooves are pretty much intact. I'm not going to do anything with that. All right, so I'm at this step here. Now normally I would file these but this bow came with fairly square tips. And like I've been saying, we want to keep this as. As original as possible. Of course I'm going to clean up this inside here because I, I changed that just to skosh. Don't want any sharp edges that could catch a string. Looks pretty much how it was when I got it. Just cleaned up. Just have a little piece jutting out there. I would leave it but I know that's not good enough for jaw. And then it's a Tuesday and early in the week and I don't want to get in trouble this early in the week. I have to get it right so I don't get chewed out. Right, Josh? That's right. I wonder what my life would be like if I didn't live in constant fear of you. Alright, so that's beautiful. Fix that up. We'll quickly do the other one. Oh yeah, that's. That's nice. Let's go ahead and. Oh yeah, that's big. Let's start with taking that throat out. What I'm doing is I'm moving your hand up underneath that shell. The closer your hand gets to where the arrow is, the more accurate your bow will be. The fellow that owns this said he doesn't really care for a high risk grip. So in order to remedy that, I need to take some right off of here actually. And I don't want to blow that glass off. So I'm going to run it reverse. I need some water. Hate that when that happened. That's beautiful. See what Nick thinks. Oh, that's nice. Yeah. What kind of wood is that? That's German walrus wood from Tanzania. So now that I moved that in the High point of this bow is actually a lot closer to the center. So I don't think I'm going to do a lot with this shelf. I'm just going to move the high point. There we go. I want to get that right above the webbing of your hand there. Alright, let's get this inside radius. I'm impressed with the quality of the glass and the glue lines on this bow. You'll notice all these glue lines are really nice and tight. The glass seems to be of really high quality. It's not splintering or when you grind it, it stays intact. It doesn't lose its tensile elongation where it connects to the wood. I feel like this bow was really well built. There are inserts into this side. I do not want to go too far because I have two holes. They are in line also. So I got to keep that in mind. I don't want to weaken that side plate. This thing is going all over the place on me. But I've relieved the sight window so your sight window is going to be a lot bigger. Maybe, maybe even able to shoot around corners. Once again working into the glass so we don't blow it off. Oh what I was gonna say also when I bought that little sheath knife I figured, you know, okay, this is a hand forged blade. Be like a hundred bucks. Nope, 20 bucks. Remember thinking really, really low price a hand forged blade like that year at $20. I should have given him more because you, you're not making a dime at that. Okay, that looks really good. 120 grit. Clean this up. I guess when Josh says it's good enough, I'll quit sanding. Guys, it's been a couple days we worked on this bow. Probably two hours on Tuesday. Today is Friday. Probably got an hour left on it. This goes to some 120 load it up. In Makita, the king of drills. Upon further analyzation, this is proven to be pressure dyed maple. I was talking to the owner of this bow and he said they believe it to be made in the late 80s. The other thing about maple can be a little bit frustrating to sand because as you're sanding it you had to have in the wood there's naturally these little streaks and stuff in the grain. And a guy wants to think that those are actually scratches. So if you look real close here, that right there is grain but that scratches. So it looks really close. See there's grain, there's grain. Those are scratches. They're almost identical. So it's hard to pick them Out. Alright, I'm gonna call that good. Let's go tune. This bad boy grip is too thick. If you could get the weight down anywhere between 48 to 53 pounds, that would be incredible. Otherwise, just as close to the low 50s as possible. Yeah, we can do it. So it's getting exciting, not taking this jacket off, but the bow. What he got is 58 pounds at 28 inches. To get a lot more years out of it, he said 48 to 53. Honestly, if we could hit 48, I'd probably be happier than low 50s. Just because it is an old bow and it would probably last for many, many, many years if it was less poundage on it. I looked at it before. When you're tuning down a bow, you want to consciously think about the tiller, the straightness and the weight while you're taking material off any surface. It's a lot straighter than I would have thought. It's actually, like I said before, nearly perfect. We'll check the tiller just real quick. When you check a tiller on a bow, you want to measure from the end of the string. So you put your tape right here. If you're using this method to check tiller. And just like that on the other side instead of the tip. Because there can be discrepancies in the length of this tip. So we're out of teal or by a quarter inch. Not a big deal. We can correct that. Easy, easy fix, no problem. We've got at least 8 pounds that need to come off, so we need to take a quick look at this and see how much glass we got. If you can. I always remove more belly glass than the back glass because that will make for a smoother, faster bow. Now, it's. It's not huge, it's just a small, small thing. You're not going to ruin your bow if you take it all off the back. But it's just that little edge that we give them here. I can straighten this real quick by taking it out the outside. And we have plenty of width here, so we'll start on the flat sender here. So I'm just a hair off that way, so I'll just take a little bit off. Main thing when you're doing this is you don't want to take it off up here because that'll change the distance from the string to the edge. That's it, man. That straightened it perfectly. Just a hair off of this side. That's perfect. For reference, we did change the tiller a little bit, but we're basically where we're at. I wish everybody had a stringer like this. Then I would never have to worry about people losing control of their recurves and blowing out a limb. And then. Then it's somehow the bowyer's fault. That's another topic for another day. We're going to move my high tech sanding station around. I should start a gofundme for more tools. Okay, turn on our dust collector. This is a projection dust collector, so it actually collects the dust over there, not right here. We need to take quite a bit off. I've got a lot of glass there to work with. But this is an old bow. We don't want to compromise it. Okay, that's seven. When I do this, I look to see if I'm taking it off evenly, and I am taking it off pretty evenly. But I can tell just by the way it took it off. I need just a little more pressure on this side. It's not much. Seven strokes. Eight, nine, and ten. That's perfect. Okay, let's do the other side. Okay. Interesting smell. It's releasing right now. Tiller's perfect. Oh, man, that is so perfect. £49. That gives us £1 to edge. Send the bow exactly where we want it. Let's shoot a few arrows through it. That is nice, guys. Fix the tiller problem. Man, that was like a laser beam. With the limb profile, I thought there might be, you know, slower speeds and hand shock. Look at how I'm stacking those. Okay. I didn't, did I, Robin Hood? All right, let's go. Look at it. I was aiming at this big dot. I'm a little off to the side this one. I plucked the string, but look at that. And this is. This would have been right in there. Good job, Fred. You did good. All right, let's edge. Send it. We got her tuned. This is going to be a light touch. 1, 2, 3, 4, 5, 6. That's so pretty. Look at that. I just makes a beautiful edge immediately. Okay, let's go do the final hand sanding on it. I think we could get Chris to write on it because we want some pretty writing on it. We don't want my writing on it. Yeah, she's probably not going to write on it. You been a bad boy? Yeah. We're just going to take out the scratches now, Sam. In order to honor the memory of Fred Asbell, we have to have this thing. Perfecto. Exhaust. There's a little pinhole there in the maple. That's a wormhole. So we can't have that. There. You see that little hole right there? I'm going to build up a little bit of dust. Not too much. Then we'll put a drop of CA on it. A lot of times the tips on ca, because it naturally dries, you tend to get. It just kind of gets too big. You take a piece of paper, you put your ca right here, and you use the wicking properties. Where's the hole? Am I blind? Josh? There it is. There it is. Okay, quick, quick. We don't want it to run all over that. Mix up that slurry. That's perfect. Check that out. It's completely filled. Yeah, that's. That's just a beautiful repair. These steps that we always do on every bow, keep our quality control at the top because we don't ever deviate from them. You follow the steps, no matter if you think the bow needs it or not. That's how you get every bow perfect. So we'll just get us a new piece of paper, and we'll go over absolutely everything. We want to get as close to a wall hanger bow as we can once this guy's done. Okay, my guys and gals, my guys and gals, we have one more step. This is just turning out better than I would have thought. It's. It's. I'm really excited about it. I wish Fred Asbell was here to see this. I hope he would like it. Let's go back over, check the final tune on it. See where we're at? Perfectly straight lower limb. Perfectly straight upper limb. That's a perfect tiller. She's tuned. Let's check our final weight. We were hoping for 48. Dead on. See what we got here. So, I mean, we are dead on. 48. Perfectly. Very happy with that. So here's my inserts. And this is brass. It has a slight patina on it. We're going to take that patina off with steel wool, but we're just going to shine that up and make it perfect. So, hello. Okay, that's clean and shiny. It's not just a big difference, but we just want it perfect. So you can see the one on the right has been buffed, and it's just. It's just prettier and cleaner. You're right. Yeah, yeah. So the one on your left, we'll do the other one. We just have to have some buffer pad. We'll grab a block of soft wood. I'm not going to glue these because they'll never come out. Plus, if you glue them. If you have squeeze out and it blows out the side, you're gonna have a fight getting that off around there. You're gonna mess it all up. Almost there. I started with the soft wood, and if you'll look. What that did is that flared that down just a little bit. So then once I had that little edge flared, then I finished with the hard. You can see the difference. See how that one's square and that one's got just kind of a rounded, and it just looks a lot better. It kind of floats down. Makes it just kind of a little touch. Very gorgeous. Okay, we are ready for graphics. I could put it on there, but my writing is not as good as my wife, so we're gonna have to go get her. Is that cool, Trip? All right, here we go. That is pretty. I like that white on there, even on that darker maple. We'll put another gloss coat on this here portion, and then we'll go dull for a hunting sheen, which won't be dull dull. It'll have a little bit of shine to it to give it a pop. This right here is Fred Asbell's initials. It's the year of his birth and the year of his death. What we did here, it's kind of turning on us. We didn't know the serial number on it because it didn't have any markings on it. So for the serial number, we did 814, which was when he was born, and 1 7, which was when he died. It turned out just beautiful. It's 48 pounds. It's a shooter. The tips are gorgeous. I'm just really excited about it, and I hope it honors his legacy. Thanks for watching.
More from Pro







Choosing a Traditional Bow for Beginners | Custom or Amazon? | Which is Right for you?


Vintage Bow Restoration | Ben Pearson BP-H52 | Very Twisted Limb, Bad Finish, Holes in Riser

