Browning Backpacker + bonus footage
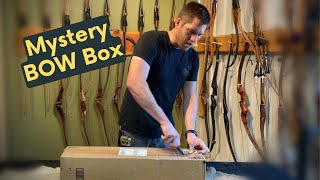
Shane from Great Plains Traditional Bow Company unboxes and tests a Browning Backpacker takedown recurve, measuring tiller, brace height, and arrow speeds. He finds issues with limb fitment and plans to build new belly-mounted limbs to improve performance.
Questions this video answers
65 pounds, 54 inch limbs.
19 inch riser.
4B123.154 (visible as '4B123. 154 inch Amo Browning backpacker' in the transcript).
65 lb at 28" (dead on what it's marked).
212 ft/s.
Chapters
Welcome great plainsmen Shane with Great Plains Traditional Bow Company. I'm the bowyer here. Today we have a little exciting project we're going to be working on. We love it when you guys send us bows that we can test out, try, work on, change things on. We're always excited to get new bows in our hands. We're going to do a little unboxing video and then we're going to shoot it and we're going to show you what we got. I haven't opened this box at all so I don't even know what's in here. So we are fixing to find out. So this looks like it's a Browning. These are the limbs. They're 65 pounds, 54 inch limbs. I noticed that the indexing and attachment points are a little different than I'm used to. Let's get out the riser, see what we got to be smarter than the packaging. Okie dokie. Not sure how old this bow is. It's kind of set up. It looks like it's a belly mount on the limbs. That's kind of a well known design. There's a lot of belly mount bows out there. Let's see if there's anything else in the box. Nope, nothing in the box. First of all, I noticed this is a very short bow. Now the riser, it's a 19 inch riser. So with a 19 inch riser you're getting some length on there. But then you've got some pretty stubby short limbs here. Not, not too bad of a profile. The fade out is pretty short, which is what you would expect. I normally like to measure the lineal length of these limbs. So let's go four there. Four. That's 8:12. So you got about 16 inches of working limb after the wedge fade out. On my recurves, I like to do about 18 inches of working limb after the wedge fade out. It seems to be the sweet spot. So let's put this together and let's see how she shoots. It. Looks like we've got a bushing right there for a stabilizer or bow fishing reel, possibly an elevated wire rest. Whoops. Okay. That rest is completely shot. It was just barely hanging on there by a thread. It just broke right off. I was just gonna move it into position and it just popped off. So it has an elevated rest. Looks like the flipper rest too. I'm just gonna. I think I'm just gonna pop that off. We got to refinish this bow anyway, so we're probably just shoot off of the shelf. Alright, let's mount these limbs on here. It says on the riser it's got the serial number 4B123. 154 inch Amo Browning backpacker 1 I don't think. Well, I know for a fact I've never had one of these in my hands. The wood on it's fairly pretty. I think it looks like they've got maple lamination, Possibly some sort of rosewood in the riser. Okay. So just looking at this rest on here, you got a really, really wide or I guess. Yeah, a wide and long rest. Looks like it's a bit overkill from my taste. However, one thing that does do for you is is that keeps that hand below the fletching. You will have no trouble at all on this bow of the fletching. Cutting your hand or hitting it. It's well protected. Another thing I like to do is I measure to the center of this bow. So if we take nine and a half would be the center to right there and then up from that. So it looks like the shelf is about 1 and 316 above center. Which is pretty normal. But he had an elevated rest on there which was about right here. We'll have to check the tiller and see if it was tillered for that elevated rest or to shoot off the shelf. All right, let's put it together and string it up and see what we've got here. Not a fan of these at all. I think they detract from the beauty of a bow. Big, huge knurled knobs. I mean they are user friendly. Let's see which would be. Looks like they're identically marked. I guess we'll just try them and see which one fits where. So I think I figured it out. Not. Not entirely sure. But we think we got it right. So we're putting this browning. This little browning here so that it's. It's right side up. Because if you do it this way it would be upside down. I think that's right. Wow, that is an interesting bow. So a 54 inch AMO. So let's see what we got here. Probably work. Okay. We got a serious severe twist in this bow. The top limb is also twisted, but it's twisted the opposite direction. I think what I'm going to do, I'm going to flip these limbs around and see if it's any different real quick. Yeah, I think that. Yep. Because now that looks straight or fairly straight. So I think I did have the limbs on backwards also. The tiller would be a Good indication. Some of my first impressions on this bow, the limb fitment is very, very bad. If it's so bad that it's twisted whenever you reverse the limbs, that means that the limb pad cut is not square, it's not straight. It's different from limb pad to limb pad. So that's a little bit worrisome. Also, if you'll notice, you can see this overhang here. It's a big old lip. So these are not mounted flush at all. I would give the limb fitment on this bow about a 2 out of 10, maybe 3 out of 10, because it does fit nice and tight down on the index pins. So that's a good thing. But having the limb pads a little bit off square, that's a negative. And having this overhang on the sides, that's a pretty, pretty significant negative. Now let's measure the tiller here. Five and a quarter. Okay, so that's showing me a reverse tiller of 3, 16. If you calculate that for sure, if you're shooting off the elevated rest, you're getting pretty close. About three, eight off tiller. So we can easily correct that. We're going to shoot it just like it is and see what we think. This brace height might be a little high for this, although it is a forward handle and it's a short bow, so it's probably designed to not be drawn quite as far on the overall stroke and which gets you a shorter bow overall and gets you into tighter hunting places. First we'll, we'll go and measure the weight on it. Yeah, it's dead on. What it's marked 65 at 28. Let's go and fling a few arrows and see what we think. I do apologize for the state of the shop. We are frantically and desperately preparing for the Colorado Traditional Archery Society's High Country Shoot up by Rifle Colorado, which we're really excited about. We'd love to see a bunch of you guys there if possible, but there hasn't been much time. We're trying to build about six or seven showbows for the show. And then also we've got some really urgent customs that we're kicking out. So it's pretty, pretty crazy around here. So that's why the shop looks like it does. Okay, I got my chronograph set up here and I'm gonna shoot through this. We're gonna see what it does here. 212ft per second. That's pretty good. Now that arrow is just a little light. Let's, let's shoot a Heavier arrow through it. I didn't have one that was exactly the right grain. This one here is about 9.3 grains per pound of bow weight for this 65 pound boat. And this one here is 15 grains per pound of bow weight. We'll shoot the lighter one first. 186ft per second. About a 9.3. That's not too bad. It's not super impressive for sure for this heavy a poundage and this short. Because I'm sure I'm overdrawing it. So let's see what it does with 15 grains per pound. 142. I'm gonna shoot this one one more time. Try to get just a little better release off of it. 173. Even worse. But with this little light arrow it was 212. But that. That first arrow I shot was only like 480 grains. Way too light. I haven't done the math on it. But it'd probably be down around 7 grains per pound or so. I don't know. When I was shooting it there it felt pretty stiff. It wasn't just super smooth. That that could be a lot due to just being fairly heavy and also short. It's not bad till about right there. And then it stacks pretty good. So the last two inches on it. I have a 29 inch draw. So it starts stacking pretty hard. At 27 inches. The shot felt okay. There wasn't much hand shock at all on it. It was a bit twangy. It was a little louder than I thought it would be. That's probably due to quite a bit of string and limb contact up here. Basically no hand shock. Which I expected that it's quite a significant riser. You know. It's 19 inches overall. You can kill a deer with it. Not a problem. It's just there's some things I would definitely change. What we're gonna do with this particular bow is I'm gonna put my limbs on it. Now this is going to be interesting. And I'll tell you why I do not have a belly mount limb bow takedown at this time. This will test my skill as a bowyer. All of my takedowns. All my three pieces. The limbs mount on the back of the bow. We've talked about designing a belly mount, takedown, recurve. But we have not done that. So we're just going to test out the bow, your skills and see if I can just put some limbs on this bad boy. Part of the reason that there's not as much performance in this recurve. Is the wedges need to be a little bit shorter, which you couldn't even hardly do for how short these limbs are. But it's a little out of proportion. It's a little out of balance for how long the riser is and how short the limbs are. So you're working recurve area. Your working limb area is about. Is a couple inches too short for optimum performance. So because of that you're getting it's kind of stacky. That's kind of my word. It's stacky. It's a little uncomfortable to shoot and I think the performance could be beefed up quite a lot on it. The other thing I noticed, which I don't quite understand is it looks to me like on the wedge that it's been tapered from both sides. Now that's not all bad. However, over time I could see that creating a weak spot. If you'll notice here, the wedge doesn't have a very aggressive fade. So you're probably flexing. You know, you're flexing right in here and then here you're getting no flex whatsoever. There's too much wood here. There's too much mass. You're not getting any flex in that fade out. So that would hinder performance. Also you need a long gradual fade out that flexes about 2 inches for optimum recurve limb performance. So we're going to change those things on it. What we're going to do is we're going to build a 62 inch set of limbs for this bow. We're going to increase the wedges, we're going to put nice long sweeping fades on them. We're going to belly mount my limbs onto this bow and we're going to see if we can upgrade the performance significantly on this bow and make it into a sweet shooter. All this without having ever doing a belly mounted recurve bow. So it, it'll be interesting. It will be interesting to see what we come up with. But I know I can do it. It's just a matter of doing it. So that's it for now and thanks for watching. Keep on shooting those Great Plains bows and we would love to see you at the high country shoot in Colorado. That's next weekend, June 23 through 25, up by rifle Colorado. You can look it up on the interwebs and come see us there. Come shoot our bows or just come hang out. We'd love to hang out with y'. All. Thanks for watching. I personally like back mounted limbs because I feel like they look so much better to me. It feels, it feels to me like they, they flow through the bow so much prettier and it, it looks so much better because on belly mounted limbs the problem you have is you have to have enough mass here for your index pin and your limb bolt so you end up with this big old bulbous knob here on the back of your bow. And this is, this is considered the presentation side of your bow. The back of your bow is always considered the presentation side because that's the side that you're showing people when you're shooting here. We always try to put the beauty, you know, the prettiest veneers on the presentation side. The thing I've always hated about belly mounted reekers is this big bulbous chunk of wood that has to be here to house the bolt and the index pin. In theory, like we've been talking, they possibly are more accurate, which we're going to find out. I showed this bow on a short and you can see the limb pockets where that limb just sinks down in there and it just flows one continuous line. If I were to mount that on the belly, that would, that would change all that and it would reverse that. Now I still think a guy could probably make it streamlined even if you mounted it on the belly. And I have to think about this some, but if I were to make a belly mounted recurve look great, I would do something about this right here. What it looks like to me is the riser is, is a totally separate animal from the limbs. It's like you've got three components on here and it shoots an arrow like this. It's like, oh yeah, that's a bow. You know, it all flows together. The riser mates real nice and it's beautiful. Great Plains has never done belly mounted limbs. And until you've done it, you really hardly have the authority to speak on it. But I'm fixing to do it and then I'm gonna have a far more educated response on what I see the benefits are to belly mounted limbs. Are they the other way around? Yeah. Okay, that's it. So the specs are. Go to the inside. See the specs are there. The specs actually are hidden once you put the limb on. I believe that one goes there. Let's look. I think that's right. No, I don't think that's right. I mean how I would write the specs. Let's.
More from Pro







Choosing a Traditional Bow for Beginners | Custom or Amazon? | Which is Right for you?


Vintage Bow Restoration | Ben Pearson BP-H52 | Very Twisted Limb, Bad Finish, Holes in Riser

