Cedar Stabilization Process | Great Plains Bows
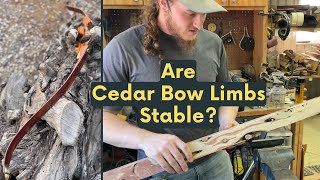
Nick demonstrates how to stabilize figured cedar for bow limbs by filling voids with epoxy heavily loaded with cedar dust, wrapping and curing, then grinding into laminations. Straight resin casting fails because it cracks under flex. Multiple fills over time, starting thick then fine, get the wood ready for final finishing.
Questions this video answers
EA40 two-part epoxy glue (used for gluing limbs and bows).
About 2 inches (he said "take a good 2 inch block off this side").
"Go right at 37." (spoken in context of cutting to length).
Approximately 1 3/4 inches ("What we need is inch and three quarters").
About 80,000ths of an inch ("Let's say we needed a lamination that was 80,000ths").
Chapters
Hi, everybody. Nick with Great Plains Traditional Bow company today. And a lot of you guys have seen the cedar in our bows and wondered, how are we using cedar that is that unstable looking and that figured and making it work in a bow? Well, I've developed this method to make cedar work in a limb that goes from a block like this that is knotty and cracked and swirly and has this gorgeous grain in it. But it's full of all kinds of voids and stabilize it out and make it into usable lambs for limb verniers. Now, we tried casting it initially. You cannot cast this in the traditional sense and use resin. The resin will crack. It will totally detach from glass whenever it flexes, especially in bows like our Swift that have so much flex in the limb, it'll just break. It'll. That resin doesn't have enough stretch in it and there's not enough medium in it to keep it together. What we do is we actually took cedar dust. What this does is it acts like rebar in it. This does take several fills. This is not a fast and easy process. This is cut it out into lambs, fill it, get it in the blocks, fill it and just constantly fill until eventually you get to where you're just using a colored resin and not a reinforced resin. But that takes several fills to get to. So let's start with this block here and do our first fill on this. This actually came from a log. We split it out with a chainsaw into lumber and then ran it through the jointer until we had it squared up enough. We're gonna see what part of this is gonna be the easiest to get to. So you gotta look at your lumber, see where all those knots come through. You want as few of these as possible, but it's not gonna be end of the world if you have any of them. We're gonna take just a good chunk off of this side. That way we have quite a bit of white streaks and we actually have some curl in this cedar. So I'm just going to take a good 2 inch block off this side, set the table saw, move our dust collection. When we're cutting this, it's really twisty. So it wants to grab onto that table saw and give you some serious kickback. So we'll open up our dust collector ports and take this block off. This is what we're after. That's wide enough to get a handful of bows out of. If we run it that way, it's 2 inch because we got to take it down afterwards. But it's way too long. So we're going to square up our ends. There's trash can right there. So I'm going to run this a little longer than we need. So I'm going to go right at 37. First thing, we want to make sure that we can get our resin everywhere that we need.
All of that stuff that's real pithy. That's just going to want to pop out. Dig on that just a little bit.
If it doesn't come out, it'll stabilize in. But the more we clean it up now, the better fill we can have on that first initial fill.
So we'll come in here, get all of that out.
Get in there, try to get some.
Of that pith out. Just loosen it up just a little bit.
And then come in here with the air hose.
That side's pretty clean. This side needs a little bit.
So stuff like that where it's real soft. We're just going to come in here, clean all that out. Cuz that's going to be a problem later.
Come in here where all of that is.
Especially stuff like that where you have.
All that dust built up around that bark that has to come out. Check all of our sides again. We'll come in here, hit this side from a different angle.
The more we work on this now to get a good initial fill, the less work we have to do later on these.
Now there's a lot of work that goes into these. At the end of the day these.
Are going to be in high performance bows. We have to make sure that they're.
Not going to fail. Alrighty. So we got all that loosened up in there.
Now we're ready for our first fill. Our first fill is going to be EA40 glue. This stuff is what we use to glue up all of our limbs and all of our bows. It's a two part epoxy and it's got quite a bit of flex in it. This is to get it all filled and have the actual flex needed in those areas we filled so that that limb won't split. We're going to fill this with black. We can also do almost any color that we want to dye. Start out a little bit of glue.
Get that all mixed up.
Now we come over here and we.
Add just a little bit of dye to it. Get that deep color in there and mix that in.
And here is the part that makes all of this work. Cedar dust and quite a bit of it. Initially what we're doing is we're making.
An almost putty out of this Stuff we'll get all of that folded in, mixed up.
The consistency we're going for with this is really thick.
Now, we want this to be loose enough still that it wants to stick to stuff, but thick enough that we.
Can force it into voids and with.
Enough cedar dust mixed in there that.
There'S some structure to it. Once it's cured up, this is where the fun begins. So we come in here and we start working it.
Into those voids.
Now this fill doesn't have to be perfect. It doesn't have to be pretty. Just has to give the initial structure to those large voids.
Got to force it into areas and.
I like to overfill them. Shoot just a little bit. Sometimes you end up with bubbles up under there. You may end up having to do another fill after you clean it up.
Just before you can cut it into lambs and start working on stuff. Anything like that, like cracks. Work it on in putting quite a bit of pressure over those cracks. Since I can get it from both sides there, you got to really work on that. Go ahead, hit that crack in there. Come in here. Hit that one there.
Alright, so that's the first side. Take a little bit of Saran Wrap.
Just stick it on. That way we don't stick this thing to the table. We'll get this side. We have a huge void here, but that one will fill really easily. Overfill it pretty.
Pretty heavy.
Same thing right in here. Overfill it pretty heavily. And we leave this block quite a.
Bit larger than what the initial laminations coming out of it are going to need to be. That way we can grind it down to get to that. Because these corners will not be square after we're done with this fill.
And again, Saran Wrap on this side. This side's actually pretty clean. There's not too much that we have to fill. Little stuff like that especially needs hit.
Fill that.
That in there. That's filled. Hit that crack right there. And our last side. Come in here. Get that, that right there. That seems pretty all right in there. Big old void right there.
That block is ready to wrap.
Full size Saran Wrap. Come in here.
And you just need this kind of halfway tight. Not over the top tight. Just tight enough to kind of hold it all together, not get glue all over the oven. Alrighty. And now that's the first fill on this block. So that's going to go right here in our oven and cure up. After you get that block out, you'll see there's little voids still in there. That first fill is just there to get the major areas. And these have already been ground down quite a bit. So we'll go from there. Secondary fill come in here, all of those voids. And we're still using the same cedar dust thick mix. Now these pieces are small enough, I'm just gonna rotate them and do one wrap with the Saran Wrap.
And.
And now these go in the oven. Once we've done those first two fills, we'll end up with a block like this. This is after it's been cleaned up. So if we're doing a black dye, black covers everything. So I'll use cedar dust. This is that turquoise that we used in this block. This is maple dust. Maple is real light colored wood, so it takes color really well. And we dissolved our turquoise resin dye in denatured alcohol, mixed it with it, let it dry, and then we can use that to fill. So you'll end up with a block like this. After you've done those first two fills, clean it up, grind it down, get it squared up. This is still just a little over final size. What we need is inch and three quarters. That's just a little over that because we still got to clean it up and fill it. So what we're going to do is come over to our bandsaw and split it into lambs. After it's split into lambs, you'll have these. As you can see, they're still voids. And these voids are big enough that we don't want to just straight fill them. How do we do that? Take a little bit of that and more glue. That turquoise stuff gets everywhere. I'm just all glittery and turquoise. Back at it with EA40. Come over here.
Hi, dog. I wish I could pet you, but I have glue on my hands. This time we want it to be.
A little thinner of a mix. We want it to be able to fill voids a little better and not be a structure that we're making.
Come right in here. Get a little bit of that.
See where our color is and our consistency. And on this round, we're just adding.
Little by little, a little more.
And we're gonna get into the more fine stuff in there. So instead of being like a loose bread dough consistency, we're getting this into like a cake consistency cake batter almost.
Let's see how that spreads. And we're going to start on these lambs. We're going to hit one side of all of them. And now just trying to get in, do one good fill on these.
Hi, pupper.
Right. Saran Wrap them. Just hit the one side of them.
So a bunch of you might be asking, why five? Don't you only need four for a bow? Well, I need overlays. So I'm gonna have one piece of overlay that stabilize with the rest of them. That matches what came out of them or that matches the block that it came out of.
And now we fill the other side. Stack these up. Saran Wrap side with Saran Wrap in between each layer.
Alrighty. And that goes in the oven. Didn't have any more cedar for filming today. That's to the final process. But this is the final fill. What we do, this has been done through the same process. Multiple fills split out. We've ground it down to smooth and almost final size. And there's still some voids in there. This is a turquoise streak. So now we have to dye ca to make the turquoise for this. If it was black, I would just use black ca float ca in and sand it in. But since this is turquoise, it's a little different process.
Take just a little bit of that powder. Once we've got that all coerced into all those little voids, just enough time come in here, force that in.
Cured up on my finger there.
That should cure it up pretty fast. See right in there. It's filling real liquidy with that thin. So there's way less getting stuff in.
And it's about to flash cure. Or we can accelerate it just a little bit.
Once we're to that stage, clean off all of that.
Now we get to see if we have to keep doing that step. That one's at 90. So let's say we needed a lamination that was 80,000ths, which would be about perfect for this. 80, 70. You want to be relatively close to your final size.
Feed that in.
So we are really close to what we're needing.
We found that there was some voids in there. Almost to final. We get that dust right back. Force it on in there.
Run it through the grinder one more time.
There we go.
Right, and now that's ready to be used in a limb.
More from Pro







Choosing a Traditional Bow for Beginners | Custom or Amazon? | Which is Right for you?


Vintage Bow Restoration | Ben Pearson BP-H52 | Very Twisted Limb, Bad Finish, Holes in Riser

