How to Repair Checking and Cracking on a Traditional Bow | Robert Armstrong | Dark Mesa Bow
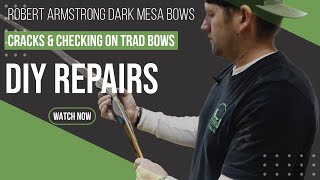
Robert Armstrong repairs a 60-inch Dark Mesa longbow with delamination, finish checking, and a near-through glass impact. Using medium-viscosity CA glue and wood dust, the host fills cracks, re-tillers by edge sanding, then test-shoots to confirm the repairs hold.
Chapters
Hey, guys. So today I've got a Robert Armstrong dark mesa longbow, and it's a cool little bow. We're gonna do a repair on it today. It's got looks like black and white ebony and cored with bamboo. And it's 42 pounds at 28 and a half inches, 60 inch long longbow. But here's something really cool. There's a arrowhead made out of crushed turquoise rock inlaid in there. That's really cool. And you got a little antler here, Then some carving here. A little bit of stipple work with some deer tracks there. So the issue here is this bow is delaminating on several areas, not inside the limb so much. But I thought this would be a fantastic opportunity to show you guys how you can fix this, because this is something a lot of guys face with their own gear, Their traditional bows. And since I closed down my restoration rework reduction program for the public, I'll still do them for great plains bows. But since I have done that, I would like to show the public how they can fix some of this stuff. So it might be hard to pick up on camera, but if you look right here, this here grip is the problem, and it's kind of delaminating along here. There's a little crack right there. And just all the way down, you can see that sort of lighter piece right there, that little line. That's the finish that's been flaked. That's starting to flake off from where it cracked from the movement. So the good thing on this bow is the way this bow is built is this here part right here. Running through here is the riser core. And so this is not structural at all. In fact, you probably could take. Well, you could. You could take this piece completely off, and this bow would still function. Now, if you did that, it would be very uncomfortable to shoot because you would lose your grip. So we don't have to be super conscious about getting this to where, you know, if it. If it comes apart, the bow is actually going to fail, because it won't. Even if this whole thing flew off, this bow would still shoot. But we do want to fix it. And there's a lot of stuff right in here. I'm going to have to sand around on it. We'll see how much we can save. But we're going to fix that crack right there. And then on this top limb here, there's a little. Looks like an impact wound to the glass right here. Just right there. And I looked at it. It's not even full thickness. It's almost full thickness, though. There's probably 10,000ths left where it stops. So we need to fix that too. Just mainly stabilize it so that it can't continue. That one could. Could turn into a problem if it was left alone. That one. That one could make the boat eliminate eventually. So this area and then this riser, that's what we're gonna fix here today. And I'm gonna show you guys how to do that. First thing you want to do is just kind of clean it up a little bit, which I've already done. Took off the side plate and the rest strike plate. And now I'm going to highlight this crack because I need to see it better. And the way I'm gonna do that is just gonna send it. You can feel this. With my thumb, I can feel these here raised areas where it's cracked. So we're just going to start with the random orbit here and get this one down and expose it. These things were. Unfortunately, they're going to get sanded because you can't do it with. You can't fix it without sanding it. So probably just do this. We're just. We're doing exploratory. So far, these cracks are just not that bad. I can put some good hard pressure on them. You want to flex that and see what opens up. And I mean, I can really push on that hard and they're not opening up. So this is going to be super easy to fix. I don't know if I showed this one very good. This. This is probably our biggest problem right here. This guy right here coming in here on an angle there. I can kind of push dust in it. You can see it better, but it's just. It just comes in an angle and it stops right there. So we can fix that, no problem. So. So for that, I'm just gonna grab some hand sandpaper, probably some 220. I don't want to get harder on it than I have to and just highlight that crack. Now if a guy wanted to, you could take this whole grip off, just replace the whole thing. I could do that. But that's an expensive repair and time consuming. And then we would also lose. Okay, so now we're seeing more damage. And this is always what happens when you dig into it. You can see the real story when you go to sanding on it. A little bit of adhesive right down in there. And you can see as I'm sanding here, you can see that crack. It does continue down along there. Across here. So we're just going to explore and see where all it goes. Gonna grab my little pneumatic. I sell these little pneumatic drums. They are awesome. And I'm gonna put some real fine paper on it. Because here, again, we want to go minimally invasive as we can. To start here, we're gonna go with 220. And we're gonna air this up. So it's got pretty much given it. We want to be able to squeeze that down so it contours around our bow. And then we're just going to run this real slow and precise right along that crack to highlight what we're working with. We're in the exploratory phase at this point, Finding out how much damage, where the damage is. And once we figured that out, we're going to be able to transition to the phase of determining how we're going to fix it. So I've highlighted it all the way around there. Let's get a little bit more random orbit action right into that crease there. Now, this bow has a pretty sharp angled radius down in there where the side plate meets the shelf. I do. I don't like that. If you're building a bow, don't put a sharp edge there because that causes a some issues. And you really want that to be a wider radius down in there. So I can't hardly get in there. What I'm gonna do, take a little file. And we're just gonna come in here. Okay. What? Alrighty. There's something down in there that is interesting. There's like a big old. Okay, now we're getting into the meat of stuff. There's more issues here. That's a tool mark there. When this bow was built, a hacksaw or something made that line right down into there. That's not great. That is not great. Gotta expose the damage here. While I'm doing this, I'm just going ahead and.
Kind of reshaping things.
So I kind of made a little groove down there that I'm taking out now with my file edge here. Well, that was hiding some nasty stuff down in there. There was a bunch of adhesive residue left, and it was hiding this here stuff. There's a little gap where the bamboo is on the bow. And then there's that little tool mark. Easy, easily, easy to fix. I don't think I'm gonna go much. I don't have a lot of room here. And I don't want to compromise this bow. So I'm not going to go too deep Here. But I am going to get that. That actually might be glue where he tried to fix this when he was building this bow. Now I'm going to grab my little rubber sanding block and put some 120 around it. This makes it a lot quicker work than trying to use my hand. And that will, of course, make the radius. I got these little sanding blocks. This one here is one that I've ground the different radius sizes on there. You can see that one's much, much bigger, larger. I want a pretty fine one for this. So getting down in there. Normally on my shelves, you know, I would use this one because I put a much larger, larger radius down at that junction. But I don't have a lot of room to work here because I really don't want to narrow this total thickness up at all because it's already plenty thin. I feel for this particular bow that's keeping on going there. So what my guess is what happened here is when. Yikes. You can see exactly what happened when he was cutting this. Either a bandsaw or a hacksaw came in here. And it's got a saw blade mark right there. Just like that. Pow, across there. I could take that out. But how deep does it go? Well, let's find out. Dental picks. I went to the dentist sometimes, if you got your dentist, if you're good buddies with your dentist, just go there and say, hey, I'll take all the dental picks that are broken or you can't use or the package is contaminated. And a lot of times they'll just give them to you. And you can get some really cool little tools, and then you can shape them to whatever size you need. And then you can be a dentist, too. So that's glue of some sort. He tried to glue that cut that he made, and I'm just kind of digging it out of there. I might should leave it. I don't know. Okay, that's good. Let's kind of clean it up. Okay. So this is kind of what you get into. Whenever you do reworks, invariably, this is what happens. You look at it, it's real straightforward. You're like, oh, I got this. And then a couple minutes later, you realize that the damage is a lot more than what you first thought. This is not extreme by any stretch of the imagination. But we do need to fix it. So for that, all of these are pretty fine cracks, and they're just. It's still really, really strong. So I'll show you how I'm going to fix it. This one right Here. We do want to clamp that one. So it's really important before you do any repairs to dry clamp it and just see if that crack closes up at all when you do this. And it does, that is closing for me. And that's. It's closing plenty good enough to do what I'm fixing to do. Okay, that looks good. So I'm gonna. I'm gonna use super glue. Super glue is really strong. And something like this. I call it ca. And I'm not gonna use thin, though. I'm gonna use thicker. A little more viscosity. I'm gonna use medium here. And there's actually a little hole there. What we're gonna do is we're gonna force it into there real good. Force it into there, Force it into there. And then we're gonna clamp it, and then we're gonna cure it. And it should hold no problem for the long of this bow. Now, when I do this, I want that real clean. I don't want any dust in there. We will put dust in there later to make it look really good. Initially, you want this clean and open. And let me grab some gloves. I'm going to grab my glue, and we're just going to put it on this crack everywhere. And then we're going to just force that in there. Now, if that crack went all the way through to the other side, A lot of times what works good is to use a vacuum. But these cracks are way too tight. You're not going to be able to suck any glue through there at all. They're just really fine, tight cracks, which is good for us. If we don't fix it, they will turn into big cracks. Just pushing that in there, really forcing that glue down in there. Forcing it, forcing it, forcing it. Getting plenty in there. The squeeze out will tell the story of how well we did. Just force it in there. I'm not going to so much worry about these big damage right down there. We're going to fix that. Different step. We first have to take care of this big mama here. Okay. Now you want to clean that off real good because you want to be able to see what kind of squeeze out you got. There should be a lot of glue in there. Okay, here we go. Okay. Oh, yeah, that's beautiful. So you can see that crack closed up. Awesome. And it squeezed out real nice. So we'll go ahead and cure it now, But I don't want to get it. I don't want to overheat it. Turn on, on the riser now. I've already set the outside of this blue pretty good and it will have set down in there quite a ways too. Plenty good to keep it close. The reason I call this my cold set, I get it heated up nice and toasty and then I blow it back down with cold air. And you would be amazed how efficient this method works. Okay. Alrighty. Now we're gonna undo this. But when we do it, we're gonna watch and see if anything opens. Nope. Perfect. Nothing opened. So now let's clean it up and see how good a job we did. Grab a piece of 220 here and.
See how tight we got that crack. You wouldn't want to use thin ca to do what I just did because it doesn't have the body, it doesn't have the strength. And you could do it with a really, really thin viscosity. Low viscosity.
Epoxy. It would work too in some. And if it was structural, I probably would have used that. Something like this where this here grip is not structural. It's gonna be just fine. Okay. That's a beautiful repair. I mean that crack is so tight I can just barely see it. I mean, just barely. So we'll get this guy clean up this edge. Oh, that's just perfect. Absolutely perfect. I mean, I can't even find the crack there. I was, I was gonna say we're gonna have to fill that later with vincy. We're not even gonna have to do that. It went in there so good. Okay. All right, so we've got that one. Good. Now let's go ahead and check this one and see if, if anything moves when we put if I can see that crack moving, I really can't. So tight. Even though I can't, I'm still going to clamp it. We just want to be on the safe side.
So.
I'm not going to show you do that one because I'm going to do it the exact same way. I'm going to clean it out. I'm going to force glue into it with the medium ca. I'm going to clamp it and do the cold set on it. So I'm not going to show that one. But I will show how we're going to fix this junk down in here. Normally I would just cut that out of there. I would just, I would just machine it out with a file and sandpaper and we'd be done. But I'll show you why. You see how thin that is right there? It's already so thin. I just don't feel comfortable doing that on this bow. So I'm not gonna do that. I'm gonna glue it. So for this one, I think see if this closes up at all. That doesn't close. I don't want to crush this wood fiber at all. So we're just gonna go ahead and press it on in there with the medium again. And then we have to fill this later after we're done gluing it deep, we have to go ahead and fill it's on top with. With wood dust. Now we're just getting that glue in there so we can glue down deep. Really push it. Now if this is coming out the other side, then we have a different ball game on our hands. I don't think it is. No, that's super tight. No, there's no crack there. So that doesn't. That's not a full thickness crack at all. Now you'll notice on my. My vise jaws here I've got a wood backing and then I've got 8 inch rubber. You can buy that rubber off of Amazon or anywhere. And if you're working on bows, it's really nice to have that. Well, you can't. You can't even already do it if you don't have a way to clamp your bow. So I'm just forcing this in here real good. Lots of glue. Just pressuring some hydraulic pressure in there. Just for kicks and giggles. We're going to go ahead and clamp it and see if we. If there is any movement at all. I got lots of glue in there now. Just gonna clamp it right here. No, that's not moving. So yeah, we're done. So we'll go ahead and set that. So now we kind of filled up the base of glue. So now we will go ahead and fill this on in. We don't want to leave any divots or voids. And for that we're going to use. We're not going to use the medium. We're going to use the thin. So you just want that. So here we got our thin ca. I'm going to get this here and we just want to put that. Okay. Now I'm going to dab up the excess. And then before it's even all the way dry, we're going to go ahead and sand it, kind of make a slurry. And you'll have to do this a couple times before you fill everything. We'll go ahead and do it again. Just build that up. Now that's your thin ca which is highly viscous.
This.
All right, so that's completely filled. Now I'll touch that up with sandpaper to make it all pretty. But there's zero voids down in there. And yeah, it's a different color. But when you put the strike plate on there rug rest, you'll never know it's there. So that cracks repaired. That's all repaired. All those voids are filled. I'll do the same method on here to fix those. And then I'll be able to save this stippling for the most part. And I'll go ahead and do this side too, just. Just to be on the safe side. I'll go ahead and fill this and glue this all the way around here. Then I'll clean it up and refinish it, and that's how we'll fix this riser. Okay. So I went ahead and I glued all these cracks, glued them all up, sanded them, and I wanted to do that before I strung it because if there's any movement whatsoever, we got to make sure it's not. You know, you could, if you wanted to, you know, fix this thing, really, really, really fix it. You know, you could grind this off and put a new piece on. But very, very time consuming, very involving. You don't need to do that because it's not structural. So this is going to last forever, this repair. But I wanted to go ahead and glue that up so that when I strung it, I could check and see if there was any movement whatsoever. And that's what I'm gonna do now. So I just strung it here. And what I do is just feel this, make sure they're nice and tight. If I can see anything, feel anything, there's nothing. They're perfect. So here it is, strong and pretty cool looking bow. Just looking at it right here, To me, it looks like it has a. Well, I was gonna say it might have a slight reverse killer. Let's see what it's got. Actually, I don't know if it does or not. That's. That's a wild guess. Wild, wild guess. So 7, 11, 22. Yeah. So it does have reverse tiller. Actually, it does have reverse tiller. I thought I could see that, and I did see that. We can fix that. But anyway, let's go see. See here if this, where we're sitting there, this says 42 at 28 and a half. So 41. Well, no, that's. Yeah, 42 at 28 and a half. It is perfect. Okay. So this bow feels pretty good. I bet it. I bet it's a good shooter. Haven't shot one of these bows, actually. So what I was going to do is we're going to look at this here little injury here. The question is, can we fix that without reducing any weight? The good thing is we have reverse tiller. Now, that's a perfect scenario. Absolutely perfect, because I can take material off this limb and bring it back into tiller, and hopefully that the amount we take off is about all we'll need. Looks like he tried to glue this a little bit. So we're going to. Now that we know what it is, since it's strung up, we'll unstring it. We'll take it back over to the device, and we'll do a little bit of sanding on there. Okay. I'm just going to start by taking off this glue that was put on here. There again, just all we're doing is exposing the injury to see what can be done and see how deep the injury is. Now let's go ahead. So I can see it's, you know, it's about a little under an eighth of an inch deep in there. And that was most likely an impact of some sort. I'm sure it was. So I got it cleaned up there. We'll turn it over on the side now, And we'll clean up this edge, this side here, And that is right there. So now with it cleaned up there, let's get a little bit so we.
Can look at it. Okay. So it's not even quite all the way through the glass.
So I'm gonna.
Just kind of open this. If I can get the glue away.
That was put on there.
Pull that edge back. Okay.
Now we're gonna try something. And half the time this works. I shouldn't say half the time. 40% of the time this works. 40% of the time, it does not work, or 60% of the time it does not. This one here is going to have to work. Okay. So we're going to do is we're going to heat this once again, being careful not to overheat. Just want to feel how hot it's getting. Hot enough. Let's see if this actually will wick in there. Very unlikely. Ah. We did go in some. A little bit went in. Whoops.
And we got a tiny bit in, but we did not fix it. But it looks better already.
So we know we can't get glue in there. We know that glue will not.
Will not flow into there because it's already sealed off. Now, if I look here real close, I can See that? The initial injury was, like, right here. It was this half moon here, and it's about that much full of glue. A guy could probably leave that and you'd never have any issue with it whatsoever.
I think what I'm gonna do is I'm gonna round that over pretty good.
And proper and send that, because we can.
We can afford to.
To lose that little bit of weight on the top anyway, and that's gonna take it almost all the way out. I think that's the way to do it.
I do here is I'm just gonna kind of aggressively round these edges, and I think I'm gonna do it by hand. These edges are pretty sharp anyway, so we can blend this in.
Do the.
Do the two outside. You know, the outside edges, the top. This is the back of the bow. Should be the back edges together at the same time so that it looks uniform. You're just not going to get that all the way out. There's just no way you're getting that all the way out. I mean, you could. You would reduce the bow a long ways. I really think that's never going to cause a problem. I'm going to round these over real aggressively and take a lot of it out. And then we're going to put glue on it one last time, and we're going to call it good. In fact, I may have kind of opened it up right there to accept more glue. Get some glue. Get this. Oh, yeah, that did it. That completely did it. It filled the rest of it all the way up just by opening the edge of that crack. Okay, good. So now we'll clean that glue off. And what I'm gonna do. Oh, wow. That's gone. It is gone. Sometimes these glass cracks, you just gotta keep working at them. Just keep working at them. Getting a little glue in from this side. Getting a little glue in from that side. Just keep. Keep working them down until you can take care of them. Can't always get them, but we got that one. Let's look at it here. Oh, it's gone. That is totally gone. I can't even find it. I cannot even find it. Okay, just to be on the safe side, I'm going to hit some accelerator on here. Oh, there it is. I see it.
Just there.
I don't know if you can see it or not. It's right. It's right there. I don't know if you can see that or not, but it's completely full of glue now. And I hit that with accelerator, so it's dried. So let's go ahead and string it and see how we affected it, the tune and tiller of it. Okay, so now looking at it, and I may have just corrected that tiller, which is doing that, but we'll see. We'll go ahead and look at it. We strung it up, see if it moved at all. It did not. Okay. Check the tiller on. Actually, before I even. I better find the center of this bow, the fulcrum. Make sure that I'm calling tiller tiller. That's 31 there. 31 there. All right, so we got an inch and a quarter above center. So perfect tiller on. This would be about 3:16. So let's go at 21. Seven and a quarter. Okay, well, that's. That's crazy. So the tiller did not change at all. Even with the sanding I did, it did not change. We still have a reverse tiller issue. That's weird. That is weird. Very uneven limbs, but they're fairly straight. I do not know why some bowyers don't round their limbs more. It's pretty rare. But like this one here. The edges are super sharp, and that leads. That creates issues where they're very, very prone to chipping if they are hit. If they are impacted, they're much more likely to chip than longbows with rounded edges. Much more prone to it. So you just don't want that. If you're redoing a bow and you do some work on it and you sharpen those edges like what I just did here, by taking material off to change the tiller, you've got to round that back over just like what I did there. Because you just. When you have a sharp point, a protrusion on glass or wood or anything, it concentrates everything onto it, makes it so much easier for it to chip. It's just like the. The a knife blade edge. When you have a really dull knife blade, you can whack it on rocks and all kinds of stuff, and it doesn't affect it much. But if you have a sharp blade and you whack it on a rock, it's going to chip. It's the same thing with a bow. Also, when you're talking about sharp edges of wood on bows, it gets real critical because moisture leaves faster from sharp edges on a bow. And so the moisture will leave faster from that sharp edge. And then you can run into situation where it will crack on you because of accelerated drying. And so that's another issue why you don't want to leave sharp edges. Now it depends on if sharp edges are there for aesthetics, but they have a lot of support underneath them. That's a little bit different. We're getting really technical here, but I think you know what I mean. So now we have a positive tiller, and I know I might just. It's not as much as I would like, so I'll just go ahead and take a little bit more off, And I'm just gonna take a little off the edges here. That finish is doing some weird stuff. Okay. We gotta be close. We gotta be close. Yep, I'm happy with that. That is tillered perfectly now. Well, let's see how much weight I took off. Basically nothing. Maybe. Maybe a quarter pound. That's it. I can live with that. All right, so just an overview here. All. All these cracks are full of glue. They're filled. You cannot feel them. It's totally seamless. Nothing to feel there. This one is clamped and closed up tight. All tight. Glue's been forced into all these cracks, and then it's been sanded smooth. Real simple to do, guys. This kind of a repair is super simple. The. The biggest. This part is simple, actually. The bulk. The majority of the work now comes because I've got to refinish this to make it look pretty again after I. After I fixed all these. So that. That's actually what takes far more time than repairing a repair like this. But last thing we're going to do before we call this one good is let's go shoot it, and then we'll look at the cracks one more time to see if they open or any. That is a good shooting bow. I like that a lot, actually. That's a very nice shooting bow. I could see why he wanted to fix this one. Wow. I like that a lot. What? All right, you got to see this. Well, first, let's look at these here. Yeah, they're. They're perfect. That's. Nothing is moving there at all. Look at this one. Was that on. That was on this. List them here. I can't even find that. I can't even find that glass repair we did. It's.
It's.
It took that glue so well, it's gone, so, yeah, it's perfectly repaired, and, man, it's a shooter. But you got to see. I never shot this bow before in my life. Look at this right here. That's from about 17 yards. Never shot that bow in my life. I was aiming at the can, which I kind of aim the same place every time, but it hit a little bit down to the right. But, man. Robert Armstrong Armstrong, Dark Mesa Bows. Man, if you find one of those bows, that is a good shooting longbow, I love it. I knew on the immediately after the first shot, I knew I loved that bow. That's a really, really good shooting bow. I. I know. I'm. I'm pretty sure I've done some of them. I'm pretty sure I've reworked some. I'm almost positive I have. But it's been a good while. But fantastic shooting longbow. But anyway, thanks for watching, guys. That's how you repair some little checking and cracking in a longbow.
More from Pro







Choosing a Traditional Bow for Beginners | Custom or Amazon? | Which is Right for you?


Vintage Bow Restoration | Ben Pearson BP-H52 | Very Twisted Limb, Bad Finish, Holes in Riser

