Out of the box 3 piece bow setup + bonus hunting footage
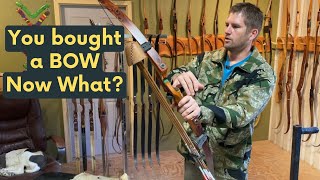
A Pro Archer Shot-Coach YouTube video demonstrating how to set up a three-piece bow out of the box (riser, limbs, rug rest/side plate) and how to string and tune it for hunting. The instructor fits calfskin rug rest and side plate, bolts limbs, installs a fast-flight string (about 12 strands), uses a portable stringer (recommends against the step-through method), sets brace height (recommended 8.25–8.5 inches for Swift recurves), places the nocking point (9/16" above center), adds rubber 'cat whisker' silencers about 12 inches from the top serving, fits a Mini Boa 4-arrow quiver (3 broadheads + 1 judo), and recommends increasing new-string brace height by ~1/4–1/2" to allow for stretch (settles after ~100 shots). The video closes with hunting footage and a successful animal recovery.
Questions this video answers
Between 8.25 inches and 8.5 inches.
9/16 inch above center.
About 12 strands.
Using the step-through stringing method on their recurve bows.
About 12 inches (on the upper portion of the string).
Chapters
Setting up your bow. So when you get your bow from Great Plains, it's going to look kind of like this. This is a three piece bow. This is actually the first bow I have ever made for myself that I intend to keep. This is kind of a special bow to me, but this is a three piece sock. So it's got limb compartments. You've got your divider right here. Got space for your two limbs here and your riser. There's the riser set that there. We'll get the limbs out of here. This is a cocobolo riser, turquoise accents. And you got your naughty cedar limbs with ramshorn tips. On our recurves you're going to get something like this. This is what it's going to look like. This is calf skin, this is the side plate and this is the rug rest that goes on your shelf. A lot of times on our recurves we won't install these because this is a kind of a personal thing how people want their bow set up. So you might want to have it a particular way or you might want to set yours up particular. So we don't put these on on our recurves. On our longbows we install the rest and side plate on our longbows. It's calfskin all the way around. You're going to get these pieces. And so what I like to do is I start with this rug rest. I'm just going to put it on here so that it goes around just like that. Then I'm going to hold my, my Sharpie. I'm going to hold it at a pretty severe angle because we want that to clear. There's a bevel on our shelves and we actually want that to be cut on the inside of that bevel. We don't want that hanging over. So I'm going to hold that there and then I'm going to mark around here just like this and then I'm going to mark the front like that. And we'll just give it probably a good 8 inch on the inside there. Alright. It's kind of fuzzy there. I like to just trim that off on a bevel there. Okay, set that on there. That's nearly a perfect fit. So that's pretty close to the edge. That's almost a perfect fit. But one more thing I'm going to do is I'm going to relieve the inside of this just a little bit. The reason we do that once again is for the fletching to pass through there. Shallow radius down to nothing here. Okay, get that on there. So that's, that's a perfect fit. Let's go ahead and stick that down. Take off the adhesive backing here. This adhesive is really powerful, so even the paper wants to come off real tough. And we're going to stick that down. There we go. That's perfect. Now you can see I've kind of beveled that carpet back there, that rug rest. And I'm going to just trim this here. Next. This is directional calfskin. So for a right hand bow, the grain of the hair is running this way. You can see. I can. If I go that way, it roughs that. Those fibers up. That's. That's a right hand. We have right and left. First of all, what I'm going to do is relieve this here with a shallow radius like I did on the. On the rug rest for the fletching. Once again, it kind of follows the radius of the shelf. So that's nearly perfect there. It doesn't have to be perfect, but it's nice to get it right. Next take this. And what I like to do, get me kind of a pleasing look on here. That looks really good. I'm going to cut that out now. I can cut right on the line on this one. That's the look I'm after. So we'll pull off the backing on this and there you have it. Now you can see I've left that relief in there. That's very important for that fletching to come right through there. Next we'll go ahead and bolt the limbs on. On the swift. You've got that little notch there that tells you that's the top limb only going to fit one way. Now when you tighten these recurve limbs up, this goes for any recurve, not just great planes. It's loose there. I get to where it's snug, just where it starts tightening up. And just give it a little bit like we're talking on the end of your allen wrench. Maybe an inch more clear on the end. So snug. Then just a little bit more till it stops. Put on the lower limb.
Okay, it stopped there. Then about an inch. That's it. You're going to get your string in a little package like this. This is a fast flight string. These are, I believe, 12 strands on this particular string. What I like to do here is you can lay this out and you can kind of see there's going to be a top and a bottom to the string.
I look at the serving and I see where that Serving is going to come in relation to my, to my shelf. So let's flip it around and look at it. So you can see that's quite a bit different. So here I've got it's way lower. So if I put it on that way the serving would be quite a bit lower. So the proper way to install it is going to be like this. So we'll go ahead and put it on the bottom limb here. This is our portable stringer. If you use the step through method on our recurve, you void the warranty. These are high performance hunting bows for sure. The Swift series do not step through them. You will twist the limbs, you will lose control of it and you'll void the warranty. You must use some kind of stringer, portable stringer. We sell a tow hit stringer that is a hundred times better than our portable stringer. They are a little bit expensive, but if you spend the money, it's well worth it. This is another shop stringer that we have. So much safer than a portable stringer. I know everybody can't afford that. You can build your own just by sticking a couple dowels in a 2x4 stud wall somewhere. It's just a matter of leverage and physics to get it strung. But we do send this portable stringer with all of our recurves and our longbows. When you put your string on, the first thing you're going to do, you're going to slip it over the top limb, slide it down onto the limb. The stringer has a nylon pocket here and I always put that on the lower limb. You don't have to put it on the lower limb. That's just the way I do it. Then you put your string on the lower limb, make sure it's seated into the string groove real tight. And then you put your nylon over your nylon pocket over the string. Get it on real nice and tight. I like to keep just a little bit of tension on that string. Then you put this little rubber, I'm not sure what they call but it's a rubber fastening point onto your limb. Now the further out you get it to the tip of the limb, the more leverage you have. So I'm going to, you know, tighten that string up pretty good, move it out here and I'm going to hold it there. I'm going to put my foot out a long ways and get it nice and squared up, kind of feel it squared up, keep tension on the string and as it gives, you can give it just a little bit and Then move it out. Ok. That's about as far out as I want to get it. Make sure it's flat on there. I'm going to pull straight up, slip it on, make sure it's seated slowly.
Let it go. Okay.
Make sure that string is seated perfectly even and centered. Now I'm going to check the brace height. The next thing I'm going to do is I'm going to put the knocking point on. You need it at correct brace height to set your knocking point. It's not super critical, but I feel like it gives you that little extra edge to get that knocking point just perfect. On the swift recurves, recommended brace height is between eight and a quarter and eight and a half. So I'm just a little bit low. So let's go ahead and unstring it. I'm going to show you how to unstring it with the stringer. It's easier to unstring it than it is to string it with a portable stringer. We're just going to go ahead, put that nylon pocket over, make sure it's seated real good. And on this you can get that way out to the tip. You can get a lot of leverage. So you want to put it on there. Put it on nice and flat and square. Step on your string. On your stringer string, get. Get your legs pretty far out because that's going to give you leverage. Lift straight up, slip that string over the tip and just let it slide. It's going to pull that stringer back as it goes. Okay, now, for speed sake, I'm not going to use this as I do the brace height just because it's a lot faster with our stringer. So we'll move over here and we'll change the brace height. To change the brace height on any bow, you twist the string counterclockwise to increase it. So we're going to go ahead and twist it, give it about six or so rounds or so. Go ahead and string it back up. Brace height is always measured from the deepest point on the belly of the bow of the grip to your string. So there I've got 8, 7, 16. After I have that, we're going to go ahead and put our bow square on. I'm going to lower it down to where it's just touching that rug rest. I like to set my knot point nine 16 above center. It's kind of different for everybody depending on what style you shoot, what release you have. For this purpose of just speed, I'm going to use a crimp on nock. They're simple, they're easy, and I'm going to use a black inside. They're color coded on your crimp on nocks. The red ones are a little bit bigger. A lot of strings that are custom built have a bit bigger, bulkier serving. The red ones work a little bit better for that. See how it's kind of flared open there? Take that and just crimp it down a little bit. What that's going to do is going to stick on your string and it's not going to fall off as you, as you try to clamp it. So here I go. I'm going to stick it at the bottom of it. It's going to be at 9, 16. Slide it on. It went on real nice. Stays exactly where I want it. Now the red handle on the black knock actually works better because it's just a little bit bigger. The black handle one is a little bit smaller. You can use this one, but it will leave little crimp lines in your knot. So once I have it on there, go ahead and crimp it on down tight. Then I'll just crimp it from a couple different directions. Last thing I'm going to do to the string is I'm going to put silencers on. Now, I prefer rubber silencers. I feel like rubber is far superior to anything else for dampening. The other thing I like about it, it doesn't slow your string down like puff balls or beaver balls. I know that's a very personal opinion on what kind of silencers you like to use. I just like to use rubber cat whiskers. And a lot of times you may be tempted to put your silencers down low. Silen silencers generally belong on the upper portion of your string. And I'm going to put them about 12 inches. So let's unstring it. Now. There's a lot of different ways you can tie your silencers on. I'm just going to use a simple method. They're going to perform just as good if they're just tied on simply as they are any other way. Now, I don't like to put the full amount on because the way I'm doing this, it makes a big knot when you do that. And that knot can come unloose. You want a nice tight knot. So I'm going to take about that much off. I'm going to go over here to 12 inches, open up my string here. What I like to do is kind of separate the colors. Then I'm Going to slip this here cat whisker in here, kind of get it in the center. It doesn't have to be perfect. Then we're just going to do a simple tie on to this. Now you get this pretty tight. I like to go until I just feel those strings. Sometimes they'll want to break on you. So I'm going to go pretty tight here. I don't like a lot of string, a lot of whiskers hanging out. So I'm going to trim them about like right there. And then I'm just going to open these up. You don't have to do this. You shoot it, it'll open them up. Now to do the other side. I'm not going to measure to get it perfect. I'm just going to take the string, double it up on itself and open it up at the same location.
And that's your silencers. Put on real simply, easily and effective.
When you're putting a new string on, get that brace height about a quarter to a half inch higher than what you normally run because that's going to allow for string stretchage and it's going to settle at your. At your brace height. After about a hundred shots it's going to settle at what you normally shoot at. So I'm sitting about eight and a half. So this one is recommended eight and a quarter to eight and a half. So we'll leave it at that for now. That's all ready. Now let's put our quiver on like in a previous video I showed. I like the mini boa four arrow quiver. That's my favorite. Always put the hood on the top limb. Put it about like that. Then we're going to slide it down onto the fade. It tightened up real good and we're onto the fade out of the limb where it's not working. That's perfect. Let's put on the lower one. You want this as far away as you can. You wouldn't want to put it on like this. Slide it down onto the fade outs or on a. On a three piece of be. Call the wedges. So I've got my hunting set up here. These are my broadheads. These are the broadheads that we send to Discovery Channel's Naked and Afraid show. We build all the bows for that show. When we set up arrows for them, we use the steel force two blade. They've taken a lot of animals with these. A lot of small animals, a lot of African animals, warthogs, springbucks, impellas. The way I like to do it. Is my first arrow. I'll put on the mini boa. You've got the side. And I really like this feature because you pull that out on your very first arrow. It pulls out sideways instead of. Well, it pulls out towards you instead of sideways. I guess it would be. I'll put my second broadhead in. Clip it in. Third broadhead, clip it in. My last arrow is always a judo. Clip it in. Now, I like to kind of turn my arrows so that my fletchings are not damaging each other. I just turn them so they're not mashing each other down. And that bow is set up and ready for hunting. You've got your rests installed, you've got your knocking point, your silencers, your brace height is proper, your quiver, your mini boa. Quivers on three broadheads. One Judo. And I'm ready to hit the stand. Shoot this thing and see how she works with all setup. Smooth. Very smooth. Thanks for watching. There he is.
Stop, Stop.
He'll see you. He smells fear. Yes. Oh, yes. Let's go.
Let's go. Look at what we got. Oh, he's a beauty. Look at this. Look what we got here. He's a gorgeous animal.
Pull my arrow out. Wow.
Look at him here. That's a trophy. It don't get any better than this.
It don't get any better than this. Look at this guy. This. This probably goes for. This will probably be about three inch. About a three incher. We measure him green by three inches. Once he's dried out, he'll probably easily net two and a half inches, no problem. He's a beauty.
More from Pro







Choosing a Traditional Bow for Beginners | Custom or Amazon? | Which is Right for you?


Vintage Bow Restoration | Ben Pearson BP-H52 | Very Twisted Limb, Bad Finish, Holes in Riser
