Part 1 | DIY BLACK HUNTER Rework | Budget Amazon Bow
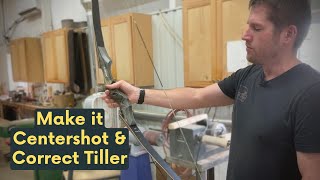
A pro archer reworks a cheap Black Hunter longbow from Amazon, filing a center-shot shelf by hand and adjusting the tiller to fix arrow porpoising. The bow measured 53 pounds despite being marked 50, and the instructor uses a rat-tail file and sandpaper to get it shooting straight.
Questions this video answers
50 pounds at 28 inches (marked)
About 53 pounds at his 29" draw
Believed to be 58 inches (speaker uncertain)
Top limb ~7 1/8 inches; bottom limb ~6 3/4 inches
18 1/4 inches from the chosen reference (wedge fade-out area)
Chapters
What's up guys? So a while back we did a review on a Black Hunter recurve. We got some requests that people wanted to see how to rework them on their own. And we're gonna do a short video here. Just a couple things that you can do with basic tools. We have a Black Hunter longbow today. It's not a recurve. This one is by far in worse shape than the recurve we had. The fit and finish on this one is just absolutely horrendous. I mean there's ledges and overhangs and the limbs aren't tapered parallel, they're not straight. I believe it's a 58 inch. It doesn't say on the bow. It might actually say right there. That's some Chinese writing that I cannot read that. I was looking at it and on this bow, if there's tapers, they're very, very slight. I don't. I don't even know if this thing's tapered. It doesn't. It might be tapered just a little bit in the limcore, but very slight on this one. Much, much less than the recurve was. So let's go take it out to the shop and fling some arrows. We're gonna just measure the weight quick on it and see what we're at. It is marked at 50 pounds at 28 inches. I did get a digital scale but man, I just like the dial scale better. I had it on for about a week, but I just didn't like it very well. Alright, so we're sitting about at £53. So it's about £3 off. I've seen them worse. Most people do better with just a little bit of less poundage. For sure if it's your first bow, but this one is actually 53 pounds instead of 50. It stacks pretty badly. Honestly, it's not that probably has to do with being such a short longbow and back mounted limbs. So your handle is not pushed very far forward on the bow. So it, it stacks quite significantly. Not bad. I expected it to be fairly fast simply because my draw is 29 inches and with it being so short and I could feel it stacking up on me. Basically you're just stretching everything out. You don't have a lot of working limb. This bow would probably be better suited for about a 27 inch draw instead of a 29. Very loud. Significantly louder than I would expect from a longbow most of the time. Longbows are much quieter than recurves without silencers. There's no silencers on this of course, but I expected it to be quieter. Let me check the straightness just real quick. It's not too bad. The upper limb is off more than the bottom limb, but definitely not enough to ever worry about. Let me check the tiller on it real quickly. On the top limb we've got about seven and an eighth. On the bottom limb we've got six and three quarter. So the tiller is off by a quarter inch. So this surprisingly, this longbow is much closer to center shot than the recurve was that we worked. But we'll move it over just a little bit more. The methods that we'll show you you can use on the recurves or honestly any bow. I did notice also on this bow they put this felt on. The felt on this particular one is cut very poorly. It's not. It's. It's not shaped well at all. In fact, it's hanging over the edges of the riser. That would be a simple fix. Also this is a great little workbench idea. If you got a vise and a board, this. Doing it this way allows you to get to all sides of it. If you're working on a smaller project like a bow, we're going to grab one of these quick clamps and pick these up anywhere. These of course have the rubber on them so you're not going to damage your. Your bow. I wouldn't use a C clamp on this here. Normally if the riser is not finished, we would use one of these because this is way more power here. But with this situation, we don't really want to damage the riser too much. We want to use a quick clamp and it'll be enough force. So what you're going to do now just get you a rat tail file. You can buy these without the handle or, or this is just a quarter inch rat tail file. You could buy these without the orange handle or with it. If you buy them without, you can make your own handle with wood or you can actually buy these orange ones that you just pound it into that and you've got a handle. But so what we're going to do is we're just going to radius right here. We're going to radius that out with this rat tail and dig it deeper. Now this is kind of your guide mark, your guideline here. So you're going to set your parameters with this first step. You're going to come in here and however deep you go with this rat tail, it's very, very Simple. All you're going to do is just remove the material up into to that first layer or that that depth that you created with the rat tail file. So we've got a pretty nice radius there. You could actually use a bigger one too. Either. Either size would work. We're going to use the quarter inch here today. So we're just going to come in here like this. And first we're going to set our depth right at the high point of the shelf. And then we can. Because once we have that depth set, we can float everything to that location. And you can go cautiously so you don't mess it up. So I know I want to be deeper than that. And while you're doing this, pay attention that you don't cut into the shelf because it's kind of hard to get that out, because you got to remove all this material to get that out. If you cut this way into the shelf. So we're just gonna. I'm basically cutting straight down and 90 degrees to that shelf at this point. So I know that this one doesn't need to go that far to make it center shot. That's about as far as I want to go. What I can do now is just take my tape, hook it under here, and just look at where that. How far I've cut at the deepest point of my radius there. And so what I want to be at here is about 5, 8. That's perfectly at 5, 8. That's as deep as I want to go. So now all you do is just extend it both sides and just make it the same depth. And that way it will maintain the same radius of the side plate, which is important because removing this material here and here is what allows the arrow to have just minimal contact right in the center there or above the webbing of your hand. So now we're just gonna extend that on out. So when you make a center shot bow, essentially what you're doing is wherever the string falls on your bow, which it should be in the center, if your limbs are straight, it's going to be in the center of the arrow. And the arrow's not gonna be moved over by this side plate. When the side plate moves that arrow over, you have to adjust. When you're shooting your bow. If you're right handed, you got to adjust to the right. If you're left handed, you got to adjust to the left to get that arrow to go straight into where you're looking at in the target with the center shot bow if you wanted to. And you shoot Three fingers under. You can put it right under your eye sight, right down the arrow point at like 15 yards. It's going to go right where you're looking. You're just going to be able to sight right down it. So that's the reason for a center shot bow. Some people have gotten used to shooting a bow that's not center shot or cut to center. And for them at that point, if they were to make it center shot, it would probably throw them off. But if you're new and starting out, you're probably going to want more of a center shot bow. It's just easier to get more accurate quicker. That's pretty much all we need to go here. I got into that a little bit, but that's, that's perfectly fine. So now you can see I've basically created the same depth all the way around here. And you're done with the rat tail file. Here's the next tool you'll need. This is a half round bastard file. This is the coarse cut. I only buy the coarse cut for this here step because it removes material material faster. Any cut will work. It just might take a little bit longer. The half round is really important because when you're coming up to this here shelf, you don't want this to be a square file because you run into your, your shelf. So you. That half round makes that just a thin edge so you don't get into it. So now all we're going to do is just take this down. Now when we're doing this, we really don't want to hit right here where it's going up. We can take it off a little bit, but, but we don't want to dig a hole here that we later have to carve and carve away to get out. So maybe just a little more relief. Not quite as much pressure on this opposite side here. So we'll start here and being conscious to not hit that shelf. A file only cuts in one direction. You push a file and that's the way it cuts. Unless you're used to pulling it. But you can see it comes off very quickly. Basically we're just going to maintain that first index that we created with the rat tail. And we're just floating this side material into that index hole that we created with the rat tail. You do have to take it off enough to where you don't just have a slanted point right into there. You do need to take enough off as parallel as you can on the Black Hunter. What's nice is you've Got these lines. These lines can help you file just the grain of the wood. They can help you get it pretty straight down here. It's pretty much flat. It's just, it's kind of like the concentric lines on an altitude map in the mountains. And you can see as they, as they go up, they get tighter, tighter, tighter. So if you want this whole area flat, it's just like chasing the grain on a self bow. You just maintain the same width of those of that grain as far back as you want to go. I'm going to take it back to maybe like a right here and then we're going to start floating up. So you can see I can keep these the same distance apart and I know that's perfectly flat. You can't do that on solid wood risers as much. But on this one I can actually use that to my advantage. This is very simple though. Anybody should be able to do this with a vise and some basic files. I'm just floating this out as I get into this swell here. Basically I'm floating this out to smooth. I don't want to dig any gouges in here with my file. So because I've re, I've removed material here and so that's going to change the, the way that this here slope here approaches this. So if I didn't remove any at all here, then you would have kind of a flat and then abrupt. So I don't want that. So that's what I'm doing. I'm, I'm floating that all together. Just take your time. Okay, so that right there is all the file work you need to do. Now we got to clean that up. So most guys are not going to have pneumatic sanders like these. You can buy these from Lee Valley Tools. Normally I would use this and clean this all up. But because most people won't have one of these, I'm not going to use it. I'm going to grab one of these rubber deals. Probably most people won't have these either, but if you don't have one, you could just make you one. Just cut a wedge out of a block of wood or something. And you don't have to use one of these either. You could just fold some sandpaper over and do it. But if you want to just cut you a block of wood or you could just get a gigantic dowel and then just cut a triangle on one side of it on the table saw. So we're going to go with 120 paper and then we're just going to clean up what we did. We're going to take out the deep scratches of the file. We're maintaining everything. All we're doing is taking out scratches. We've already done the shaping with our file. We're simply taking out the scratches that the file left. And we want to maintain the integrity of that inside radius there. Like I've said in previous videos, anytime you have a sharp angle for sure on an inside radius for sure on a bow, moisture can leave that area quicker. So you want to have it rounded out and then it's a lot more stable. A sharp inside corner is weaker in any type of woodworking. And a sharp outside corner is very weak because moisture leaves that a lot faster than if it's rounded over. Wood is like a sponge. So regardless of the sealer you put on will take on its environment over a period of time. If you do a good high quality sealer, of course it takes longer for it to take on the environment. And so by the time it takes it on, it's stable enough and it doesn't split or crack out. So a good high quality finish is of course paramount to longevity of woodworking projects. Right now I'm just shaping it, making it look good. Anything that I, you know, I'm rounding this over. I don't want any sharp edges for sure on the outside of this either. So I'm just, just kind of shaping the whole thing. And as you do this with files or sandpaper, anything the whole time you're doing it, you can be shaping. Like I said, I'm taking scratches out. But if I see anything, I'll shape that while I'm doing it. Okay, so that looks really good. That's the 120 paper for you. Next we're gonna grab a random orbit. I would imagine most guys have one of these. If you don't have one, they're very inexpensive. You can get one for 50 or $100 pretty much from anywhere. You don't want to get one of the ones that have a real stiff or hard pad. You need that. You need that flex. Dewalt, Makita, most, most manufacturers, it comes with that. I'm gonna start with 120 paper. What about the square bottom ones? The square bottom, random orbits. They'll work, they'll work. They just don't work quite as well as the round ones. Now one thing we gotta be careful of here. If you're not going to fit your limbs, you don't want to hit this edge because that's Going to change your limb fitment. So I'm going to just kind of keep that side up as I sand. Okay. With 120 paper. That's really all it takes. So you can see I stayed off of there. I brushed that with my file a couple times. If you're really, really careful, you won't do that. I did. It's not a big deal. But. So we're moving on to finish paper. Now. You can finish this with 220 and it'll be plenty good for any sort of spray finish that you put on it. So now we're just going to repeat the step we did with 120. And after we do this, it'll be finished, It'll be ready. So now I'm going to come in here and if you've got grain, you want to try to sand with the grain. Of course, you don't really want to sand against the grain or crosswise or anything. So now I'm going to come up here and I'm going to carefully take out those file marks that I put in there. It won't take too much. The finish that's put on the Black Hunters is not super hard, so it should sand pretty good. Now if you look real close here, you can see that the integrity of that edge is still virgin finish right there. That's what you want to see. You don't want to take that off because then you're going to change the fitment of your limbs. So when I get to this point, I'm going to switch over to just using a piece that I folded three times because I have a little more control with that when I get up in here, just stay off that edge. Go right up to it, but stay off of it. Take out any cross scratches that we may have put in there and that's it. That bow has been made center shot. To make it center shot, you want to take into account whatever side plate you're using. If you're using calf skin, Velcro, whatever the thickness of that and half the arrow diameter. Right now we're sitting at about an inch and 5 8. I move this over to just 5 8. By the time we put our side plate on there, that will be a center shot bow. With the arrow diameter that we use and the side plates that we use. Very, very simple. And that's how you make it a center shot bow. We've made it center shot and we're now going to show you how to adjust the tiller on this bow. First of all, when you're going to measure your tiller. So you want to be in the location within a quarter inch of where the fade out of the wedge is. This is called the wedge. And this is where it fades out into the limb. I can see it ends about right there. You want to be within a quarter inch of where that fades out. So let's just make a little mark here at eighteen and a quarter. You just do one side and you make the other one exactly the same. So you find where you're going to make it on the one side. We decided we're going to go 18 and a quarter. And then you go 18 and a quarter from this side. Okay, now gently put your tape up against the string. You don't want to move that. That string over. So we're going to measure. And we've got 7 1/8 of an inch on the top limb. I like to tiller bows at 1.8of an inch difference between the top and the bottom. The reason for the tiller is that you're adjusting the limbs so that when the string is released, the limbs hit the bottom of the string stroke at exactly the same time. So you've got an even force pushing the arrow. If one of the limbs hits the bottom of the string stroke before the other, that string will go like that and you'll have a porpoise effect which will in turn make your arrow porpoise. Over here we've got seven and an eighth. And over here we've got just over six and three quarter about six and 13, 16. So that is telling me that my bottom limb is too strong. So we need to take material off the bottom limb to check the straightness of it. When you eye down it with one eye closed on a longbow, you're going to center this string right in the center here where the riser meets the limb. After you have it centered, then you look at this limb and see where it is in relation to the string. That will tell you which side of the limb you're going to take material off. When I look down this and I center the string on that limb down there. And then I look up here, I've got more material here. So I can see there's a little jut out here. I'm gonna take it off right at that point. So you can look down there, see where that jut out is. Just make a mark there. So not only will will I be weakening this limb, but I will also be straightening it at the same time. Now, if you look down here and you've Got the same amount of material on either side of the string, and your limb is straight. Then you're gonna want to take it off evenly off both sides. Now, on the Black Hunter, we don't really want to take it off the belly in the back simply because they paint these limbs. And you'll be removing that paint, and there's a risk of making it look funny. So we're going to take it off the sides. Now, this vise has rubber jaws that we put on all of our vices. If you don't have rubber jaws, you can just stick a sweatshirt in here, Something real bulky to protect your bow. We're not going to clamp it super tight. We don't want to crush the wood, but tight enough to hold it for us. I'm gonna show you how to do this with hand sandpaper. We don't necessarily use hand sandpaper, but, I mean, we do, but not. Not in this capacity. So what we're gonna do is we're just gonna fold this three times just like this. This will work. It might take a little bit longer. It'll be a lot safer than doing it with power tools. We're just gonna come along here. I can see this is the side I want to take off of, and I'm just going to start taking material. You want to make sure you have even strokes. If you have a little bit of limb that's kind of jutting out, which I do right here. Take a little bit more off there as you go. You can just step back and look at it, see what you're doing. So that has already made a huge difference in the way this limb looks as far as straightness. I'm going to stop right there, and I'm going to go ahead and look at my tiller again. There's my mark that I made. So I moved it already a 16th of an inch. So see how easy that was to move it a sixteenth of an inch? Not a big deal. Let's go look at it here. Okay, so before we had about seven and eight. Now we have about seven and a 16. A lot of times if you move one limb, the other one moves too when you're doing this. So we don't even have that far to go to get it perfectly tillered. So let's take a little bit more off, step back, and look at it. Looks real good. And it's straightening that limb as I'm doing it too. We want to stop just a little bit before we get to where we're happy with the tiller. And the reason we're going to do that is we'll switch to 220 paper and we'll take out the 120 scratches and then we've got a finished surface. So let's go just a little bit more because I know that wasn't enough. Keep in mind this is your top limb. This limb needs to be weaker. We moved it a little bit more. Don't get discouraged if you measure one of them and it didn't move. Sometimes that happens. Sometimes just one limb will move. So we moved it about a 16th that time, which looks like a 30 second on a tape. Both of the limbs moved a 30 second. So I love how it's straightening that up so beautifully. I wish I could do it to that side, but it's not quite straight yet. So I'm going to go ahead and keep doing it some more. You want to keep this pretty flat as you go. It's not critical, but you're going to round that. Like I mentioned before, on these black hunters, these limbs are painted. So if you don't want to spend a lot of time refinishing the surface of your limb, the flatter you go, the less scratches you're going to put into that finish. So now we should have a pretty sharp point on here, which we do. And that tells me that I've kept my paper really flat. If this was rounded over then I wouldn't have kept it flat. So we're about a 7 and a 16 there. We need to go another 16th, we really straighten that limb. But I could use just a little bit more off of this side that I've been working on. I'm going to get a new piece of paper because I don't like to sand and sand forever and not get anywhere. Alright, here we go again. I'm gonna put a little bit more pressure on just so we can get get done here. We should be nearly perfect after that sand. Okay, we got 6 and 15, 16, 7 and a 16th. So that bow is 10 tillered perfectly at this point. And you can see I didn't put a single scratch in the surface of that limb. That doesn't even have to be refinished on that that whole limb. Now it's a good idea to refinish this anyway. But I'm just going to gently ease that sharp corner I created and just slowly round around there, real gentle. All I'm doing is taking out the 120 scratches just to make that a finish ready surface. Okay. So now not only did I re tiller it. I nearly straightened it perfect just by doing that. Very, very simple. So let's take a look at it. So there we got about 6 and 15. 16. 7 and a 16. Perfectly tillered. And now it's straight. That's all it takes to retiller your black hunter longbow. Now, when we shoot this, there's not going to be any arrow porpoise. Now, if you have a particular style and you know the type of tiller you like on how much distance, how much weaker the top limb is than the bottom limb, you can absolutely do that. You don't have to tiller it at an eighth inch. At great Plains, we till all of our bows at an eighth inch. They accommodate three under and split finger. We have yet to have anyone call us back and say their bow was tillered wrong. When we tiller them at an eighth inch. It works perfectly. So far, we've made this black hunter center shot. We've straightened it, we've tillered it. Thanks for watching.
More from Pro







Choosing a Traditional Bow for Beginners | Custom or Amazon? | Which is Right for you?


Vintage Bow Restoration | Ben Pearson BP-H52 | Very Twisted Limb, Bad Finish, Holes in Riser

