Part 2 | DIY BLACK HUNTER Rework
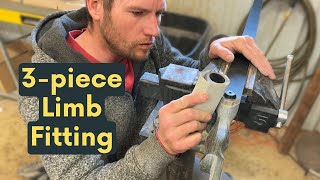
Learn how to refinish a Black Hunter longbow's limb pads and shelf with basic tools. The tutorial covers safe filing, sanding from 120 to 220 grit, Dremel work at 35,000 RPM, and finishing touches, with repeated warnings about not altering the bow's tiller or damaging the limb glass.
Chapters
Alright guys, so we've been working on this black hunter longbow and we put out a video where we made it center shot and we retillered the limbs perfectly. So it shoots great without any aero purpose.
We don't want to make this too complicated, but if you guys want to take it another step, we're going to show how to refit these limbs. You can see that it just simply does not fit at all. Really hanging over there. This is hanging over pretty bad. The benzels are really close to the edge. Normally I would probably put new benzels in and move them back so I had more room. But that's going to involve you guys having to go buy new benzels. And I'm going to try to do it as best I can without having to replace any parts on the bow.
Let's take it over to the vise to get started here. This will probably help you to not mess it up. Put you some tape right along there. When you hit that tape, you know you, you don't want to go any further.
Now this is very important.
You cannot file like this or like this because you will blow this glass off. When the file comes out of the off the limb. We have to file this way in line and we'll come in here. So there I roughed that tape up a little bit. That's okay. So that's pretty flush right there. I could go a little more. You can scratch this a little bit because you're gonna hit that with your random orbit. The main reason I had the tape there when I was taking off a lot of material is you just don't want to all of a sudden take a huge chunk out of this here riser when you're doing this.
Okay, that's perfectly flush.
This step here would probably be a little bit more advanced than what I showed previously on this bow. But it's well within people's capabilities. With a little bit of patience, we'll.
Leave that there and we'll switch to our random orbit. So I've got 120 paper on here. Just because the deeper scratches and now we don't really care if we stay off this. When you do this, you've got to keep this, this tool moving. If you stop and try to get out scratches right there, you'll dig your hole right here. You can go up to where the limb wedge fades out without changing your tuner. Tiller of the bow up in here you can send and it's not going to change the tune or tiller. If you get out into here with this, you will change the tune and tiller and that's not going to be good. The main thing with a random orbit, just keep it moving.
Okay, that's it. That is perfectly, perfectly flushed up. I can still feel a little edge there, but that's that felt that's coming out from underneath the limb. That's how to do the sides. They're all the same on the sides. I'm not going to show all four of those or the three that's left. So now let's focus on this right here. This will be a little bit more difficult than what we just did.
I always look for a 90 degree line coming, coming off the limb. And then imagine that across there where you can see that one's lower than this side. That's not a huge problem. But we'll correct as much as we can. We're not going to be able to correct a lot because there's the reveal here is already smaller than over here. None of these steps that I'm doing here are going to affect the performance. It's just if you want your bow to look better and look like a high quality bow, you can do this. And archery is a hobby if you want to play around. A lot of people take fulfillment and joy out of this kind of thing. Because it's on the wedge, there is no limb movement. Now if you get into here, you're gonna change it right there.
But right here, I mean, I do it constantly with my bows and I never change the tuner tiller by getting on the wedge like that. This one's got quite an overlay. How to do that without using my tools, huh?
It might just be. We just have to skip that. After a lot of thought and thinking about it and talking about it, I'm trying to make this process easy or available to the the guy with the normal garage tools in the bow shop. Fitting this here contoured part, angle part is just a matter of a couple minutes with our bearing tender. Most people are, you know, are not going to have a bearing sander or the kind of tools that we have here. We talked about it and I think it can be done with a dremel. Now before we do this, we just wanted to say that doing this to your bow does not have to be done to make the Black hunter perform great. This is more of something that you're going to do. If you like woodworking, you like to soup up your equipment, you want to make it look cool and special. Now, that being said, I am going to show you how you can do it and not to minimize anybody's skills out there. Because most guys will be able to do this. Most people will be able to do this with a Dremel with a drum sender on it. It's not that it's that complicated. I just don't want you to get in trouble where you actually compromise your bow by cutting too much into the limb pad or something.
And I'm going to turn this limb, put it in the vise on the side there. Again, if you don't have rubber jaws on your vise, just use some T shirts or plenty of materials. I need to take more material off the riser than the limb. Just gonna. This is not a good Dremel, but it works when I get it going. Come on. Don't buy a battery Dremel unless you hardly ever use it. If you never use it. Hardly. They're not bad. But if you use it any significant amount of time, get the corded Dremels. Way better tool. I had a. This is a 4300. I had a 4000 series that I ran for 10 years almost daily before it burned up and it was corded. Okay, this one will work. So I'm just gonna come in here. I'm gonna hold my Dremel down here. You got to be conscious of what, what it's doing on the pull out stroke. So. Okay, that's good. We're just gonna rough shape the whole thing. That's perfect. You can see, you can look right down there. And I flush that up perfectly. Really doesn't take much time to do it with a Dremel. You just have to take your time and work. Not get crazy with the tool because it, it does have these little drums spinning at the RPMs. They spin. You can slow that down. I have it at 35,000 because I like to get things done. But, you know, you can slow it down to 10,000. Take your time, you know, like that. And it'd go a lot slower. You wouldn't have to go as fast as I was going. But I. I don't want to wait. See, I left just a little bit off that. I'm taking my time and kind of letting it all come together without going too far on any one surface, which is pretty important. You can already see I've flushed that up pretty nicely. So now let's do the point here.
Jesus.
Pretty rough there, but it's starting to take shape and it's starting to look real nice. I don't understand on these black hunters why they put this, this bushing or benzel on the limb bolt so close to the edge of the limb. Seems like it, it builds in weakness because the hole of that, the limbo bolt hole is so close to the, the end of the limb. So you can see there's kind of a gap right here. And that's because when they made this bow, they didn't spend a lot of time getting those limb pads completely flat. I wouldn't just kill yourself trying to get that out. You're probably not going to get it out until you're back into the limb.
Aways far enough that you've compromised the.
Limb pad on the riser or the limb pad on the limb.
If I was doing this to soup it up and make it look great, I would just clean it up, flush it up, make it look pleasing to the eye, make this here symmetrical, this little diamond shape here, make this symmetrical, clean it up and sand it and it's going to look great. You could stress yourself out trying to get that perfectly flush all the way back here. And it's probably not even going to happen because I don't think the quality control is there on these bows of getting that limb pad perfectly flat. I'm going to look at this from back here. What I'm going to look at is if these points are across from each other. I can see this one needs to come just a little bit. This point needs to come back just a little. So I'm just going to touch it up just a tiny bit and then we're going to finish sand it. Okay. That looks really good. So I've got that all flushed up all the way. It's symmetrical. The diamond shape of it is, looks 100 times better, but it's still rough. So I need to clean that up. Now normally I would use my pneumatic sleeves. If you, you can buy these from Lee Valley Tools. They're inexpensive and if you're a woodworker, you got to get you a set because they're invaluable. But here again, most people aren't gonna have this. So I'm not gonna use it. I'm gonna instead go back to this again. And like I talked before, you can make your own one of these out of a dowel or even a block of wood or anything that could be any material. You're just. All you're trying to do is get a radius on there. When I use this 120, I'm not gonna be so worried about cross grain scratches. I just want to get out the dremel mark, we can take care of that at a later date with finer paper. While being cautious of keeping all your lines straight that you made with the Dremel. We're just taking out the dremel marks. We've already shaped it, and I'm looking.
The whole time while I'm doing this, I'm watching my angles on my limb, making sure I'm not changing that. Because you don't want to get carried away sanding. And all of a sudden, you look up or look down, and you've drastically changed the profile of what you're trying to do. And then you have to start over. So that's pretty much all of them out on that plane. See, just a little bit there. I need to. Okay, I'm gonna do these angles while I'm sanding. I'm shaping. So I'm watching what I'm doing on the riser and on the limb. So I still have a nice straight line there.
That you want to share with our viewers.
Yeah. Poverty. Well, that's not a good one, because I'm broke most of the time. Unkindness. How about that? That's a good one. Don't be unkind, you people. And Shane.
So I'm just taking out those dremel lines, and I about got them all out. One thing a guy could do is use finer paper on your dremel, but it'll take you a lot longer. And the other thing is you'll run the risk of burning. Those dremels spin so fast that when you put fine paper on, they slick up really quickly. Then you constantly have to be changing it. So on the drums on the dremel, I generally use a pretty coarse grit, and I use them just to shape, is what I used them probably seen me shape. Oh, we didn't shape that outside edge. I'll do that too, on this video. Normally shape that outside edge of that shelf.
Okay.
So that's all the dremel scratches out. And then I want to make sure that I didn't change anything. That looks great on the riser. And then, like, right here, right in this corner, you just want to round that over a little bit. You still kind of want the. The profile of that diamond shape, but if you don't round that over, you don't want to create a sharp edge. Like I've said a thousand times, moisture release. But also, if you hit that and it's a sharp edge, you can break that off. Okay, let's do the other side so I can see.
I Changed it just a tiny bit. Whenever I was sending, I did the thing I said not to do. Okay, that looks good. Now let's do this side. Don't get the idea that I do things this way when I'm building custom bows for you guys, because we have.
Tools for all this.
But I just want to show you what you can do with your tools at home, because this whole process would have taken me maybe five or ten minutes with my tools here in the shop. I'm not trying to brag. I just. I would think people would be like, you guys need to do something else if you're taking this long on bows professionally. Alright, so I almost got that, but I'm kind of sick of this paper, so I'm gonna. I'm gonna switch out because I don't like dull paper. Okay, that looks pretty good. Looks really good, actually. Because of the poor shaping at the factory of the limb pad. You're not gonna. You're not gonna get this here to absolutely mate perfectly as far as like this. But you can definitely get it to make perfectly like this, you know, and this and this, which is what we're gonna do.
If we had more room, if they would move this bottom bolt back to, like, here, I think I, you know, you'd have enough room that hopefully you could take it back far enough that the limb pad would flatten back out and you could go ahead and make that flush. I'm going to switch to 220 paper. I'm not going to wrap it around that little rubber doohickey. I'm just going to fold it. I think I've been saying fold it three times.
You actually fold it twice, but it makes three panels. I'm just going to go like this. And then we're just going to take out the scratches we put in with the 120. That's all we're doing here. We've already shaped it. We've already sanded out the dremel scratches. Now you'd want to be a little more careful on sanding with the grain at this stage when you get to fine enough paper. If we were going down to like 320 or 480 paper, you probably wouldn't even have to be that concerned about the direction you went, because the scratches would be so fine that were left in there, you wouldn't see them. But we're still using 220.
Okay, that's looking pretty good right there on the tip.
I might have some. No, I think that is something else. I thought that was Dremel scratches but I think it was just the, the wedges on this are made out of diamond lux. We were looking at that earlier. But what's interesting is they kind of got this thing cut on an angle. I, I think that's dime a lux. Has to be because the grain is too uniform. It looks really good. It's all flushed up. I'm just going to quick do that side and then we're going to finish this up and shoot it with a little bit of finish just to show you what it can look like when you're clamping a bow limb in a vise like this. You don't want to put your vise like this and get on the wedge because this wedge doesn't move. So you can really crush stuff and mess up the fade out area. If you're going to do this, get right on the edge of that fade and then go ahead and clip it. But don't do not over clamp or you will ruin it too. There's just to where it's just holding its own weight. And then I'll go like maybe a quarter to 38 of a turn. That's it.
You know what, Just for speed on this, I already showed how to do it with file. I'm just gonna quickly do this on my pneumatics.
Redneck sander alley right here. Oh, you build both professionally. Cool. Oh, you use those kind of tools? What? Yeah, mostly A crescent here is just a bigger size rock. Like you know if you're using a.
Wrench and then you need a crescent wrench, you just get the size larger rock.
This is 180 grit paper.
We're just gonna get this side.
And that's done so quite a bit faster now.
I always look at this because I changed that just a little bit. So I'll do this side a little bit more. Okay, perfect. Yes, lovely.
Okay, so after I do that, always take the random orbit and just mate these up pretty good.
Like that. Then I'll quickly do the other side. So as I was doing this I noticed that I kind of changed the.
Radius of that on the riser when I was doing my other step.
So I'm going to just take this piece of sandpaper, what you can do.
At home and just come in here and make that back symmetrical like it was actually I don't know if it was symmetrical. And that's good. Again we'll take out the random orbit scratches with our 220. We'll take them out from this side. So we have Directional sanding travel. Okay, good. Let's blow it off. Now here's what I was talking about. You can see there's a gap there. You are not going to take that out on a Black Hunter. It's just not possible. That's done at the factory on a high end custom bow. You aren't going to have that, but that's not going to affect your performance.
That looks really good. Actually. I'm going to squirt this with a little bit of finish. But before I do that, let's do that shelf. It's a very fast process and it is a great addition to your Black Hunter. So for this, we're just going to take our drum again and we're going to give this a bevel on here and get that sharp edge off of there. And also dress it up and make it look cool. This step here is super simple. Anybody can do it. If you don't have a dremel, you can do it with hand sandpaper and a block of wood. Gonna hold my dremel like this. And then I'm just gonna follow that radius around, put a real pleasing bevel on there. Okay, that looks really good. To clean that bevel up, I'm gonna take some 220. We're just gonna follow what we made around there.
Just take out the deeper drum scratches of what we put in there with the Dremel tool. Okay. Looks real good. While I'm doing this, I'm surprised I didn't do this when I was making it center shot. Maybe we ran out of time, I don't know.
But right in this corner here, you do not want this to have a sharp edge. So you come in here with your sandpaper and round that and smooth that out right where the shelf meets the side plate. You want that to be smooth radius down in there. That's a point where moisture can leave the bow. A lot of bows will get cracks there if that's not done correctly. Same thing over here. Looks like I did do this one pretty good.
Okay, that's good. Another thing that that does, it reduces mass of the shelf. And you can go a lot further than this. You could literally take this into right here probably and it wouldn't hurt the bow.
And what that does is that reduces surface area for the arrow to contact. And actually, if you make less material here on the shelf, you'll get a better, cleaner arrow flight because it's contacting less of the bow. Think drop away rest like on a compound.
One thing I would probably advise on Doing is taping this black bushing benzel thing so that you don't scratch it accidentally when you're. When you're working on your bow. I didn't do that. I'm used to working with these tools. I didn't scratch it, but I could also see myself scratching it. Just because I know that people slip and I slip. I've never seen one glued on like this one was.
You can see when we shape this, we kind of gave this a sharp edge all the way. We don't really want that.
We also don't want to scratch the surface of this limb. So I'm going to take my sandpaper and being careful, I'm going to fold it like this and I'm just going to hit that sharp edge and I can get pretty aggressive with it. It'd be fine if it's rounded over pretty good would actually be better. You just don't want to get aggressive.
To where you're getting onto this. And you can see I'm staying off of that as I'm rounding that. I'm staying off of that surface. The actual limb surface. I'm just hitting that edge.
So let's do this side. Just the areas that we touched. This will also keep it from chipping. When you have your limbs off of your black hunter. Let's go ahead and let's do this. Keeping in mind to not change our profile that we created. Okay. Shaping up to be really nice. Okay, I like that. Now on the bottom side. Or this would be the belly of the bow. We've also created a sharp edge here. Now we want to relieve that too. However, we don't want to relieve that as much as we did on top. Because we want as good a fit.
Onto the limb pad as possible. We want this to be as flushed up as we possibly can. You can already see I made that diamond shape and it looks so much better than it did before. I do this on all my bows too. I ease the belly side of the three piece limbs because here again, you don't want this sharp. Number one, it can cut you. Number two, a sharp edge will chip. It doesn't matter if there's. If it kind of folds in on itself a tiny bit. You'd rather have that edge protected than worry about it absolute being 100% perfectly perfect. After all, we shoot these bows for performance and what they can do for us. This bow is no good just hanging on the wall and looking at it. Yeah, it might look better if you don't use these. But we're all about performance. So what I do here is I count my strokes. So I don't. I normally go 1, 2, 3, 4. But I do it faster. So 1, 2, 3, 4 dot 1, 2, 3, 4.
1, 2, 3, 4, 4.
1, 2, 3, 4.
And that's all I do to ease. That is you. You want it fairly sharp, but not too sharp. Okay, so let's put this back on here. One thing you can do, which I would kind of recommend this. Take the edge of this very gently. Take the edge of this felt off, because I just really don't care for it hanging out. If you had, like, a razor blade, this would probably work just a little bit better. But this is working. This is a pretty sharp knife. Of course, this felt needs to be put on after this is perfectly fit. And in a perfect world, you wouldn't be putting this felt on and then having to cut it to shape on an already finished limb pad. Now here you can see it's really hanging over. So I'm gonna do my magic here too. A little trick you can do also, if you want, you can run some masking tape along here. You can take a black magic marker, a fresh one, and just hit that edge. And because it's kind of a gray white, when you cut it, you can just darken that edge and make it look really, really great. I'm not going to take the time to do that. And if I did it without masking tape, I would probably get it on.
The bow, and we'll go ahead and put the washer back on.
I don't know why this one was glued. Glued on. I haven't seen that before, but it was. Maybe they are just the one that we got before. Didn't. Black Hunter is kind of. It only has one indexing pin, so you can kind of wiggle it into where it's all flushed up and then tighten it down. I don't really like that. Our bows have two index pins. Okay. That is a perfectly fit limb using hand tools plus the dremel, I guess.
So let's go squirt it with a little bit of finish and see how she looks. We just did the bottom limb. I didn't take the time to do the top limb because that would have made the video just too long. I chose the harder one to do just to kind of show you to do one with more angles and contours to it. But it's the same process for the top limb. It just takes time. It's really not that hard. This is a hobby we love Tinkering with our hobbies. So if you are a tinkerer, do it. I really have full confidence in anybody being able to do it. I am going to do a video on different types of aerosol finishes. I have some. Ordered a variety of them. Right now, I'm just going to use this rust Oleum Ultra Cover Gloss clear. I don't know that I recommend this so much. We will do a video where we recommend the aerosol finish to use on your.
On your bow.
It's going to do what we need it to today, just to darken it up and show you what it looks like. It's always important to sand between coats. Probably most of you know how to run an aerosol can. It's really not that complicated. The main thing is just keep it moving when you start your spray. When you come to the start of your stroke and the end of your stroke, let off on your spray tip. So you know it's going to be like. Like that. You don't want to go. Very, very bad choice. That's going to put drips at the. At the two ends of where you're spraying. Okay, this is gloss. You can see how that dressed that, how it fit that up so pretty before it was hanging over really badly all over. Do not get discouraged. As if when you spray it, you see like debris and stuff in your finish. That's all going to be taken out when you sand between coats when you're spraying your bow. So. So you can see what we did there. We really dressed that up and made it look great. We fit those limbs. We made this all symmetrical. This is all flush now. This is all flush. It's a nice diamond shape. If you have any questions, please comment on this video. We'll help you with it as much as we can. Thanks for watching.
More from Pro







Choosing a Traditional Bow for Beginners | Custom or Amazon? | Which is Right for you?


Vintage Bow Restoration | Ben Pearson BP-H52 | Very Twisted Limb, Bad Finish, Holes in Riser

