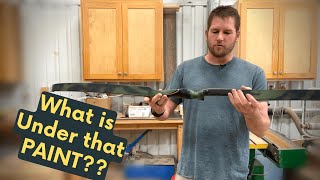
Shane and Josh strip and refinish a vintage Bear one-piece recurve bow, checking tiller, weight, and geometry before sanding, blending the finish, and test-shooting it. The video walks through paint removal, fiberglass protection, shelf setup, and how to refit the medallion without damaging it.
Chapters
What's up, guys? So today we have a bear recurve one piece. I am going to refinish this bow and make it look brand new. First thing I'm going to do is take out the medallion. So we need some heat for that. There's the medallion. Now we can clean that up around there and take out this little arrow rest. Okay. And then these are pretty worn and tore up, so I think we're gonna go ahead and take those off too. Put new ones of those on. When I do refinishing, sometimes I use a product called clean strip. Now, you don't want to put clean strip on fiberglass. It will actually eat the fiberglass.
I learned that the hard way. But you can put it on wood, phenolic, things like that on the riser. But you don't want to leave it on for very long. I don't have to get this perfect, but the better I do now, the less time with sandpaper. Okay, that's a good start.
Like I was saying, this is a bare recurve and the serial number on it is 721740. I'm sure there's a way to date those on their serial numbers. I'm not sure how. It's a 60 inch, 40 pound recurve. You know, before we get to sanding on it, let's. Let's string her up. That's eight and a half right there. Okay, we're gonna check a couple things here really quick because when we refinish this, we also want to tune and tiller it perfectly. So at 15, we're at 6 inches. So that's real good. One thing I want to check on this particular bow. Here's the center line. We're gonna mark about 29 and a half. And then the reason I want to mark that is because I noticed the location of that arrow rest is really high. That will affect the tiller too. So that's your centerline right there. So that shelf is one inch above. So by them putting that elevated rest another 3/4 of an inch up, that actually will mess with the tiller. Yeah. And it was tillered a little bit higher. That's probably why it was tillered like that. So I'll probably retiller just how they have it. Okay, let's check the straightness really quick here. Not bad. Just a little bit off on the bottom limb. Top limbs perfectly straight. Okay, let's check the weight. Oh, man. Dead on £40. So. Oh. Kind of impressed with the tune and tiller and weight and everything. On what they did on this old bow, they did a pretty fine job. It just needs to be restored to its former glory. Because it's got green paint all over it, it should shoot pretty good right off of that rest. Except my knocking point is going to be too low. I can see that now, which I can adjust for that. I'm not a split finger shooter, but I can shoot it split. Very impressive. And that arrow is spined too heavy for this bow. That's a spine for a 50 pound bow. So it's definitely tillered correctly for that rest. These are tapered shafts. They seem to work better off a lot of different varieties of weight with a taper on them. That thing shoots good. It's not super fast, but it's also because these arrows are a little heavy for it. I actually like it. Like, there's no hand shock. It's smooth. The only drawback is it's not super fast, which has to do with the limb profile. But that's nice. I. That's a nice shooting bow. I'm impressed. An old bare bow. All right, let's get to strip and paint. This was my first arrow. That's where I was aiming. But then, of course, I don't know. It's hard to be super consistent when you are always shooting new and different bows. But for never shooting that bow before, it's not bad. You having a good day? You're so soft and warm and brown and fuzzy. Oh, that's beautiful. Look how fast that's coming off. When you're taking paint off, you never know what kind of paint it's gonna be. If it's a real gummy paint, it could absolutely be a nightmare to get it all off perfectly. Now you can see here, you see this sort of white, milky looking stuff. That's the original bow finish. And then this is the down to the bare, bare bones of the bow when you're sanding this. One thing I like about these old bows is that maple. You know, it's yellow from the finish and everything. And then when you sand it, it turns that nice white color.
I hate it.
I really hate it because for me being a bow here, it's. I think it destroys the beauty of the natural beauty of the bow. But I don't know. I mean, if a guy had a black hunter and not a very high quality bow. Yeah, I'd probably paint it if I felt like it. The challenge for refinishing these is to get this paint off without changing too much on here. I think to do that, I Need to tighten my drum up and get a new sleeve on there. Because what happens is if your drum is too loose, you sand all the way off the sides, but you don't get the middle. And then that will definitely change the tune and tiller of the bow. So I was standing here, and I found that there's. The stickers are still under there. These stickers on bare bows, they're actually screen printed onto the raw fiberglass. They're not a sticker. The Bear Archery Company actually does not even have these stickers for sale. I've tried to get them before. For a guy refinishing the. Refinishing them, that's kind of a mess. Because you want to put new stickers on, you really can. Let's see what happens when I go over this. I bet it comes right off. If it doesn't, look at that. I might be able to keep that bad boy. I'm not going to sand anymore there. You got to watch your glass as you're going. Because I'm doing a good job. You don't want to take too much glass off as you get the paint off. I don't know how you would do this accurately without a pneumatic sleeve sender like I've got here. This makes it so much easier because you just, you know, that's. I'll do a little touch up there, but that's basically done. I don't want to go too. Too much more. I can on here because that's on the fade. Keep the same steps and you won't screw up always. And I always start with the tips on my bows. I start with the tips on this bow. So a lot of these bows, I even still see this on some new bows, but they leave an abrupt transition right here. I don't really understand that. I'm going to fix that just a little bit here. I wouldn't have to do this, but that transition, I feel like you got a smooth tip transition. It really adds to the quality of the bow. The look of it, the feel of it. If you have an abrupt transition, it just feels like the craftsman, the bowyer, just kind of skipped a step. It's like, I'll just glue that on. I'll leave that. Yeah, you can feel it. Who cares? I'm also not a fan of square limb tip transitions, but each to his own. That may be just a personal taste. So. Okay, that looks really good. Grab this pneumatic. I got to be kind of careful because that is a pretty shallow. I can go like this to See how deep it is. That gives me an idea of what I'm working with. I'm going to switch to a smaller drum so I don't take that out. This is going to fit in there a lot better. The problem was, is I was taking away this hook a little bit. You don't want to do that. We need that there. I'm going to deepen that just a hair. I said I was just going to refinish this bow, and here I am modifying it a little bit to make it better. Make sure. Oh, I got plenty of glass there. Okay, that's good. Switch over to this bad boy. Get the side we start with in here. Clean up those scratches. We put in with the Dremel, making it uniform the whole way around. Now we top it out. Roll all the way around it, because we're not going to touch the top side of this tip again. This is it. You can see a little bit of yellowing. This is a fiberglass overlay, and some of that yellowing has crept down into the glass. You're not going to be able to take that out. You have to put a new tip on. But for the most part, it's nice and pretty and white again. Looks great. So you can see how that tip looks. And then the finished one. Lovely. So we shall do that to the other one real quick. Need to film that? Okay. All right. So we're just going to clean this paint off of here and around here. How am I going to do that, Shane? I am going to do that with this.
A lot of guys don't like to refinish bows because it can be quite tedious. And stuff like this, Like, I don't mind doing the big spots, but I myself do not care for stuff like this. I'm gonna try this. Oh, yeah, that's the way to go. Good idea, Josh.
I got a new. A new power file, and it works pretty good. I mean, I was surprised. Unfortunately, it doesn't work quite as good as my hand files, but I was pleasantly surprised at how well it did work. I think if a guy was getting into bow building and you didn't have the. You weren't used to running files yet, one of those power files would actually be a pretty, pretty valuable asset to you. What about the hand files Work better. There's just. If you know how to run a file, you've got more control and more precision with a hand file than you do with the a power file. Those things are cheap. That was like 50 bucks or something like that. I was Surprised? I would give it a pretty high rating for what it is. That's beautiful. Okay. I just got it off Amazon. Take the green off of this surface because we can't get to this with our pneumatic. So we'll take it all off of here. Okay. And then we'll finish up. I wonder if there's a machine in the Bear factory that they put the tip in and it makes all these profiles for them. I have never toured the Bear factory. I wouldn't mind doing that. Maybe we should load up and go give it a tour. See how the pros do it.
Although I have redone a lot of their bows.
Okay, tip's done. I enjoy this kind of. It comes off pretty fast. I really dislike how they did their shelf here. I was told not to change anything, though, on this bow, so I'm not going to look at the difference there. Pristine white and yellow. There's basically no radius down there. Well, there's no inside radius here, and there's also no shelf radius. But this bow may be intended only to shoot off an elevated rest. And if that's the case, then you wouldn't need that. If you look at the tiller, it would be logical to assume that it was only designed to shoot off an elevated rest on this particular model, because the tiller is tillered for that elevated rest. So on my bows, I radius this because I don't build them to shoot off elevated rests. I can build them that way, but I don't.
So.
So we radius the shelf, and so there's a high point on it, and then the arrow makes minimal contact. We also radius this side plate, and so you've got a little area about a quarter inch there that both high points are connecting. And that's all you've got touching your arrow on this bow with an elevated rest here, they're using just this point here, which actually is a pretty good way to shoot. Also, I like shooting off of a shelf, but versus an elevated rest, there's less things that can go wrong with your aiming and your bow and your and everything. Because your elevated rest has always got to be in good shape in order for you to be accurate. And the arrow stays on the shelf better. I just like it. Everything about it better. But I would imagine you can get pretty accurate with the technology of the elevated rest. Actually, I know you can. But a good proper radio, shelf, and side plate is going to be just as good if you know what you're doing. I'm going to switch over to 220 clean that up. I did a black widow about three or four years ago. The guy brought it in, had me refinish it, and it had been camo painted the whole thing. It was a three piece black widow. And he had regretted the fact that he had camo painted it. I wish I had pictures of that thing because that thing turned out beautiful. It was mint. It was a nightmare because the paint that he used, I think was a acrylic or latex paint. And so when you sanded on it, it didn't powder up like this stuff. It was really gummy, and it just gummed up everything. And I fought and fought with it. And like I was saying, you can't put clean strip stripper on your glass because it will literally eat the glass. You could damage your limbs, but you can put it on, like the riser areas. So I would do a small section, put the stripper on, wait for 10 minutes, because it's really caustic. You don't want to wait longer than that. Take it off and back and forth, back and forth. Because I couldn't sand it because it would instantly gum up my paper. The other thing it had is it had these big giant limb bolts that had knurled knobs on them. I had to get that gummy paint. No, I had to get that gummy paint out of those knurls in there. So I lost a lot of money on that deal. But you win some, you lose some. I think I figured it up. And I spent in time probably like 500 bucks or more refinishing that thing. And I charged 150. Got pretty spendy on me on that one. Look at that. Right on the edge of that thing. You see, I've got a little bit of paint and finish. So look at the minute you touch that. Look how green that got. But that's powdered up.
You sand on this and you think, oh, I got all the paint. And then you sand an area. It looks like there's no paint and there's green powder.
It's everywhere. I think this is why people don't like refinishing their bows. And they send them to me because. Gotta have some patience to do this job. But that's looking gorgeous.
Okay, let's do this side.
We're getting.
We're getting there, man.
We don't have just a whole lot left. I gotta drink some water. I just build them for people that like them, but they're kind of cool. They got. Got the throwing arm, right hand airfoil, left hand airfoil. That's a left hand airfoil. I'm going to first run the pneumatic on this side. All right, that's good.
Edged in the limbs. We're almost done here.
I was gonna just skip the 120, but if I don't, I'll have to get so aggressive with the 220 that I may change the tun. Get the moth. Get that. Watch this. I love doing this. Take this. Squirt it right at the moth. Pow. And it. It disables them so bad. And then I feed him to the dog. He loves them. Yes. Breakfast of champions. We loves it. Crunch, crunch. That will so get them off. Get him. Get the moth.
Just get him.
There's no moth. That was mean. Sorry.
Never do that again.
Now we'll take out our random orbit marks with 220. Clean up our 120 marks on the edges. You can really. On these black bows, you can really see it. If you leave random orbit marks in little squiggly circles. I know I'd get in terrible trouble with Josh if I left him. I don't know. I'd probably be in solitary confinement for two weeks.
One side. Done.
This is actually coming together quite beautifully. I didn't know what to expect on this particular one, mainly because you just don't know what paint they use. Okay, so to get the last little bit of this off of here, this is the problem we're gonna have, is that green paint went into those lineal cracks on that limb. The only way to get it out, almost, is to take them out with sandpaper. And then if you take that much glass off, you're gonna change stuff. I'm thinking, though, I will do something a little unorthodox to get that out of there just so I can use pinpoint accuracy. And what I'm gonna do is I'm going to try some 220 paper on my random orbit sit at 120. We're gonna try this up on the fade to see what. How it works so it doesn't affect the limb. See, this is a problem with this bow because, see, that's the old finish. That is the old finish, and that is really, really on there. So I'm afraid that I'm gonna change the. That's kind of gross. What's it taste like? Mmm. Strawberries and cream.
How about I try something else?
Let's try this.
This might be the way to do it.
I don't want to change the tune and tiller of this bow, but I also want to get that old Finish off there. So I can't save that decal because.
Too many defects right here.
That's coming off because I really want it down to that. That's original.
And it also pretty much took all the green out of this crack.
But that takes a lot of elbow grease. Technically, if you're just sand and finish, you're not changing the tune and chiller. Technically, that's what's happening. Let us try to do it a little quicker with this bad boy. If we can carefully do. Just makes me so nervous. Makes me so nervous to run a random orbit on a limb like that. We're gonna try something. We're gonna do both these limbs this way. We're gonna try something on the backside on the pneumatic.
Well, I got it half done.
But it took about 15 minutes to do it this way. It did take out the green, though. It's pretty, my guy. It's getting really pretty. Sort of like a skunky. It's a skunk bow. You ever read that book Skunk works, about the SR71 Blackbird? The inception of that bad boy and everything that went along with it? That's a pretty fascinating book if you like fighter planes and spy planes and bomber planes and fast jets. The crazy thing about the SR71, you know, that thing was developed in the 70s, and it had technology that was still blowing people's minds. Well, even today, seriously smart dudes that worked on that thing. I'm gonna try to save this sticker if I can. If I could save it and get the yellow off. What that is, is. It's that finish, you know, just kind of faded out. You really can't get all that yellow off without taking that sticker off.
There's definitely some old injuries on this limb that are deep.
Really wonder how many strokes with sandpaper I do on a refinish. I do know when I'm topping out bows for weeks on end, when the shop is running at full production, my fingers will all split apart because the sandpaper sands them all the way through. It sends all the skin off, and they'll just all open up in cracks because I hate wearing gloves. You can't feel what you're working on with gloves. One more, and then we're done. We're gonna have to check the tune and tiller. I'm guessing we may have taken a pound or two off with all this, but I've tried to be pretty careful. We're gonna call that good. That's. That's gonna be fine.
Oh, yeah.
I probably Even went too much. Those are actually really flush.
I'm just gonna get those out real quick. I can do it. I can do it, and you can help.
That's the power of the Home Depot. Just so that I don't screw this up and go wobbling all over the place.
Oh, that's lovely. Get some black Starbond copper.
Okay, now we go again.
It's either all or nothing. This bottle of glue.
It's drying. I see. I believe it's done. We just need to check the fit and finish. I'm just gonna kind of blend all the areas. I don't. I don't really think I need to do this, but my OCD says yes, you need to. When you transition from paper to drums and stuff and random orbit, you get, like, different sanding patterns, even though it's the same grit. I just. I do this on all my bows, though. Just make sure it's all blended. Let's blow it off. Oh, the medallion. We'll put that in last. So we really didn't change the tiller on it. Still got about a quarter inch, which would be about right for that high above the shelf. So. Ah. Both perfectly straight. That lower limb wasn't straight. It must have been from me straightening up that string groove. It took off about half of a pound. That is not bad for all the sanding we did on it. I was worried it would take off more, but it didn't. Pretty happy with it. These arrows actually are about right for it. Oh, yeah, that's. That's like a laser beam. Really happy with that. Okay, let's take this here back out. Put the medallion in, and then we'll spray it. I got this medallion, and I can tell it's just. It's just a little crooked. So I'm going to go ahead and flatten it out. Okay, that's really nice. Now it's got a little bit of finish on it. So what I'm gonna do is get a piece of steel wool. This is always. Gets just a little bit interesting here. Actually, I may. Let me try it by hand first. Let's try this in the vise if I'm doing anything. Huh. That finish on there is really hard. Let's see. I'd like to get that off there. I thought that would work. Let's take it to the buffer and see if the buffer works. I don't know. Let's try Nick's idea.
No, it's not taking the finish off. Maybe we'll try lacquer thinner. That might work. And kind of buff up the bear. That finishes. Oh, there it's coming off, huh? Tell you what, let's do. Let's let it sit in there while Chris comes and writes on this bow.
And get this lined up. Let's see. That actually looks pretty straight. Now it's sitting flush. Before it was. Before it was. It was sticking way up on one side.
All right, we're done.
Spray it. Pretty. Here she is. All finished up. You know, it had that green, nasty camo paint on it, and now it's really, really pretty bow. It's all black with white accents, maple core. And it turned out really beautiful. Refinished the medallion, buffed it up, Got shiny brass in the medallion and beautiful bow, refinished. So thanks for watching, guys.
More from Pro







Choosing a Traditional Bow for Beginners | Custom or Amazon? | Which is Right for you?


Vintage Bow Restoration | Ben Pearson BP-H52 | Very Twisted Limb, Bad Finish, Holes in Riser

