Tillering a Hoo-dini Hybrid Longbow | Great Plains Traditional Bow |
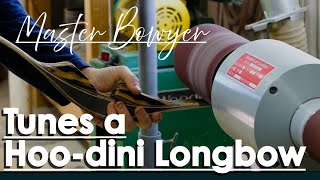
This content was created by Pro Archer Shot-Coach. This content was uploaded by Pro Archer Shot-Coach. This is a YouTube instructional/demonstration video titled "Tillering a Hoo-dini Hybrid Longbow | Great Plains Traditional Bow |" (created 2026-01-18). A single presenter (a bowyer/instructor, labeled SPEAKER A) walks step-by-step through tuning and tillering a 54-inch Houdini hybrid longbow (black-and-white ebony with a carbon core): stringing, checking straightness and tiller, measuring and reducing draw weight (trapping, sanding with 120/180 grit, pneumatic cleanup), adjusting tiller to an 1/8" specification, and live shooting tests — finishing at about 46–47 lb. The content is a hands-on workshop for bow construction/tuning and includes materials, tools, and process details.
Chapters
Hello, guys. So we thought today I would show you how I tune a Houdini. And I'm feeling a little bit wacky and smacky today. I just showed my daughter the different hockey shots. Slap shot, slapper, wrist shot, snap shot. It was fun. I dented the wall a little bit. But the Houdinis are an interesting animal to tune. They're a hybrid longbow. You can see they're super aggressive. Very, very aggressive longbow. And they are a challenge to tune for sure. The long ones. The long ones are a mess, like this one here. The long ones is a 62 inch Houdini. Look at that. Look at the aggressive limb on that banana bow there. Very difficult to tune correctly if you want to do a good job. I'm still working out the specs and the design and layout of the long Houdinis. They perform absolutely unbelievably awesome in the long, longer lengths. But they're tough, they're tough to tune. So I think I'm going to try a few different things. One of those, I think is what I'm going to do is simply widen the limb and give it more stability. They do have that 20,000ths carbon core, which helps tremendously. This bow in a longer length would not even be possible without carbon. It would. It would squirrel all over the place. So the carbon makes it possible with the profile like this. But what I'm going to do is make that limb wider and I think I'll have better luck. But today I'm going to show you how I tune a 54 inch Houdini. This happens to be a black and white ebony Houdini with an FR4 cap, gorgeous bow. So I'm going to just get started and show you how I go about tuning these things. Okay, so first thing I do is string it up. That's the first time that Houdini strung on our recurves. On my recurves, I string them up beforehand to mark the profile because that's the way you have to do it on a Houdini. It's really difficult. You can string them before the tips are done, but it's a mess, so I don't generally do it. And that is the correct string length. So we can look here and I can just glance at this and I don't even check the tiller at this stage because I can look and I can tell you right off that tiller is about even. And even if it's off a little bit, I just don't care because it doesn't matter. At this point. So here we go. The next thing I do is I check the weight. So I grab my arrow, Go ahead, knock it. And I'll go ahead. And when I'm. When I'm a new bow, it's sort of like you break it in just kind of gradually. It's not. If it's gonna fail on you, it doesn't matter what you do here. It doesn't matter if you break it in gradually or anything. It's gonna fail. However, sometimes if you've got a splinter fixing to lift because the edge is a little bit too sharp or something, if you do it gradually, like I'm fixing to show you, you can catch that, you can send that splinter off, and you can save it from lifting up on the limb because you can hear it creak or you can see it. So what I'll do, this is what I do. I just kind of go incrementally. I feel. I look, I listen, and I see where I'm at. Keep going down until I hit my 28. Okay. So this feels really good. It looks good. There's nothing lifting. So I'm here at 28, and I've got £67. So it's a little heavier than what I like to start with, but that's okay. It'll be a really good candidate to show you what I do. So then after I have my weight, I'll look at the serial number 17, 9, 10. I got my book here, my record book. And I'll just mark that £67 rough, because we keep records of all that, and that helps us get super accurate. This is an in stock bow, but if it wasn't, I would be trying to hit a weight. This particular bow started out as a custom build, but certain things happened. The customer decided to keep his bow that he has. Well, it was the same bow. He just wanted a different weight. So now this one goes to in stock. So I got 17, 9, 10, 67 pounds. So I'll mark in here 67 pounds roughly. And because this bow doesn't have to be any sort of weight, I'm not going to write too heavy or too light or anything. I'm just going to write £67 rough. That gives us knowledge about what's in the bow. I put this so and so much core in here, carbon glass. And that layup gave me 67 pounds with black and white. Ebony species are very, very different. You could put the same. The same layup in here, same thickness. But if you use something like, let's say Pacific yew or bamboo or walnut. Walnut's a good one. It'd be a lot different with walnut. It'd be way, way lighter. You could probably put the same layup in with walnut and you're probably looking at 55 or 57 pounds a lot different. So because we know we have a lot of weight and we know that a 67 pound bow does not sell well, we're gonna go ahead and be fairly aggressive with it. Next thing I do is I check the straightness. So I'm going to put this on here. And before I do that, I'll just go ahead, sight down here, make sure that string is coming off that point, that tip perfectly in the center, and then I'll sight down here and see where I'm at. Okay, so I have a slight deviation on the top limb, just a little bit to the, to my right that will need to be addressed. It has to be perfect before I start to trap. I cannot allow any deviations. Okay. On this one I have exactly the same thing. It's just very, very slight. But the way we'll fix that is we'll mark here. I'll just mark on this limb that's the side it's leaning towards. And on this one it's this side. Now, whenever you're straightening a limb, it doesn't matter what bow, whether it be a self bow, recurve, longbow, horse bow, the side that is out, the side that is out away from the string that is twisting towards, that's the side you remove material from because it's stronger and it's overpowering the other side and making it twist slightly. Where in the case of this one, it's just very, very slight. But I know from experience, if I leave that at this point, that can magnify intensely whenever I put the trap on and do my other steps. And I do not want that. So we have to address that now. And so we'll go ahead and unstring it real quick. The way I'll just go ahead and count my strokes on this machine here. And I'll just go ahead and take 10 swipes off both of these here limbs. Not a very big angle, just a slight angle. Sam. Now, when you're tuning a bow, it's incredibly important to have very steady hands and very steady strokes. Whenever you touch down, you want that pressure to be exactly the same and you want that speed to be exactly the same as you go across there. Because if you don't, if there's even a slight variation, you'll get ripples in your limb and that looks terrible when you're done. So we don't want that. So now that we've done that, we'll go ahead, string it back up and we'll check it. And I kind of took the little crumbs and the splinters off the edge after I took those 10 strokes off so that I could see what I was doing. If I had forgot to do that, I can just do that with a piece of sandpaper. So once again, I'll center my string coming straight down off the tip. Center my string. And now I'll see what I did. Okay. Okay. So on the bottom limb, I got it almost perfect. Extremely close to perfect. On the top limb, I lack just a little bit. So I'm happy with the bottom limb. This time I'm not going to unstring it because I'm so close. And I'm going to do it real carefully with it strung. Would not recommend that right there if you're just starting out with a string on there. I have in the past when I've done that, not paying attention what I'm doing. I've touched that string down on the sandpaper and that's 40 grit paper. It doesn't mess around. And it went through that string like, pow. And that whole bow just sprung out of my hands. I've done that twice. It's not fun. Every time you do it. It's no more fun than the last time. Okay. See what I did? Okay, so it's not moving. It's not moving like I would like it to. So I don't want to keep doing that because if I do, if you go too much doing that, regardless of how even you you go, you will start to make ripples. So we're going to move over to the flat sander and we're gonna clean that edge up on there and see if we can take that out. Sam. Okay, that is perfect. So now I'm going to re look at my tiller. It stayed basically the same. I'm ready to trap it. So now I'm going to put a trap on it. Now, a trap does a couple things. When you put a trap on it, basically what's happening is I'm going to come in here and I'm going to take about a 30 degree cut on the edge here. And I'm going to take that material off, but I'm not going to take it off the back. I'm going to leave the full width on the back of the bow. This is the Belly of the bow. Now, what that does, it does a couple things. Number one, it is going to remove the weight that I want. I want to take the weight off that way. And because I can't, like I said, I'm not going to. It's really hard to move a 65 pound bow. It's just hard to sell something like that. We got to reduce that weight. But on a longbow, especially on a longbow, you have a thicker, narrower limb. On a recurve, you have a wider, thinner limb. So on a longbow, whenever you're drawing it, when you're pulling it towards yourself, this, the belly is compressing. All the material on the belly of the bow is compressing. It's under compression. So when you put a taper or a trap on there and remove material essentially off the face, a lot more material off the face of the belly than the back, you are reducing the amount of material that you have to compress. So what does that do? That makes a longbow draw much, much smoother because you're not compressing all that material. And so you get a far more pleasant feeling bow. You get a far more pleasant drawing bow because you're removing a lot of the material on the compression side of the bow. But you still retain all your speed and performance because you're not touching the back of the bow. So when it springs back and clear after the draw, you've still got a lot of power there. Good cast. So what we're going to do is we're going to put a trap on this to reduce the compression of the bow so it draws smooth, but also reduce the weight. And because I know I want to take it down quite a ways, going to go 30 strokes with the same angle, holding the same way. So I'll hold it at one angle and I'll do 30 strokes and then I'll do five to kind of clean it up and bring it back to true so it looks right. So here we go. There you have it. To see what I did there, put that trap on there. And I did 30 strokes at the same angle, holding at the same place. And in the last five, I rotated it for each stroke up until nothing until I hit that edge. And that's how you have a good trap over here. All I'm gonna do with this machine, I've got, I've got my, my trap on, on here. And you can see now I was kind of strategic with how I put my trap on. You'll notice it's not exactly the same and that's because I know if I. If I straighten one side, it kind of has a tendency to pull back over there. So I took just a teeny bit more off of this side and also on this side, off of this side, it might look just a hair different. But I know from experience that I need to do that to keep everything coming down. If you were doing this for the first time, you wouldn't have to do that. But all I'm doing here is I'm just going to blend so you can see where I stopped here. I just need to blend that into the tip. So I need to do that. And then, you know, this doesn't look good. I couldn't leave that. So I've got to blend that into here. That's all I'm doing here. You see, I blended all that in. I blended it up to the tip. It doesn't take a lot, but if you skip this step, you will be very sorry. So I blended that in. Blended that all in. So now we'll head over to the pneumatics and we're going to clean up those deep scratches that I put in with the 40 grit. Okay, so I got 80 grit on this pneumatic and I've inflated the drum to where there's pretty good squish in it because I want it to kind of conform around my limb. And I'm going to be pretty aggressive on it because I want. I still want to reduce the weight pretty significantly, so I'm not going to worry about that. Same thing with this, though, I've got to be super careful because if I were this thing spinning at 1700 and 50, 25 rpms really fast. So if I were going along here and I catch an edge or catch that cord or anything, it's going to dig in an 8th inch hole. Bam, like that. So I have to be pretty precise. But also, if I don't have exactly the same pressure on my hands and on the machine, I'm going to get ripples in the edge of my limb. We cannot have that. We simply can. That's not good enough for my bows. So here we go. Once again, I'm going to count my strokes and I'm going to do five and six on the top side. Okay, now I'm gonna blow this off and we just take a look at this. I'm going to look at it and I'm going to see if that's even. Does it look even to me on what I did? Now if I. If I'm looking at this, I Can see that I could benefit from just a one really light stroke on this side. So I'll just do that. It won't. It won't. It won't affect nothing. Just. Just to clean that up a little bit more. Okay, that's perfect. Okay, so here we got it. We've got the limb trapped. It's beautiful. It looks perfectly even on both limbs. The trap is really nice. When I look down the edge of it, I don't see any ripples or wobbles. It's nice and straight. So we're going to go ahead and string it and see what kind of results that we have, and then we'll move to the next step. No birds out there. They're just gone. They're. They're. They're taking the day off. Giza birds, get the bars. Whoops. That's not the right string. Not even close. Must have been this one. Okay, get the birds. Get the birds. Get your birds. Get the birds. They're making fun of you. They say you have very dull teeth. You cannot bite hard. They say you can't run fast. I heard them. I heard them say that. They said you cannot bite hard. You have to get them. Okay. Oh, that is so straight. That is so perfect for the lower limb. Oh, the top limb is so perfect, too. Okay. Tiller are still. We're still not looking at the tiller because it's the in stock bow. We don't have to look at it yet. All right. Where are we at? All right, so we're still at 55 pounds. That's not gonna work. I know there's a lot of guys like 55 pounds, but it's a very small percentage, so I can't. This boat will sit on the rack for probably a while. Well, probably not. Benz is a Houdini. It probably would move fairly fast. It's a hard call. Sometimes I'll just leave it that heavy. I think I'm. On this particular one, I'm not going to. Just so that I can show you what I would do to bring the weight down for a customer, we're going to go ahead and take it down because I want to show you how I do that. So here again, because I can just look at it. The Houdini is really tiller specific. So you have to be careful with a tiller. And if it's at a tiller, it's going to tell you. For instance. Well, it'll go like. It'll go like that pretty quick if it's at a tiller. But it's not because the carbon doesn't allow that. So I'm still not gonna worry about the tiller. But I want to lose. I could easily lose up to ten pounds yet the weight comes off this thing beautifully. So that's what we're gonna do. We're gonna take the weight off of it, get it back down into the mid-40s, and it's gonna hit a broad audience of people that want to shoot it. But like I said, I'm sure there's guys out there that want a 55 pounder. There will be in stock bows coming along that I leave at £55 for you guys all turned up, don't I? So to take the weight off what I'm gonna do, we're gonna take it off in this machine and. And if you know what you're doing, even if you don't know what you're doing, the weight comes off fast. Probably. Probably even faster if you don't know what you're doing. But we're gonna go 120 and 180. The 120 is going to take our weight off right over here. The 180 is going to clean up the scratches that the 120 put in. We want these pretty tight. I want this one super tight. And this one here, I want just a little bit, but I want it. I want it fairly, fairly stiff also. Okay, we're ready. Now. I have taken three strokes on a Houdini. This is a 54 inch before. And in the past, I've taken three strokes off of this guy right here on one limb. And three strokes off. This one went and cleaned it up and it lost five pounds. So we're gonna take a little bit more than that. But we're gonna be cautious because this thing is a beast. And spinning at 1725 RPMs, this drum is going the actual feet per minute. The distance traveled on a larger drum is way more. I have to do the math on that. But it's really going on this guy. So we got to square up, get it real nice and even before we put any pressure on. So I'm just going to touch it down and I'm going to look at where it's hitting and see. I want that. I want it to be hitting all the way across before I touch down and go. So I'm going to square up and go. I'm going to do five. When you're taking weight off like that, you want to go on a brand new spot on the belt. And I'm Going to go ahead and look at my glass thickness and see how even a job I did. So that looks really good. So that I'm happy with that. Now we're going to just take the scratches off. Not near as precise on this one. So we're just gonna do five strokes and that'll get deep enough to remove the 120 scratches. If we didn't do that, we would absolutely be caught spending a lot of time sanding by hand to get those scratches out it up. Now remember, it was £55. So with five strokes on the 120 on each limb, let's see what it took off. I'm gonna guess this is just a ballpark, but I'm gonna guess it's sitting around 48 pounds right now. Once again, I'll look at it. The tiller is still really good. Nothing to worry about. That tells me I had the exact, almost exact same pressure on both drums. Well, I was close 47 pounds. So I'm really happy with that. And I'm gonna leave it 47 pounds. It's a really good weight. So we're going to address the tiller now. Now it's time for the tiller on a stock bow. So we'll go ahead and we'll mark up from the tips, making sure we're really close to the fade out of the riser, but. But not on the fade out. We want to be exactly the same point. Now it's critical to be the exact same place on the pull point of the bow. I know that my tips are exactly one inch down. I don't have to measure. But if I was doing a rework or something and the tip length was different beyond the string, then I would have to measure from where the string attaches from the pull point. But because I know it's the same on my particular bow, I can just hook it on the end of the limb and we can go from there. So we're going to measure up. The Houdini requires an 8th inch tiller. So, all right, so we have a quarter inch tiller. So we're super, super close. And I knew we were. So we're a quarter inch positive. So we're just an eighth out of tiller. So what we need to do is we need to weaken that lower limb and it's not going to take much. So we're just going to touch it on the 180 grit here and go ahead and weaken that lower limb. But look at that gorgeous, gorgeous black and white ebony. How the grain is on top of itself, overlapping. Okay, one, two. That's all I'm gonna do now. I'm gonna check it. Seven and a six. Sixteenth. Okay, that's perfect. Dead on an eighth of an inch. It doesn't take much. So now we have a perfectly tuned 54 inch black and white ebony Houdini. But we have one more step, and that is I shoot every single one of my bows, whether it be a rework or a brand new bow. Because if there's something that's going to happen in the bowyers world, in the bow, your shop, it's going to happen when you shoot it. Well, not necessarily. If you, if you string it the first time, it definitely could happen then. But when you put the force of a true shot on it, that's when you really know if everything is correct. So let me grab my arrows and I'll meet you over there and we'll see what this thing does. Here we are. We're going to shoot this and the 54 inch Houdini. It likes a brace height of 8 to 8 and a half inches. Just gets that string up off the limb. Any hybrid longbow, you'll benefit from a little higher brace because you just. You get that string up off the limb a little bit. So a mix of arrows here. Some really bad, some great. So there's a Carbon Express legacy. Really good arrow. And let's see what she does. I don't know where the doggo went, but he'll be okay because. Yeah. Feels good. That's nice. That is nice. That's good. So I'm kind of aiming at the can, but I'm not hitting the can. You see here, I've been aiming at the can, but I don't have my aim dialed in on this particular bow. So you can see that's a tight group over there, but it's down and to the right. So that tells me it's pretty consistent. There we go. That was right in there. Right to the left of the can there. That was a bad shot, but that was a really heavy arrow. That's the thing with this whole variety here. There's so many different weights and spines. The thing about the Houdini, it is able to shoot a huge variety of spines successfully. And that's not my own feedback. That is what my customers are telling me. Guys are calling me and telling me and texting me and saying, hey, these things will shoot almost any spine successfully. Which I haven't quite figured out why it can do that yet. But it, it is able to do that successfully, so. Oh, man. Bullseye. Wow. So this little baby here is a shooting machine. Very, very happy with it. I'm going to show you after this shot one thing I look for on a tuned bow. After it's tuned. Okay. No, that's not it. We're not going to end on that one because I don't like that shot. That's not a good shot. Let me get one more shot and see if we can get closer to the. That's pretty good. But now I want to get another one. These are Chinese arrows. They are junk. They come with the PMZ longbows that Nick works on. But let's see how close we can get with this guy. Almost perfectly dead center where I was aiming. Okay, that's good. This thing shoots beautiful. But what I wanted to show you here, When I tune a longbow, you don't. After you tune it and you know it's straight because you tuned it, you don't necessarily have to look down. All you got to do is just look at the tip and you see where that string is right there. If it's centered between here. Just looking at it after you shoot it, that limb is straight. It's going to be perfectly straight. So I can look at that one and it's perfectly centered. Let's look at this one. Same thing. I can look right here and just center that after you shoot it. Because the shot tells the real story, Everything settles in. So I can look at that and it's perfectly straight. So really happy with this bow. It tuned out perfect. It's now it's going to lose one pound when I edge send it for final finish. So you're looking at a 46 pound black and white ebony Houdini that will be available here. There it is. Thank you so much for watching. That's a complete all my steps, My process of tuning the new hybrid 54 inch black and white ebony Houdini. Thanks for watching.
More from Pro







Choosing a Traditional Bow for Beginners | Custom or Amazon? | Which is Right for you?


Vintage Bow Restoration | Ben Pearson BP-H52 | Very Twisted Limb, Bad Finish, Holes in Riser
