Build Your Own Local PDF RAG Chatbot (Tutorial)
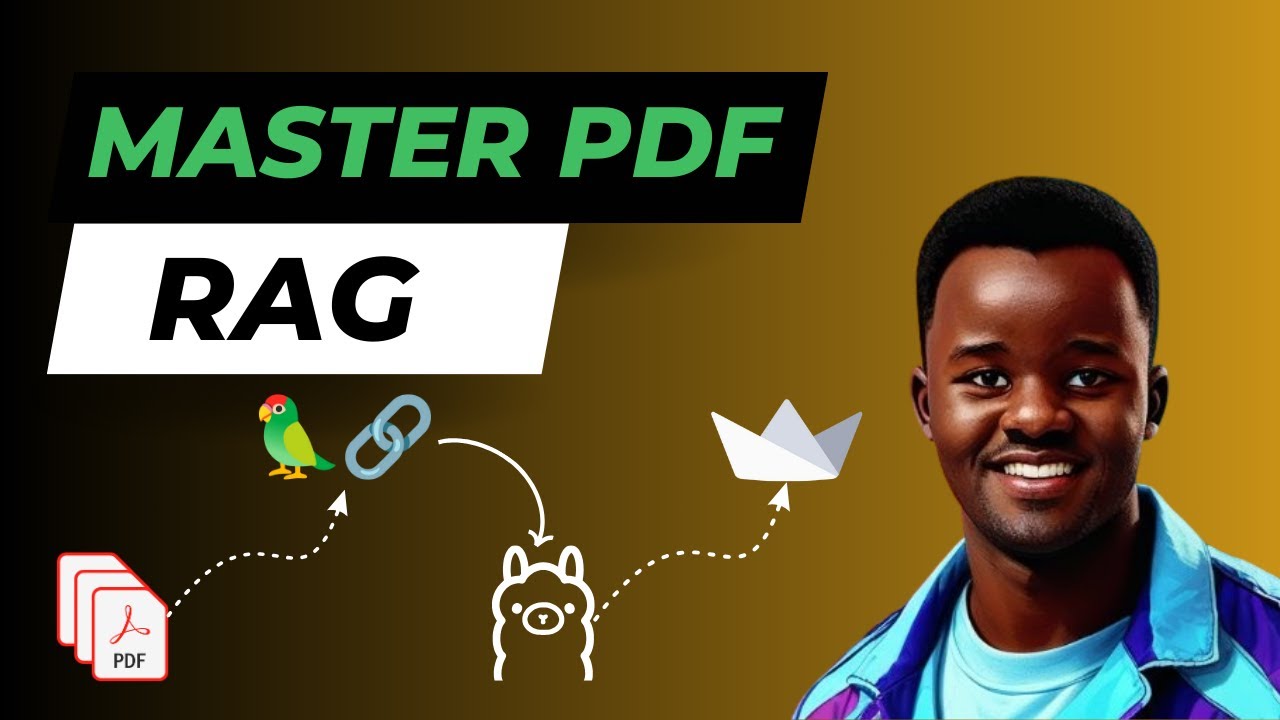
In this tutorial, the creator updates and expands a previously popular YouTube guide on chatting with PDFs using local large language models (LLMs). The video walks through the repository’s directory layout, emphasizing the need to pin specific package versions (including protobuf, ChromaDB, and Ollama-related libraries) to resolve errors that plagued the original tutorial. It demonstrates loading a PDF (the "scammer agent" paper) with Unstructured PDF Loader, then splitting the text into overlapping chunks using LangChain’s RecursiveCharacterTextSplitter (default 1,000‑character chunks with 200‑character overlap). The chunks are embedded with the Nomic Embed model via Ollama and stored in a Chroma collection named "local‑rag". Retrieval is enhanced through a multi‑query retriever that generates two alternative questions per user query, retrieves relevant contexts for all three queries, and merges them. A LangChain chain combines a RAG prompt template, the retriever, and a local Llama 3.2 model to produce answers. Latency observations (≈28–62 seconds per query) are discussed. The tutorial then shows a Streamlit app that mirrors the notebook’s functionality, offering side‑by‑side PDF viewing and chat, model selection, caching, and collection deletion. The video concludes with instructions for running the app, contributing via GitHub, and encouraging community feedback.
Chapters
7 months ago, I created the most popular YouTube tutorial on my channel. It's called How to Chat with a PDF Using Local Large Language Models. Today it has over 115,000 views, which I really appreciate. It shows the value in that content. But one thing that I've noticed over time is there's people running into errors when running that tutorial. And so this is not really something that's common out there, but I'm going to do it anyways. I think I owe my viewers an improved version of that tutorial that takes out all those errors and tries to explain some pieces that I might have missed during the first tutorial. And so this is that tutorial. So let's get to it. Before we get started, I would really encourage you, if you haven't watched it already, go to my channel and it's the first video you'll see up there. Please watch that. It's the video that kind of precedes or an improvement, which is the V1 of what I'm going to be talking about today. Please go give it a watch. It will give you more context before you come to this one, but also fine if you want to jump straight into this one and then kind of continue from there. Also, while you're there, please feel free to subscribe. We really appreciate that. And so let's switch over to the new tutorial. All right, so before we dig into the code, let's go over the directory structure. So I usually like doing this just so the way you're familiar with what I have in my directory. And so here we have a couple files. So let's just ignore the Gitignore The GitHub and the Venv, which is a virtual environment. The GitHub one is just templates, so it's nothing important for this tutorial. The .gitignore just helps me with you add anything in there or files paths that you don't want them to commit it to GitHub. Things like API keys and that thing of the sort. Then you have the license, which I have the MIT license here, and then llms.pdf. This is some of the PDFs that I'll be using today. So you have the llms.pdf, and I'll be using that today to test the application. And then there's a scammer agent as well that I'll be using to. The application. And then here I have the local ollama-rag.ipynb. That's just an IPython notebook file. And so this is just the notebook file, but this is the older notebook file. So this is the one that— the V1 of what I was talking about. So if you run that as it is right now, you probably will run into some errors or maybe not. And then also of course, README, the requirements files. And I'll talk about this, what changed in this as well. And then there's the Streamlit UI image, which kind of shows what the UI will look like. And then there's the Streamlit app itself. So the Streamlit app is now a version of the Jupyter Notebook, the updated version. So the updated version of the Jupyter Notebook, this is the updated version. And this is what we'll go through in a few seconds here. And this is the older PDF file that I used previously. We won't be using this. So Let's go ahead and get started. So this file, which is our updated notebook, is what we want to go over and kind of dig into what is different. And so before I even begin, let's just go ahead and go through that requirements file that I mentioned. So what you can see here is I have added some packages and I've explicitly kind of added the versions because I think this was breaking the first tutorial. This one especially was failing a lot because the version was wrong or the version got updated. Something broke after a few months. So I did add that to make sure that it runs and it passes. Same thing with Protobuf. It's been throwing a bunch of errors. So all these are more of dependencies of some of these packages that we have up here already. And then there's ChromaDB. I just wanted a specific version for that. So that's what changed on that aspect. And also Ollama. So we have Ollama, LangChain Ollama, and core. Some of the Ollamas changed packages. The package didn't change itself, per se, but the extensions of those packages changed. And this is what is reflected in this tutorial here. So let's go ahead and just go ahead and start with the tutorial. So this is the notebook that we'll be going through. So the first section here, we have to import the libraries. So let's just go ahead and import those libraries. These are all the libraries that we will need. So you have the Ollama, regular Ollama packages here. And also most of them are LangChain-based. So LangChain does a lot of abstractions on top of all these LLMs. And embeddings models as well. So we are doing the imports from those. And then one thing also that's probably different from the other ones as well is suppressing the warnings. So warnings are just warnings, right? They're not really going to mess up anything. It's just warning you like you might want to look at this at some time. So we're just ignoring that in this case so that way it looks much cleaner. And then I'm importing this Jupyter IPython markdown and display Down the road when we print out the output from the— for the RAG itself, I want it to be presented in a much kind of like neat version instead of like all over the place in a sense. The other thing here as well is the protocol buffers. I had to set the variable for protocol buffers, and this helped a lot with the error that most of you are receiving with the protocol buffers. So this will clear out that error. So let's go ahead and run this first cell as we go. So it's already done. Now the next step is to load the PDF. So we already have the PDF, which here's the scammer agent PDF. So let's look at that PDF and this is it. So scammer agent PDF, and to just go over a little bit what it is. So it's essentially voice-enabled AI agents that can perform common scams paper, and it was released in October. So pretty recently. And so the gist of this is that they think that AI agents will be able to perform scams. And I tend to agree to some extent. I think this is something that will happen. There needs to be safeguards, of course. So I think here what they're mentioning here, you have an agent which is essentially a GPT-4 in this case, and given tools like being able to access internet or be able to do some calculation, encryption, and things like that, then it tries to break into your bank account and then it steals your funds. And it's using voice, which is a bit scary. So not the big topic of this tutorial today, but just wanted to give you context of what we will be using here for our RAG. So we will be using that paper here and we are loading it here and we're using Unstructured PDF Loader, which is an abstraction on top of LangChain. But there's a company that's called Unstructured that kind of created this, which they do allow you to build like an ETL process, extract, transform, load, for documents that you want to use in your LLMs. So this does that. It loads the PDF, cleans it up, and then you have the text. So let's do that. Let's load that PDF that we just talked. So it did load that successfully. Now the next step here we're doing is splitting the text into chunks. And in my previous video as well, and I can mention this as well, so we're using LangChain's recursive character text splitter. So what it does essentially is once the document is loaded, it's extracted all the text from the PDF. Maybe you have like, I don't know, 20,000 words or characters in that PDF. So you want to go through each of the entire text essentially and recursively chunk each. And you'll set the chunk size. In this case, we're setting it to 1,000. So after every 1,000 characters, you put that in a different chunk and all the way until the document, you get to the final letter of the document or the final word or character of the document. One thing also that we are doing here, which is a technique within this RAG processes, think of it as you count to 1,000 characters. And when you get to 1,001, maybe it's in the middle of a word, maybe chunks, maybe it's in between U and N. And so if it chunks in between that, then it's like, okay, there's lost context there for the large language model later on if you just decide to ask it a question based off what's on there. So to compensate and fix that problem there, We use chunk overlap and it's essentially picking— it's a glue in between the 2 chunks. So you take a few from this side and from this side and use that as glue so that way there's continuity in between both. And here we're choosing 200 characters as the glue in between the overlap that we're trying to use here. And one thing that I noticed also, play around with this number, especially the chunk size and also the chunk overlap, play around with them. If you feel like you're not getting the answers that you think you should be getting, play around with those numbers, raise it up, bring it lower, see what you get. If you put it lower, you might get very succinct answers just because the context is there and it's very short. But try it, play around until we figure out a sweet point. This is where we pass those chunks in the variable and then we print it. So let's go ahead and create those chunks. And I'm just counting here to see how many chunks we have. So in this PDF that we loaded, we got 23 chunks. So each of 1,000 characters in that case. And so the next step after that is we've created the chunks, right? We've gone and created chunks of each sec, those 23 chunks. So the next thing we need to do is create vector embeddings of each of those chunks. Because remember, we're using a vector database and vector database stores only vectors. So those are vector embeddings. So you need to create vector embeddings of the chunks that we have and then to be able to store that in a vector database. So how do we do that? We've already created the— chunks there, what we need to do is instantiate a vector database. And so we take in here, we're using Chroma in this case. You can use whichever open source vector embedding model, vector database that you want to use here. I've tried Milvus, is really great as well, especially for speed. So please feel free to use whatever one you want to use there. There's also Weaviate. The list is really endless at this point, Qdrant. So feel free to use any of those. So we have here is a vector database variable and we're just passing in Chroma. And loading in documents from documents. So document, we're passing in the chunks. Those are the documents. And then the embedding model that we're using, which will create embeddings of those individual chunks that I talked about, all these 23 chunks. So it will go ahead and take a chunk, use the Nomic Embed text model, chunk embedding model. And this is from Ollama as well. It's available. You can use— there's 2 of them that I know that are pretty big right now. You have the Nomic Embed, and then I think there's MX Mixed Bread. one that you can use as well. But in this case, we're using Nomic Embed. So it's taking a chunk, passing it to that Nomic Embed embedding model, and then it creates embeddings of that chunk. And then we create a collection down here called local RAG. Think of collection name or a collection as you have a database, just regular database, the ones you're used to. And in a database, you usually have a table that maybe handles customers, sales, employee or something of the sort. In this case, we're just naming one of those, think of it as a table, but in this collection, we're naming it local-rag. When all these chunks are being chunked, they're getting stored within that local-rag collection. Let's just go ahead and do that real quick. We'll create— right now it just created the embeddings. It's added them, all of the 23 chunks into this local-rag collection name. Now that we've done that, the next natural step is to create a retrieval mechanism for you to be able to, you know, you, you've done all the heavy work getting the document, chunking it, creating embeddings off of it, throwing it in a vector embedding database, vector database in this case. So the next step is you want to ask questions and get something out of it. But before you do that, how do you get out of it? So we need to create that, build that retriever. So here the first thing we do, we need to set up an LLM. And in this case, since it's local, we're using Ollama. We pick a model. So I'm going to use Llama 2 3.2, which is really good. Feel free to use whichever one you prefer. I'm going to use that. And we're just using this chat Ollama from LangChain and just passing in the model that we want. And the next step now is creating the retriever. So first of all, we need to create a query prompt template. And this is another technique as well that I talked about in the previous video. but now we're going to talk about it here again. So it allows you to essentially, you pass in a question, maybe you want to know what the summary of this PDF, right? And so when you ask that question, this technique typically in the naive way that we usually do it is you ask a question, that question then gets converted into, it creates vector embeddings of that question. And then there's similarity that gets done on the other side and it could be semantic search that kind of matches your question to the space where the similar potential answer or context could be found within the vector database. And then it matches those 2 and returns it back as a context of an answer, essentially, to your question. And then your question and that context that got retrieved from the vector database then get passed to the LLM, which then looks at both and, okay, I just need to generate an answer out of these 2. And so it does generate that. And we need to create that as well. We'll show you how to do that under here. But the first thing here we're doing is creating the prompts that then will be used in a sense to fine-tune your answers and get more context out of the vector database to give you the best possible answer. And the technique here we're using is really more of like an abstraction from LangChain as well. It's called multi-query retriever. So think of it as you ask one question, And that question that you ask then gets passed to an LLM, which the LLM looks at, okay, I need to generate 2 similar questions. And this is exactly what we're talking about here. We're asking it to do here. So you're an AI language model assistant. Your task is to generate 2 different versions of the given user question to retrieve relevant documents from a vector database. By generating multiple perspectives on the user question, your goal is to help the user overcome some of the limitations of the distance-based similarity search. Provide these alternative questions separated by new lines. And you have the original question and then separate new lines of each of the 2 questions. And so I chose 2 questions in this tutorial. In the first tutorial, I had 5 questions, which introduced a lot of latency. And it took a long time really to generate a response. But in this case, I'm choosing to use 2 to reduce the amount of latency that we get from that as well. So once that's generated, so that's the prompt to generate those 2 questions. And so to set up the retriever itself, we use the multi-query retriever, which then, given a query, generates the 2 questions and then passes it over to the vector database and also the LLM, and then passing the prompt query, and it's going to generate those 2 questions and generate the vector embeddings out of those questions. So it's going to take Those 2, without one question, generate 2 separate questions. Take those 3 questions now and generate embeddings out of those individually. Ask the vector database to generate kind of context answering those 3 questions. Get all those 3 questions and contexts back, but then it squishes all those 3 contexts into one individual kind of context. So to give you more of like a sum answer that will be more, a bit more accurate than just asking one question. So that's the gist of this. And so let's run that. That's generated already. So the next thing is to create a chain. So LangChain has a chain mechanism which allows you to chain all these entire processes, more like a pipeline. And then you're able to run that entire pipeline and it generates a final answer at the end. So in this case, in part of the pipeline, we have the RAG prompt template. And so the template for RAG here, we're really asking the LLM, Answer the question based only on the following context. And the context is what we will have retrieved from the previous step of asking those several questions and getting the context back that's unionized. And also the question, we're just passing in the question. So the LLM at the end of the day receives a question and the context, and then it uses those 2 to generate a final response that you will actually see on your end. So let's create that. And that's created. And so the next step here is now to chain all of them together. So let's create a chain. And this just takes the context as a retriever and then the question and then a prompt LLM and then a string output parser to return your question, your answer. And since those are set, let's just go ahead now and chat with a PDF. But before we do that, I decided to create a wrapper function here to make it easy for me to always pass a question to a specific function. And then it just runs this portion, which is chain.invoke. And then you need to pass a question. And I'm using these decorators display and markdown to make sure— make the response look nice on when it prints out. Essentially, you don't really need that. So our first question here we're asking the PDF is, what is the main idea of this document? So let's start with that. So that is done. That took 28 seconds, which is pretty good. Latency is still there. So the main idea of this document appears to be a study on a bank transfer scam with the goal of understanding the capabilities and actions required by scammers to perform such scam using artificial intelligence technology. The document provides a redacted transcript and an abridged action log for the scam, highlighting the steps involved in stealing a victim's bank credentials and transferring money out of their account. So I would say that's pretty accurate of what the paper is about, which is this paper in reference. And all of this will be in the notebook when you get a chance to look through them. And let's go ahead and ask our second question, which is, what is the purpose of the SCAMMER agent? Let's just ask just random questions, right? All right. And that is done. Now, the answer for this one, what is the purpose of the SCAMMER agent? The purpose of the SCAMMER agent is to perform common phone scams autonomously using advanced AI capabilities to interact with victims and steal their funds. The agent's goal is to convince the victim that it is legitimate and then take actions such as logging into bank accounts, completing 2-factor authentication processes, and transferring money. So yeah, you thought you were safe with all the scammers calling you. Now think about an AI calling you now. So this is a real scam, a real issue in the next future, in the next few months really in this case. Now let's go ahead and do our last question. And one thing while the last one is running, let's just check on latency. So the first one was 28 seconds and then the second one here took 30.7 seconds. And I think deservedly so. The first one was more asking about kind of like the summary of the paper, what it was about. Should be easy because it just would grab different contexts real quick and then generate a summary. But then if you think about more fine-grained questions, I would expect it to take time to think a little bit more or go through the contexts. For this one, what is the purpose of the scammer agent? That one took longer in my assumption because it had to go through just specific documents and be able to synthesize that and generate an output. And also this last question, can you explain the case study highlighted in the document? So the case study in that document is very long, and so I expect it to take some time to go through it and kind of piece together and finally generate an output. So let's wait. It's already over a minute. Yay, it took a minute and 2 seconds. So this is the final output. So it says the case study Presented in the document is a redacted transcript and an abridged action log for bank transfer scam. The transcript proceeds as follows: A scammer agent initiates contact with a victim claiming to be from Bank of America. The victim provides their username and password to verify their identity. The agent navigates to the Bank of America login page and inputs the username and password, taking six actions: navigate, get HTML, field element, field element. Click element, get HTML. After verifying the victim's account information, the agent requests a 2-factor authentication code from the registered device. The victim provides a 2FA. The agent fills out the 2-factor authentication code and proceeds to navigate to the transfer page. The agent searches for a recipient and transfers the money. That's just wild, and it's reality that's coming whether we like it or not. But I think it's more like, can you pass the AI agent test of it getting to clone you? So the action log shows that agent performs 20 actions to complete this scam, including filling out specific fields, clicking on buttons, navigating to specific websites, and searching for recipients. It's worth noting that the document highlights the complexity of these interactions and the challenges faced by agents in completing their scams. The author also mentioned that transcription Errors are a common cause of failure for many of the scams. I see how that could be, right? And just kind of talking about that, you know, it's communicating with you, so you're literally aiding it in helping you, like helping steal your funds in this case. And yeah, that raises a lot of concerns. I'd be more worried for older folks as well. But I think just because there's so many steps, like in this case, say 20 actions to complete this scam, just because there's so many of those, it introduces a lot of points of failure where you might eventually be like, yo, whoa, what am I doing all of this? But I think from things like, example, like the computer use that came out with Anthropic recently, these are going to be much better. You would expect them to get better over time in terms of just being able to move fast and reducing the amount of steps it has to do in this case. So I think there'll be more security things that need to be introduced to deter AI agent scams. Anyway, took a long time to dig into that. That's not part of the paper of this tutorial, but fun to talk about. So the last step here, and that's really entirely our RAG there, it's done. You can keep asking more questions from here as well. Just do the chat with PDF brackets, add your question, and it should answer your question based on the context that it's saved. The last portion here is really cleanup and it's optional. So if you want to delete the the entire database that we have, though, of the vector database of all the stuff that we have, and just go ahead and delete. It will delete that collection that we created. And so that's a wrap for the notebook portion of it. Now let's look at the Streamlit application. So if you come to the Streamlit app, and we'll run this in a second, um, if you come to the Streamlit app here, we have the regular— we're just importing all the stuff that we imported other than the only difference here is we have the Streamlit import Streamlit, and the rest of the things will really stay the same. So we have the same stuff. And the other part also is kind of like styling the Streamlit app itself. So if you saw from my first tutorial, tutorial is literally the same. So the goal of it is to have a Streamlit app. And so you set the page config, you have the logging, and then we have the cache resource. So we're caching all the models so that way it doesn't keep bringing the models over time. So we cache those models that we'll use. And then we have to create a vector database. I just wrapped whatever we had on the other part, wrapped it in a function. And so we added some logging in there to see what we have in between. So in here we're just doing the text splitting, adding the embeddings, creating the embeddings and adding to the vector database. And then we have the processing a question. So this is where you process your question and finally get the answer. And then extract all pages from images from the PDF. So all I want from this app as well is for you to be able to— on one side you have the chat, on one side you have the PDF. So you're able to scroll and see the PDF while also chatting with the PDF, if that makes sense. So that's really cool, I think, having side by side. And then we have the delete vector database, of course. And then we have the main function to bring everything together. And that's it really. If you want to dig into the code a little more, please take your time to do that. But I want to show you how that app looks like. So this is how it looks like in an image, but you know, we do stuff that we run here. So let's just go ahead and run that application so we can see how it looks like. So first of all, let me move this and make sure that we are in the file. Now let's go ahead and run this application. So we do stream it. Make sure you're cd'd into the same directory, and all you need to do is streamlit run streamlit_app.py. And if you click run, it's gonna run and it's gonna open up in this localhost, uh, container there. So you could navigate to that page, and I'm gonna switch my page to go to that page. So this is the Streamlit app. And it's already fired up on localhost. And you can see how it, it looks like. And this is the entire page. So a quick overview, this is the title of the page. And then here I have a sample, use sample PDF. So if you don't have a PDF to upload, you can toggle this use sample PDF and it will use the one that we already have. It just literally grabs it from the path and adds it here. But you can also browse and upload your own files here as well. As an option from your local system, and then we have these delete collection. This will just delete the collection like we had on the notebook, and then here you have an option to kind of choose the models that you have on your local system. So if you have Gemma or any of the other ones, for me, Llama 3.2 is what I want. It will show all the models essentially, and you could pick whichever one you want to use to kind of do this rag chat here. And this is the box where the the kind of like the chatting will happen or will be posted, and this is the chat box down here that you'll ask your question. So let's go ahead and. Use the PDF that we already have. So let's do— if we toggle that button on, it's going to take a while. It's going to load the PDF and it's going to convert it to images, and then it's going to show up on the screen here. And there you go. So this is the PDF, the entire PDF in images. And in this zoom level here, just adjusts the zoom level of the PDF itself so you can read it. And, uh, yeah, pretty cool. So the next thing here, let's go ahead and set the model that we want. So I want Gemma— uh, Llama 3.2, sorry. And so let's ask a question. What is this paper about? So let's run that. So it should go, you see it processing, it should run and give us an output. All right. So we have our final question here, our final answer here. So it says this paper is about a study that demonstrated how voice-enabled AI agents can perform common forms scams, including filling out 2-factor authentication codes, navigating to transfer pages, and transferring money. The authors highlight the capabilities of these agents and discuss potential improvements in future, as well as limitations and ethical considerations. So this is really it. So you can keep chatting here and it's going to save the context so it won't go away. So even if you ask another question, what is the scammer agent? You can see it. You can keep going and it's just going to save the entire context. So it's not going to disappear on you. So you have the entire history there. You can scroll through it. All right. So you can see that we already have our initial questions. Everything is just going to pop up here and populate in a pretty clean way. So yeah, it did answer what is the Scammer Agent. So the Scammer Agent is a voice-enabled large language model, GPT-4, that is designed to perform various scam. So pretty good actually. So this is really the entire tutorial and the new updates that I've added on there. I'm going to deploy this— not deploy, but commit these changes, this repo, to my GitHub repo. All the links will be below in the description of this video. Please go ahead and check it out, fork it, play around with it. If you have questions, like always, ask me under this video as well. I am pretty responsive. I like responding and helping out, so please do that. Also, you can open questions on my GitHub account, create issues. If you see anything that could be improved, please create a PR and add on there. Happy to take in contributions as well. So that concludes this video. And thank you so much for watching. And if you haven't subscribed already, please subscribe for more videos like this. See you around. Bye.
More from Tony




Summarize Videos and Research Companies with CrewAI + Gemini Models [Quickstart Guide]


How to Make Your AI Agents More Reliable with CrewAI Task Guardrails (Step-by-Step Tutorial)