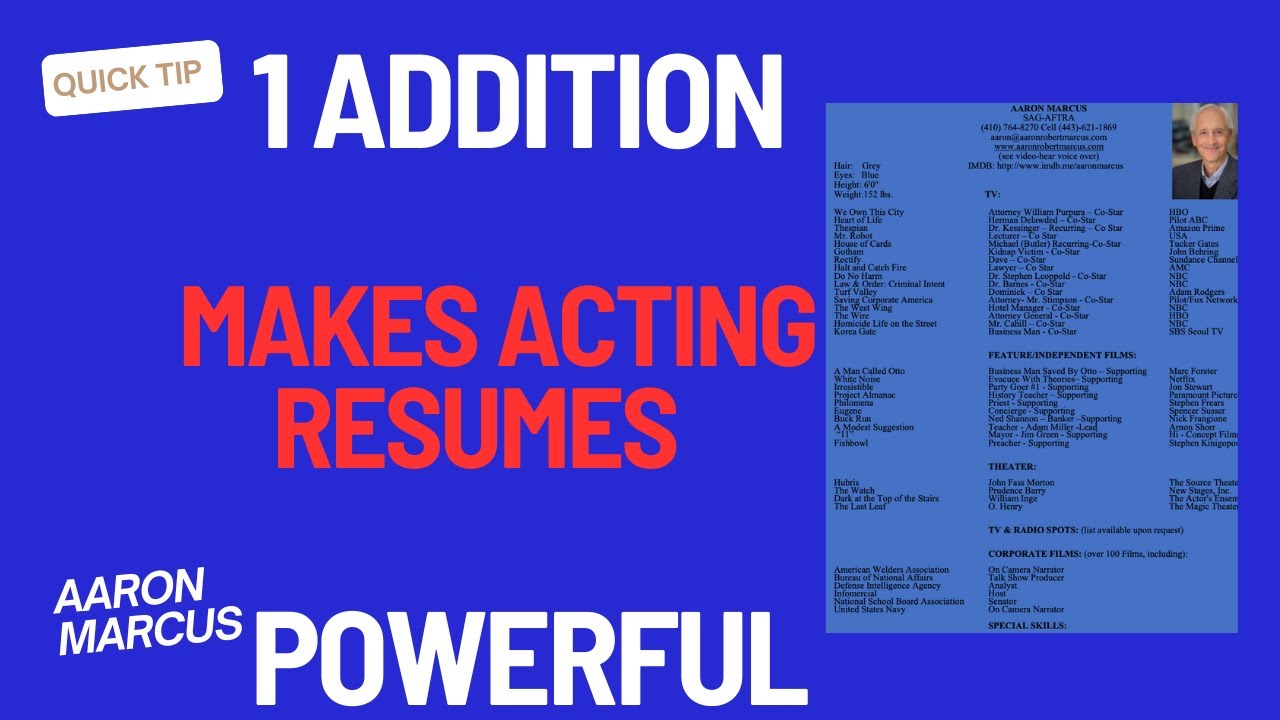
Aaron Marcus shows how to add a headshot to your acting resume in 30 seconds. Insert an image in the upper-right corner of a Word document, resize it, set text wrapping to Behind Text, then save as PDF so the layout stays intact when you send it.
Chapters
Casting directors see hundreds of resumes a day. Here is one simple resume addition that will make your acting resume so much more powerful and memorable, and I'm going to also show you a very, very simple way to make this happen. You can actually do this in 30 seconds. Okay, let's get started. Hey, I'm Aaron Marcus, and look, it's, it's essential that actors put together and create really powerful and memorable resumes. You know, casting directors just see so many of these things, and here is something that I learned a number of years ago that it's a little bit different, but it's powerful. And I want you to know about it, and I'm going to show you exactly how to make this happen. So you've got your 8 by 10 headshot on one side, flip it over, you got your resume, you've got all your information. Here is one addition that's going to be great. What you want to do is add your headshot to the upper right-hand corner of your resume. And you can see right here on my resume, this is exactly what I've done. Now, here's the difficult part. If your resume is in a Word document, which most people do, it's really hard to create and place a JPEG or PNG file in the text because it makes the text jumble all around. So here is exactly how you can make this happen. Okay, so now here is the simple way to add your headshot to your resume if it's in a Word document. So here's the first thing you're going to do. You're going to go to Insert and then you'll go to Picture, go to Picture from File. And I decided to use this as my headshot. And here comes my sweet little pup, Jamie. That's my headshot. And you want to grab the corners because it's a little bit too big. And I do a left mouse click just to keep it in the same format, because if you grab the corners, and try to do it, it's going to get all squishy and it's not going to look good. So let me grab this, make it a little bit smaller, and let me make it a little bit smaller. Getting there. Okay, so let's just say this is the size. It's still probably a little bit big. Not a problem though. So here's my name. Let's say this is my resume. Uh, here's my other information, website, IMDb. Um, cell number, email address. So if I want to put it in the upper right-hand corner, see what happens? You try to drag it and it doesn't work. Here's the trick, and this took me a long time to learn. It's so simple. You do a right mouse click on the image, and then you're going to go to Wrap Text, Behind Text, and then you can slide it wherever you want. It doesn't mess up any of the text at all. So that's the step. I'll tell you what, I will leave the information in the description just so you can follow it. Okay, hope this was helpful. One other thing I want to mention to you is whenever you create the resume, I would— if it's in a Word document, I would also make sure you save it in a PDF file. The reason is because when you are sending this to anybody in the industry via email, or if it's on some kind of website, the PDF files stay much more intact. The words will stay in the right spot. Sometimes with Word, things get jumbled a little bit. So absolutely do this in a PDF file. If you have any resume tips, please share it here so we can learn from you and we can have fellow actors teaching, sharing, and learning from each other. And if you haven't done this yet, don't forget, subscribe, click the notification bell so you always know when a new video has been uploaded. If you like it, give it a thumbs up. That's actually very helpful. And share the link, share it with your fellow actors. Guys, this was a lot of fun, and, um, can't wait to talk with you again soon. See ya.