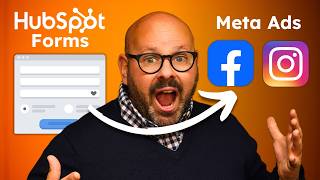
Send HubSpot form submissions to Meta's Conversions API to lower your cost per result and track more purchase events. Map form data to Facebook conversion types, optionally include predictive lead scores and monetary values, and set up contact field matching for better ad targeting.
Questions this video answers
13% average reduction in cost per result.
19% more purchase events on average.
Marketing Hub Professional or Enterprise account.
Form Submission.
Email (minimum); the video also recommends sending first name, last name, and phone number for better matching.
Chapters
Whoa, a cool new spot. And it's right down the street. This is perfect for me. One sec, I'll be right back. Up until a minute ago, I had never heard of this donut shop, but I just dropped everything to go check it out. And now I know it'll be one of my favorite places to go for a bite to eat nearby. So how do they know to get this ad into my Instagram feed? My guess, this company is using Meta's Conversions API. You see, when someone fills out one of your HubSpot forms, their information goes into your HubSpot Smart CRM database. That's great for you, but have you ever wondered what would happen if you could share that information with Facebook and Instagram? This is exactly what the Conversions API helps you do, and it makes a big difference. Advertisers use the Conversions API, have already lowered their cost per result by an average of 13%. They also average 19% more purchase events. That means they're spending less money to land more sales and and all they had to do was set up the integration with HubSpot and Meta. You can do the same thing. You can use your form submission data to teach Meta which actions are most valuable to your business. Whether that means people buy, subscribe or sign up, Meta can then use that information to show your ads to similar people on Facebook and Instagram. If you have a marketing Hub, professional or enterprise account, you can set up the Conversions API in your HubSpot account right now. Come on, let's take a look at how it works. If you haven't already connected your Facebook Ads account, you'll need to do that first. You also need to have a Facebook Pixel installed in your HubSpot account, and you need to turn on lead syncing so HubSpot can collect and sync your leads. You'll find detailed instructions for all these steps in the link in the description of this video. Follow that link to the HubSpot knowledge base article and follow the tutorial you see there. Now, to get started in HubSpot, we'll begin by creating a new conversion event. In the upper right, select Create and then select Event. Choose Facebook as the ad network and then select your connected account. Under Event Trigger, select Form Submission, then add the corresponding Facebook Pixel if the correct one is not already selected. Next, select the HubSpot form you want to send over to Meta. For today, I'm going to pick my newsletter signup form. If you want, you can send your HubSpot predictive lead score to Meta. If you check this box, Meta will use your HubSpot scores to assign a value to your form conversion event. Now, when someone fills out your form, you want to make sure Meta understands exactly what happened. To do that, I'm going to select the meta conversion event that most closely matches the purpose of my form. This is just the language Meta uses to describe what type of conversion you've captured. If it's a free trial signup form, you'd select Start Trial. If it's an online donut order form, I'd select Purchase. In this example, I selected my newsletter signup form above, so I'm going to choose subscribe here. Next, you have an option to tell Meta how much each form submission is worth. When I signed up for my Donut Shops newsletter, they invited me to stop by for a $10 surprise box. That means I'm worth $10 as a new subscriber, so I'm going to enter that number here. Next, let's go to the Consent to Share Data section. This is an important step because Meta only lets you share data from customers who have given you permission to do so. You usually get their permission by adding a consent checkbox to your forms or by adding your privacy policy to the bottom. When you do this in HubSpot, you set up a custom property that gets added to your contact record. This shows you got permission to share the person's data when they filled out your form. So here you see that I set up a custom property called Consent for the value I'll select. Yes now, anytime a contact fills out my form, they must have this property present on their contact record for the information to be sent over to Meta. If it's not present, it won't be sent. And lastly, I'm going to select the actual data I want to share with Meta. At a minimum, you want to select email, but I want to send over as much information as possible to to help with event matching. The more data you select, the more likely you are to match a HubSpot contact to a Meta account you want to send as much as possible, since not sending enough information could limit the number of events HubSpot can sync. So I'm going to check first name, last name, and phone number too. Now give your form conversion event a name and select Create Event. Now I'm going to navigate over to the Events tab and boom, there's my new form conversion event. It'll show up under Event Trigger as form submission. You can also see that I set up some other form conversion events that need to be updated. All I have to do is click on the event to change the details. I notice that two events synced, but I need to add a custom property to show consent. Once I set that up, I can come in here to add it. You can also change what data you're sending if you wish. And that's it. Earlier, when I subscribed to the Donut Digest, my form submission data was instantly routed over to Meta. Meta can now use that information to show ads to even more people like me on Facebook and Instagram. It's quick, it's easy to set up, and best of all, it helps you squeeze more ROI out of every campaign without having to lift a finger. Click the link in the description below to get started today.