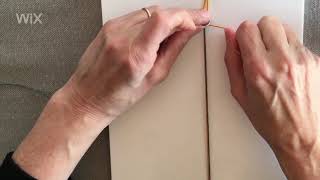
In this instructional video, the presenter demonstrates how to craft a two‑colored square‑knot (uni) friendship bracelet. The tutorial begins by listing all required tools—board, tape measure, scissors, clips, spare cord, masking tape, and a button for closure. The presenter shows how to attach a spare cord to the board, thread both strands through the button’s holes, and secure the core cord at the board’s bottom. Detailed guidance follows on forming the first square knot beneath the button, continuing the alternating square‑knot pattern, and monitoring the emerging design. The video explains how to measure the bracelet length (aiming for 16 cm for a medium woman’s wrist) using the Daisy Knots sizing chart as a reference. Once the desired length is reached, the core cord is unclipped, and two overhand knots are tied—one to finish the bracelet end and another to create a loop for the button. The presenter emphasizes precise knot placement, tightness, and checking button fit before final tightening. The tutorial concludes with final knot tightening, trimming excess cord, and admiring the completed bracelet.
Chapters
We're going to make a uni bracelet, which is a two colored square knot friendship bracelet. First of all, we need our board that we're going to be actually working on for a bracelet. We then need a tape measure, a pair of scissors, some clips to hold the cord in place, a spare piece of cord to attach our button, some masking tape. The button is the closure for our bracelet and the cord that we want to make the bracelet from. We use one of our bulldog clips and our spare piece of cord, which we fold in half. Then we loop around the top of the board and clip in place. And you can see then we've got a nice loop. The next step is to thread our cord through our button. It's really important that the button has large enough holes to take both cords into one hole, because we have to thread both cords through one hole. That's the way that the bracelet is threaded. If you're struggling to thread the cords through the same hole, cut the cords so that they've got nice sharp edges. You thread the button from the bottom through to the top. And then once you've got that done, you then thread from the top through to the bottom. Your button might not have an obvious a top or bottom, that doesn't matter. Thread from the longest side through the buttonholes, ensuring that you don't pull that cord from the shortest side out. Depending on the size of the wrist that you're making the bracelet for, this piece of cord here, which is our core cord, is going to be anything from 40 to 60 centimeters. I'm making it for a relatively small wrist, so the one that I'm making is 40 centimeters. Now that we have our cord threaded, we can then loop our button through that spare piece of cord that's attached to the top of the the board. And we use the short pieces of cord, which are our core cord, and we clip them to the bottom of the board. The core cord should be nice and taut. We take our left cord and we thread it underneath the core cord and then we're ready to start creating our square knots. The first square knot goes immediately underneath the button. Make sure that you push it right up underneath the button as the with the second one. Depending on the size of the button, you may need more than 2 square knots before you actually start seeing the pattern emerging. You're always working with the same colour of cord because the color of cord that you're working with that you started with, in my case it was the gray one. It moves from side to side. Keep tying your Square knots, the pattern will start to emerge. The cord that you led with in my case, the gray one, will be the center color on this side of the bracelet. When you've got to a certain length, measure the bracelet to see how far it's gone. You measure from immediately underneath the button you can see there, and from underneath the button from where it's actually threaded. The length that you're aiming for is the length to the first overhand knot that you're going to create. You might have to measure this a few times before you actually get to the right size that you're happy with. The length I'm aiming for is 16 centimeters. That's for a medium woman's wrist. If you're uncertain on sizes. If you go to Daisy Knots website and look for the free downloads, you will get a sizing chart for the different sizes of wrists there. Remember, you're measuring from underneath the button from where the cords are threaded to the ends of your working senate of knots. When you've got to the length that you require, unclip the core cord from the bottom of the board and tie an overhand knot. It's very important that the overhand knot is really close to the ends of the last knot. Don't leave a gap like I've got here. It's got to be really close. And if it's not close enough, make sure you move your knot right to the edge of those knots. When you're happy that the knot is as close as it can be, then tighten it. As you can see, I tighten them up one at a time, the cords, and then I pull and then tighten again to make sure that the knot is not going to come undone. Unhook the button from the loop at the top and then tie your second overhand knot. This is making the loop for the button to go in. Check that the button fits into that loop. I'm checking here to make sure that it's the right size and I'm testing with my button. Once you've checked that the button fits into the gap that you've left, you can then start to tighten up the knot. Check that the button fits again just to make sure before you completely tighten it and then tighten it as much as you can, because this is the knot that's really important. You really do not want this knot coming out. Once you're happy that the gap is the size it should be, fasten up the bracelet and you can see I'm paranoid about my knots. I'm tightening them again because this is the knot that if it comes undone once you've cut, it is really hard to redo. Once you're happy, then cut the spare cord off. I tend to leave 1-2 cm and then admire your bracelet.